Z Grills Errors Overview
The Z Grills controller has 4 errors that can be displayed:
- LEr = Low Temperature Error
- HEr = High Temperature Error
- Er1 = Temperature Sensor Error
- Er2 = Grill Controller Error
ER1 – What it means
ER1 occurs if the signal from the grill temperature sensor fails.
This can occur for a number of reasons:
- Sensor wiring connection on back of controller is loose
- Sensor cable is damaged
- Sensor plug is loose (7002B, 700E & 700E-XL models)
- Grill temperature sensor is faulty
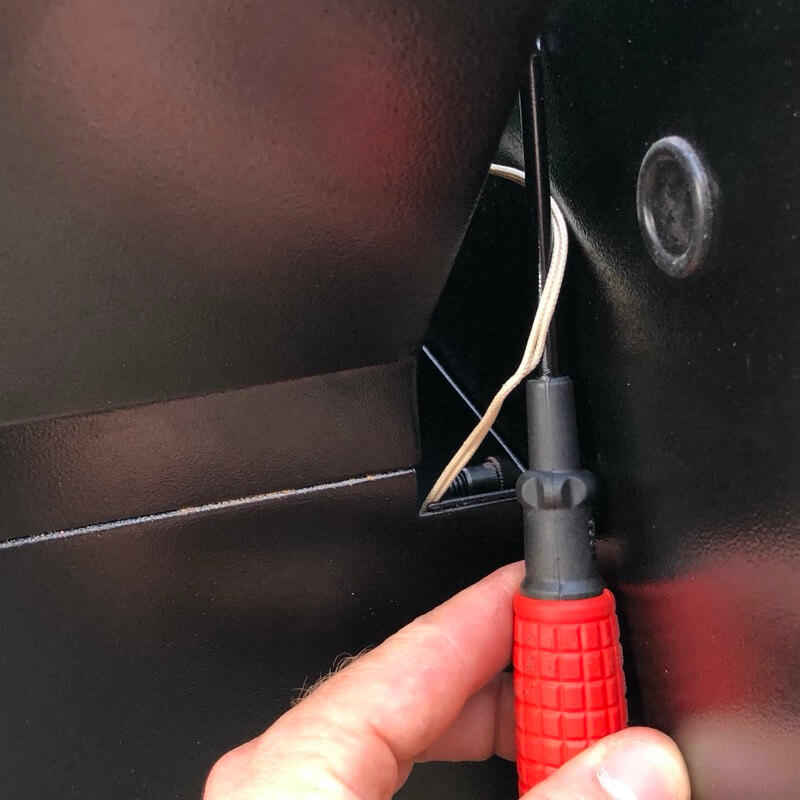
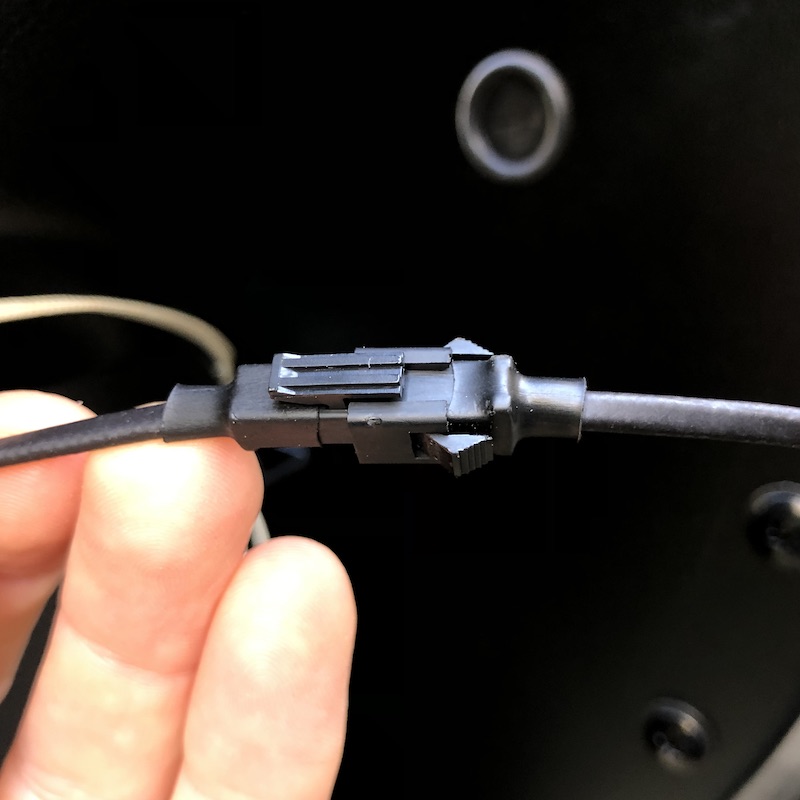
Check cable plug
Use a screwdriver to gently lift the cable out from between the hopper and grill and check to ensure the plug is tight (only on 7002B, 700E and 700E-XL models).
Test if ER1 has been fixed
- Plug the grill back into power supply
- Turn the grill power switch on. If there is still an issue ER1 will be displayed on the display.
- If ER1 is still displayed continue onto the next step.
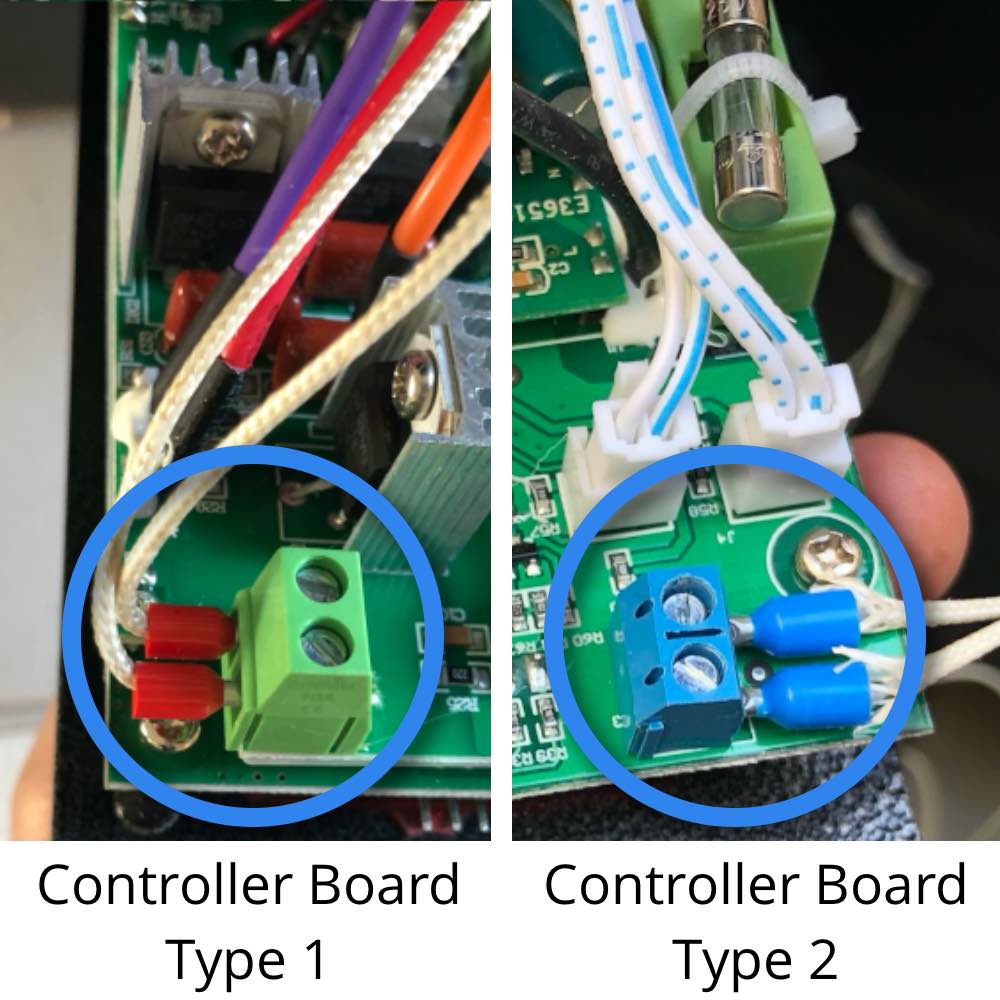
Check wiring connection
Check the temperature sensor probe connection into the controller:
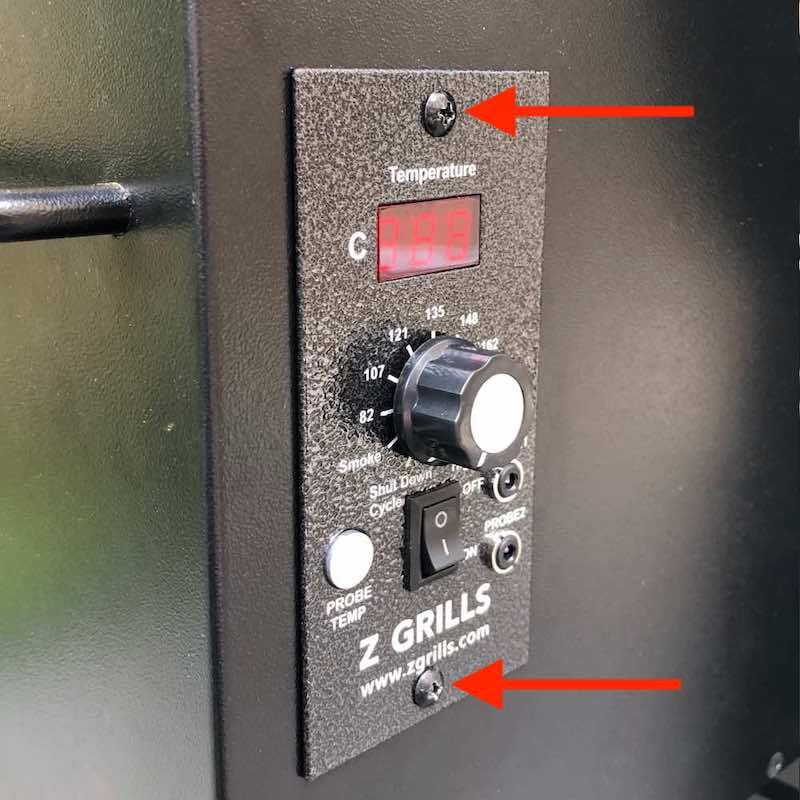
- Unplug the grill from power
- Remove the two screws that secure the controller in place
- Gently pull out the controller enough to locate the two thin white wires into the small green or blue terminal block.
- Check to ensure they are both tightly in place (gently tug on them)
Test if ER1 has been fixed
- Plug the grill back into power supply
- Turn the grill power switch on. If there is still an issue ER1 will be displayed on the display.
Emergency Temperature Sensor Repair
Temperature sensors are fairly straight forward to replace (see instructions here), but if you need to use your grill NOW and can’t wait a few days for a replacement to arrive there is a hack you can do.
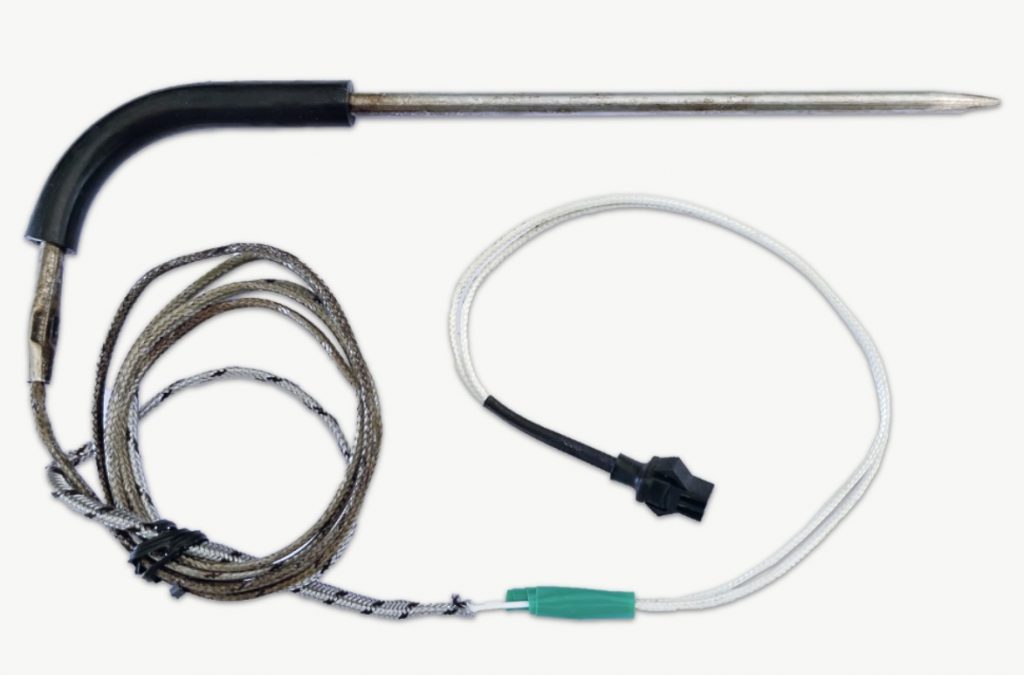
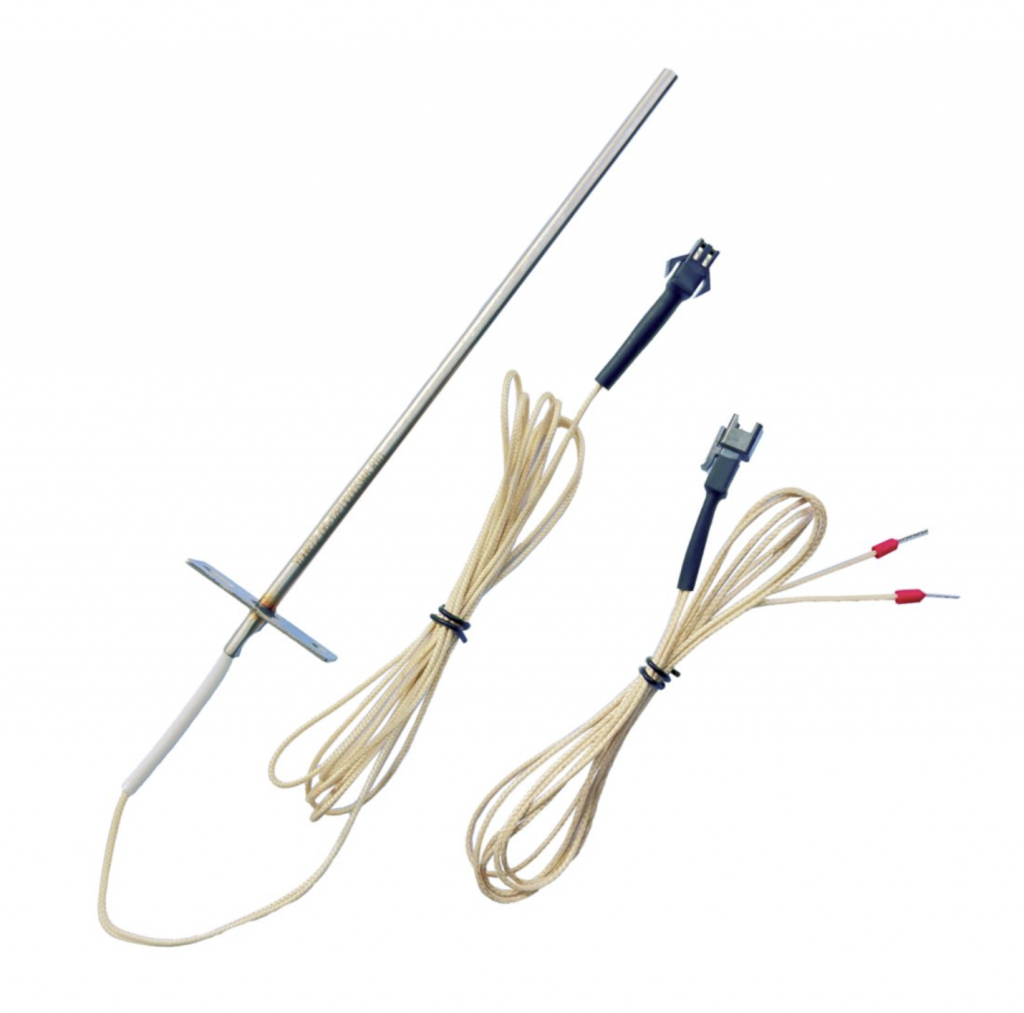
The food probes that plug into the front of the controller on the Z Grills smoker are the same type of temperature sensor (PT1000 RTD) as the temperature sensor in the grill. You can therefore splice the food probe cables into the temperature sensor cable. There is no polarity (positive/negative) on the wires so it doesn’t matter how you connect them.
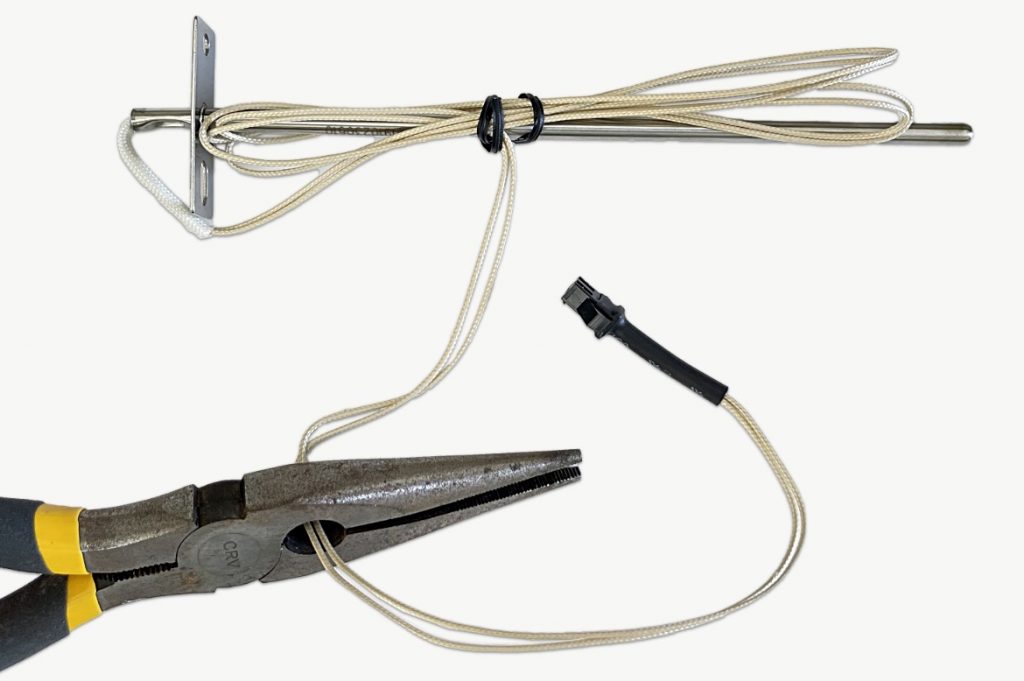
Cut the end off the grill side temperature sensor. You need to bare the wires, so don’t cut too close to the plug. You don’t need to remove the temperature sensor, just pull out the cables from between the hopper and grill (connected during assembly in 700 series grills) and cut the GRILL side of the plug, not the hopper (controller) side of the plug.
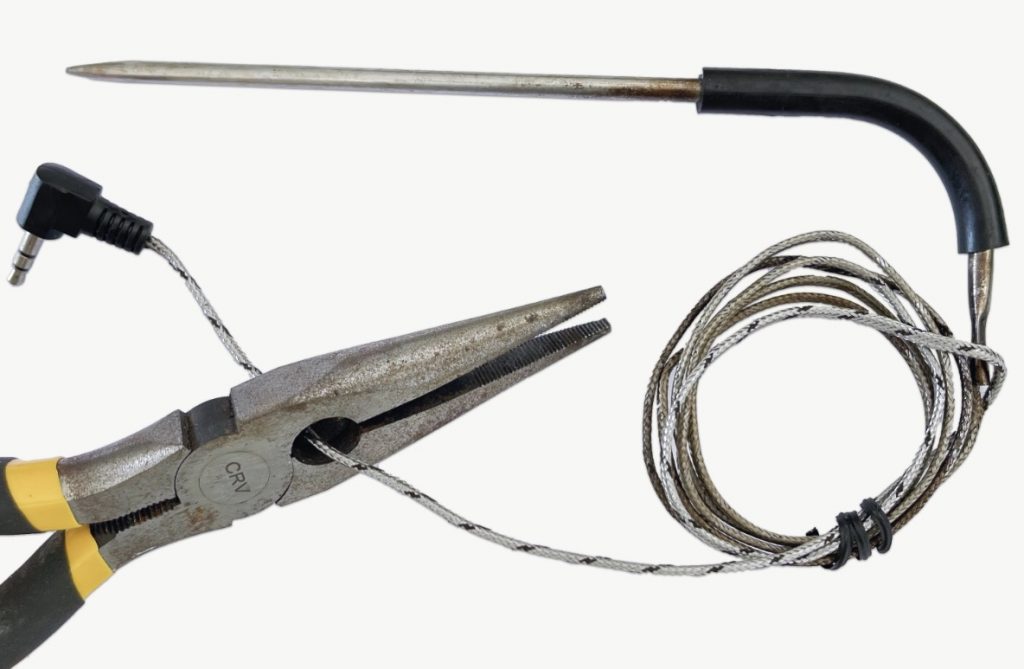
Cut the end off the food probe close to the plug.
Bare the wires of both cables, twist together and insulate with electrical tape. Plug the temperature sensor cable back in.
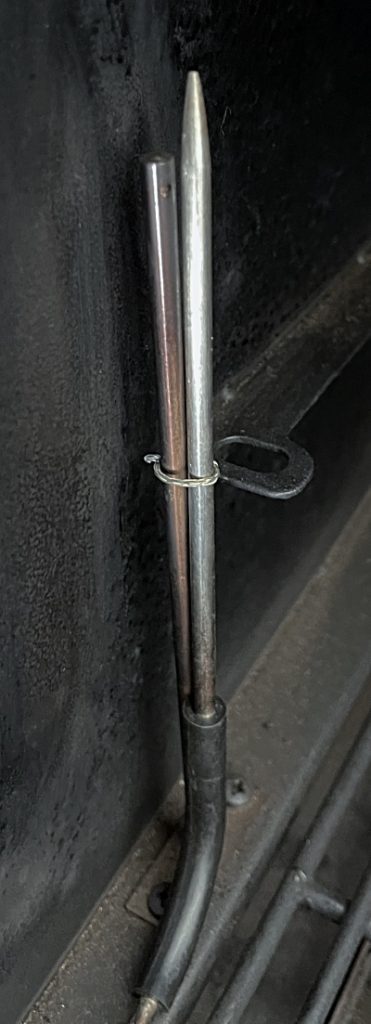
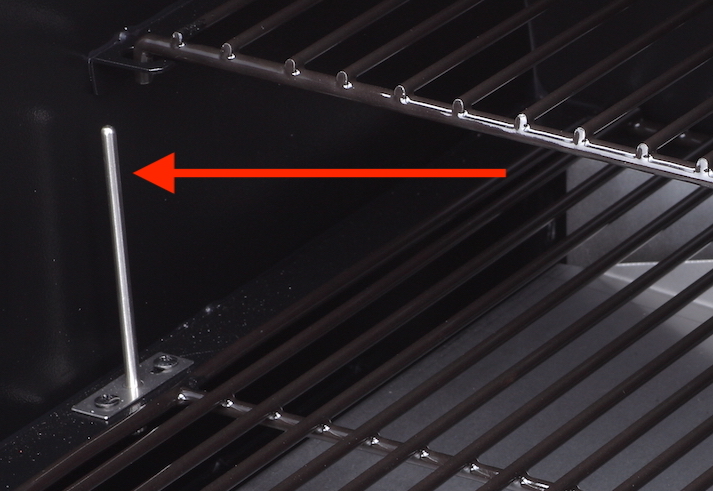
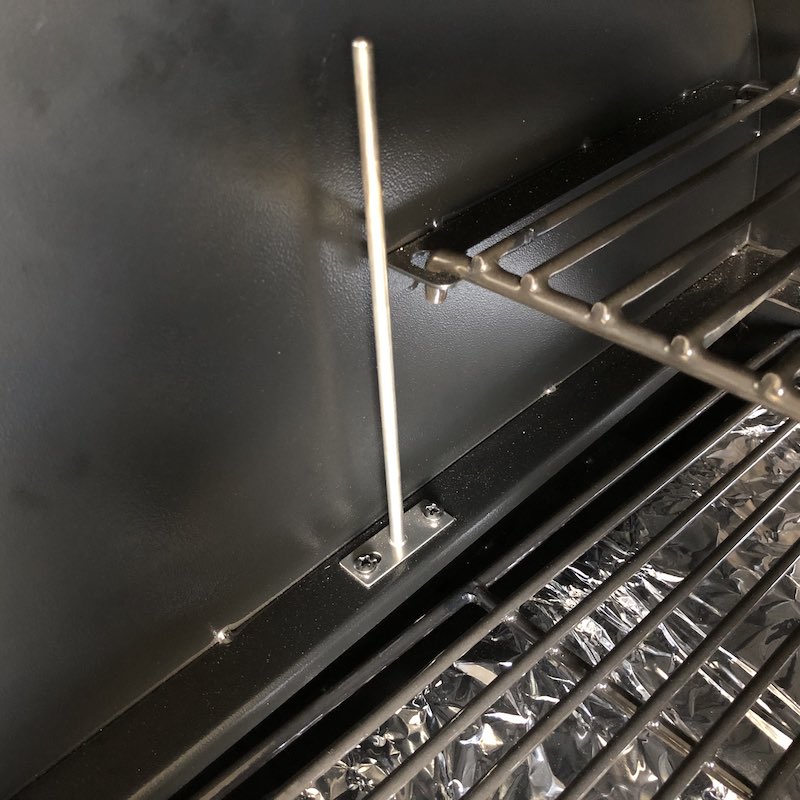
Position the food probe tip to tip with the food probe, or rest the food probe up on the top rack far left. The Z Grills controller will now get a temperature reading from the food probe and you should be able to start and run the grill like normal.
This solution can be used long term if you don’t want to get a new temperature probe.
If less than 3 years old contact our support team to get a replacement food probe and temperature sensor sent out for free (let us know you need both). If more than 3 years, click here to visit our shop to purchase these parts.
Replacing the temperature sensor
If the above investigations do not solve the ER1 problem, contact the Z Grills customer service team for a replacement Grill Temperature Sensor Probe.
Make sure you get the correct one for the grill model. The 450A has a shorter sensor probe than the 700 series grill models.
Remove the two screws at the base of the temperature sensor and pull the cable through. For cables with a plug in the middle (7002B, 700E & 700E-XL), undo the plug and then plug in the new cable.
If the problem persists it may be an issue with the other section of the cable that is connected to the controller, so replace that too, by reviewing the process in the videos below.
For 450A models that don’t have a plug in the middle of the cable, the wires must be removed from the controller – or cut and spliced together. Review the video below to get full access to the controller and wires.