If there is a problem with the operation of the grill hardware or temperature operation the controller can detect it, give an error message and shut down the grill.
This information is only for the wireless controller. For the basic PID controller (non-wireless), please click here and select the relevant error article.
Below is a summary of the errors and troubleshooting steps to diagnose the root cause of each.
Error 1 – Temperature Sensor
Error Trigger
- Temperature sensor failure, or cable connection issue.
Action
- Grill will begin shut down cycle.
- Controller will display the error.
Investigation
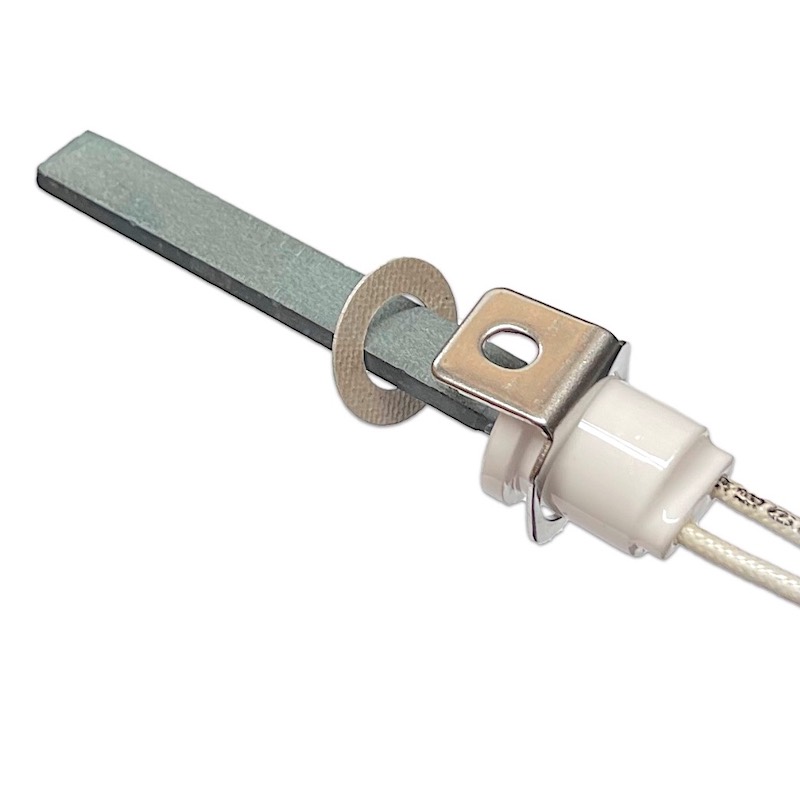
The temperature sensor cable runs from the back of the controller to the temperature sensor probe inside the grill drum with a small black plug in the centre of the cable. The cable excess length is normally bundled up between the hopper and grill drum.
1. Check cables and plug
Start by checking the temperature sensor cable plug and cable for any damage, and ensure the plug is firmly connected.
- Damaged cable? You can cut out the damaged section and reconnect (there is no positive/negative polarity on the wires), or contact our support team to confirm which part you need to purchase (or obtain under warranty).
- Cables look fine. Proceed to #2.
2. If the grill been running ok and just suddenly this error occurred (or is intermittently occurring), it may be the temperature sensor that is the cause. Contact the support team for replacement (during 3 year warranty) or if out of warranty purchase here.
Short Term Solution
The wireless controller software has been specifically designed with a function which helps in cases where this error occurs. Instead of using the grill temperature sensor, food probes P1 or P2 can be used.
- Ensure that Probe 1 (or Probe 2) is plugged into the controller.
- Place the probe vertically, tip to tip, beside the grill temperature sensor. Use a metal wire to strap them together if required.
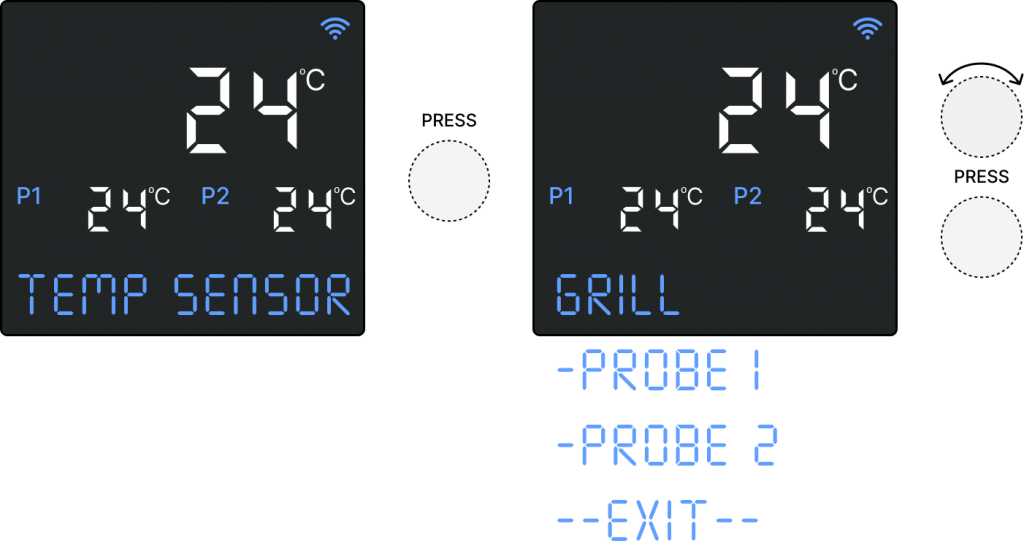
- Press and hold the control knob for 2 seconds to enter the MENU, then rotate to TEMP SENSOR and press again to confirm. Rotate the control knob to select PROBE 1 or PROBE 2 and press again to confirm.
- The selected probe temperature sensor will be displayed in the normal location (e.g P1 24℃), as well as in the main grill temperature display. The main grill temperature will only slowly change and so will not immediately (or always) exactly match the actual probe temperature.
- The grill should now operate as normal using the alternative temperature sensor.
- Once the replacement temperature sensor is installed, use the TEMP SENSOR setting and select GRILL to return to the normal grill temperature selection.
Error 2 – High Temp
Error Trigger
- Temperature measured above 260℃ for more than 1 minute.
Action
- Grill will begin shut down cycle.
- If above 280℃, the fan will turn off too to stop feeding the fire with air.
- Controller will display the error.
Investigation
1. Was the grill lid left open for a long time, then closed, leading to huge fire?
- Make sure the lid is kept shut as much as possible, especially when operating at high temperatures.
2. Is the temperature sensor reading a much higher temperature than reality?
- Run the grill and compare the temperature on the display to one or more food probes in the middle of the grill rack.
- If the controller reading is much higher it can indicate a faulty temperature probe.
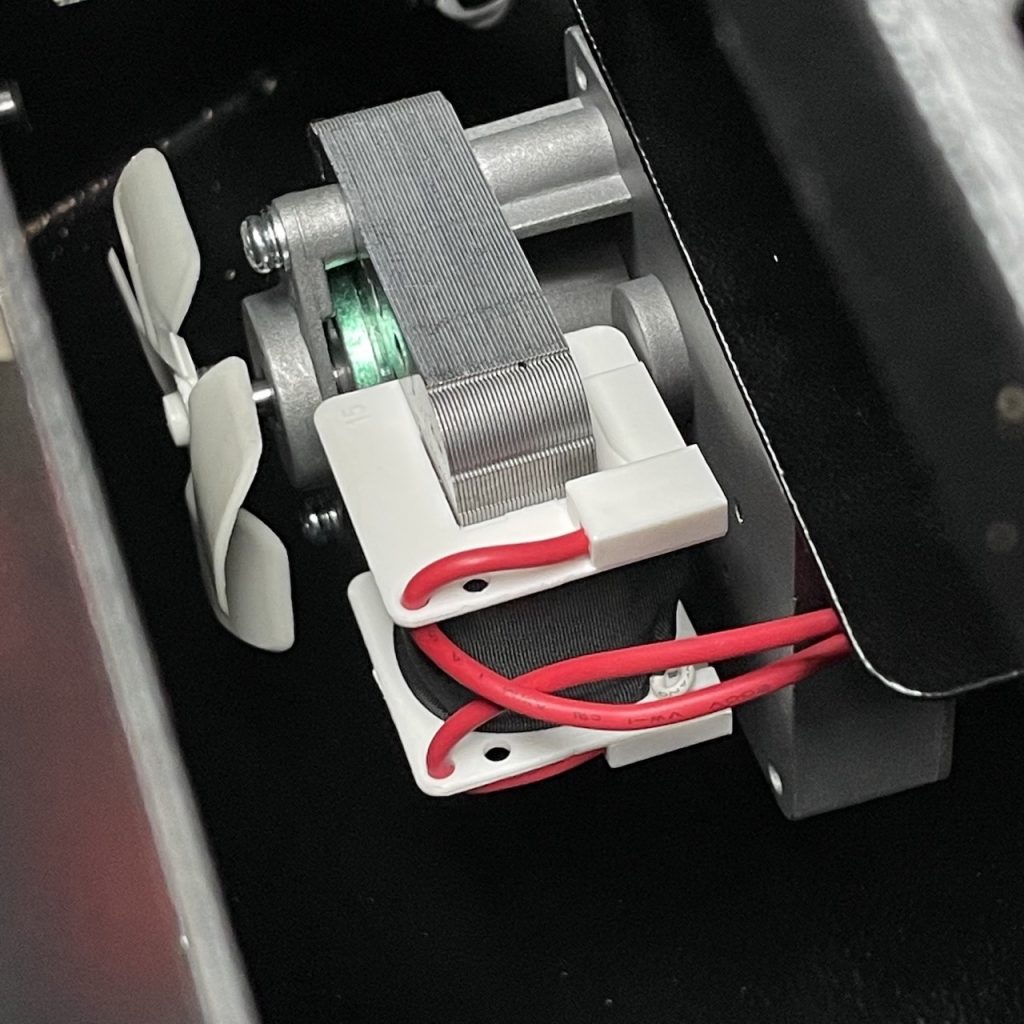
3. Is the auger running continually?
- Check to see if the auger is continually turning when the grill is on.
- At a low target temperature it should only run for 6 seconds then turn off for 10 – 40 seconds before turning again.
- If running continually the controller circuit board may be damaged.
Error 3 – Flame Out
Error Trigger
- Temperature has dropped significantly for at least 10 minutes, indicating the fire may have gone out.
Action
- Grill will begin shut down cycle.
Investigation
1. Was the grill lid left open for a long time?
- The temperature will drop down low and eventually result in the error even if the fire is still running.
- Do not open the lid for more than 1-2 minutes at a time (the less the better!)
2. Run out of pellets?
- Add wood pellets into the hopper.
- Check the fire-pot, making sure it is clean, and has not accumulated any unburnt pellets.
- Fire up the grill as normal.
3. Too much ash in fire-pot smothering the fire?
- Check to see if the fire-pot is clean.
- If lots of ash vacuum out before firing up again as normal
4. Auger not rotating?
- Check to make sure the auger is feeding wood pellets into the fire-pot.
- If the auger is not rotating (watch for at least 1 minute), it may be jammed or the auger motor may have failed.
- If the auger is not rotating Error 5 will occur confirming this issue.
Error 4 – No Fire
Error Trigger
- Temperature has not increased by at least 5℃ within 7 minutes of starting the Fire Up process.
- This would indicate that the fire has not be established – or the lid was left open for too long so no heat could build up.
Action
- Grill will begin shut down cycle.
Investigation
1. Watch the fire light
- Remove the grease tray and heat baffle so you can see inside the fire-pot.
- Fire up and see the fire light. This should occur within about 2-3minutes (Rapidflame ignition rod), or 4-5 minutes (Metal Tube ignition rod).
- Place baffle and grease tray back in and close the lid. The controller should detect the temperature rise and show Fire Lit.
2. Run out of pellets?
- Add wood pellets into the hopper.
- Check the fire-pot, making sure it is clean, and has not accumulated any unburnt pellets.
- Fire up the grill as normal.
3. Too much ash in fire-pot smothering the fire?
- Check to see if the fire-pot is clean.
- If lots of ash, vacuum out before firing up again as normal
4. Fan not operating.
- If the fan is not operating the wood pellets in the fire-pot may smoke a little but not establish a fire.
- This would normally result in Error 6 occurring.
5. Ignition rod not getting hot?
- If the fire-pot is full of unburnt pellets without any sign of smoke at all, the ignition rod may not be working.
- This would normally result in Error 7 occurring.
6. Lighting a hot grill?
- If the grill is still hot from previous running and was turned off due to power outage, or accidentally switching off, then it is important to open the lid for at least a minute to let the temperature reading drop before firing up again.
- After starting the firing up process wait until some smoke is visible, then immediately shut the lid, allowing the temperature to rise and controller to detect that the fire is lit.
Error 5 – Auger Motor Failure
Error Trigger
- Auger motor is not using electricity when it should be operating.
Action
- Grill will begin shut down cycle.
Investigation
1. Use the Test Grill function
- Press and hold the control knob for 2 seconds to enter the MENU, the rotate to TEST GRILL, press again and then select Auger Test.
- The auger should run for 60 seconds. Look in the bottom of the hopper (if no pellets) or in the fire-pot to see if the auger is rotating.
- If not rotating the auger might be jammed or the auger motor has failed.
- Error 5 will shortly occur again.
2. Auger jammed?
- If the test in step 1 above confirms the auger is not rotating, it may be jammed.
- A jammed auger will be tight compared to a free auger that can be wobbled back and forth either from the bottom of the hopper or fire-pot end.
- If jammed, see these instructions to remove and clean it out.
3. Auger motor failed?
- If step 2 above confirms the auger is loose (not jammed) then the auger motor may have failed.
- A failed auger motor often results in a “burnt plastic” smell.
- If within the 3 year warranty period contact us for a free replacement. If outside of warranty a replacement can be purchased from our website.
Error 6 – Fan Failure

Error Trigger
- Fan motor is not using electricity when it should be operating.
Action
- Grill will begin shut down cycle.
Investigation
1. Use the Test Grill function
- Press and hold the control knob for 2 seconds to enter the MENU, the rotate to TEST GRILL, press again and then select Fan Test.
- The fan should run for 60 seconds. Listen for the sound of the air blowing and feel inside the fire-pot.
- If not operating the fan might be blocked or the auger motor has failed.
- Error 6 will shortly occur again.
2. Fan blocked?
- Have a look through the bottom cover of the hopper to see if any thing (cables, insects, spider, frog) is touching the fan.
- When the grill is turn off the fan should spin freely (can flick with end of screwdriver)
3. Fan failed?
- A failed fan motor often results in a “burnt plastic” smell.
- If within the 3 year warranty period contact us for a free replacement. If outside of warranty a replacement can be purchased from our website.
Error 7 – Ignition Rod
Error Trigger
- Ignition Rod is not using electricity when it should be operating.
Action
- Grill will begin shut down cycle.
Investigation
1. Use the Test Grill function
- Press and hold the control knob for 2 seconds to enter the MENU, the rotate to TEST GRILL, press again and then select I-ROD TEST.
- The ignition rod should run for 60 seconds. Look to see if it is getting red hot down in the fire-pot.
- If not operating the ignition rod may have failed.
- Error 7 will shortly occur again.
Ignition rod failed?
- If within the 3 year warranty period contact us for a free replacement.
- If outside of warranty a replacement can be purchased from our website.
Manually Light Fire
- The grill fire can be manually lit and the grill operated as normal until the new ignition rod is fitted.
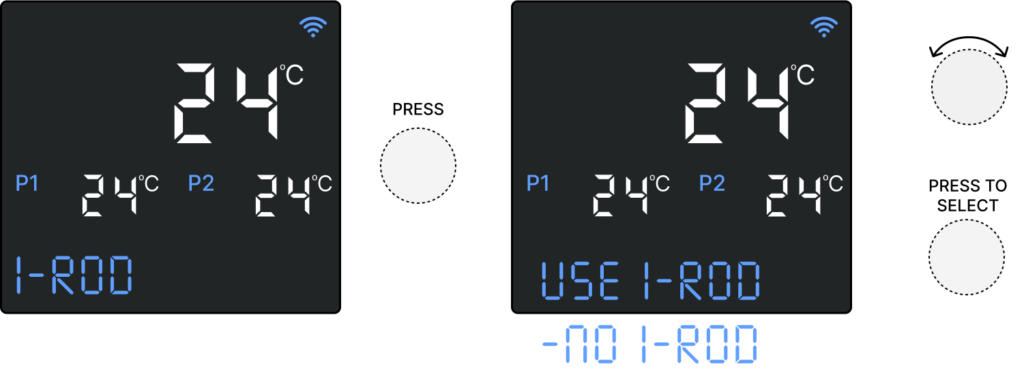
- Press and hold the control knob for 2 seconds to enter the MENU, then rotate to I-ROD, press again and then select NO I-ROD. This will turn the ignition rod off and thus prevent Error 7 from occurring. Once the ignition rod is replaced this setting should be changed back to USE I-ROD.
- Remove the grill racks, grease pan and heat baffle.
- Pour 1/3 cup of wood pellets into the fire-pot. Do NOT add too many pellets!
- Place a fire-lighter cube into the fire-pot or squirt a small amount of firelighting gel onto the pellets. DO NOT use alcohol, petrol or any other flammable liquids. Never add any firelighting gel to an already lit fire.
- Carefully light the pellets with a long match or long reach fire lighter.
- Alternatively a butane gas torch can be used to light the pellets.
- Once there is fire in the fire-pot, start the Fire Up process as normal which will turn on the fan and add more pellets to the fire-pot.
- Once the fire is confirmed as burning well, carefully replace the heat baffle, grease tray and grilling racks.
- Close the grill lid so the temperature can rise.
- Once the controller indicates the fire is lit, set normal temperature. Do NOT set a temperature below 90℃, as the ignition rod may need to periodically come on to maintain a lower temperature settings with a small fire.
Error 8 – System Error
This error is no longer used.
- If your grill has error 8 occur it is not updated to the latest software. Please do so and this error will not occur again.