For grills with wireless controllers, updates are completed through the Z Grills Aus App. Click here for more information.
For non-wireless controller, please review the information below.
Most Z Grills models in Australia have a controller board with a plug to allow the software to be updated using a special dongle.
Do I need to update?
If you have been using your grill and it is running well, there is no need to complete an update. If a software update pack was provided with your grill then you need to complete that before burning in. Click here for instructions.
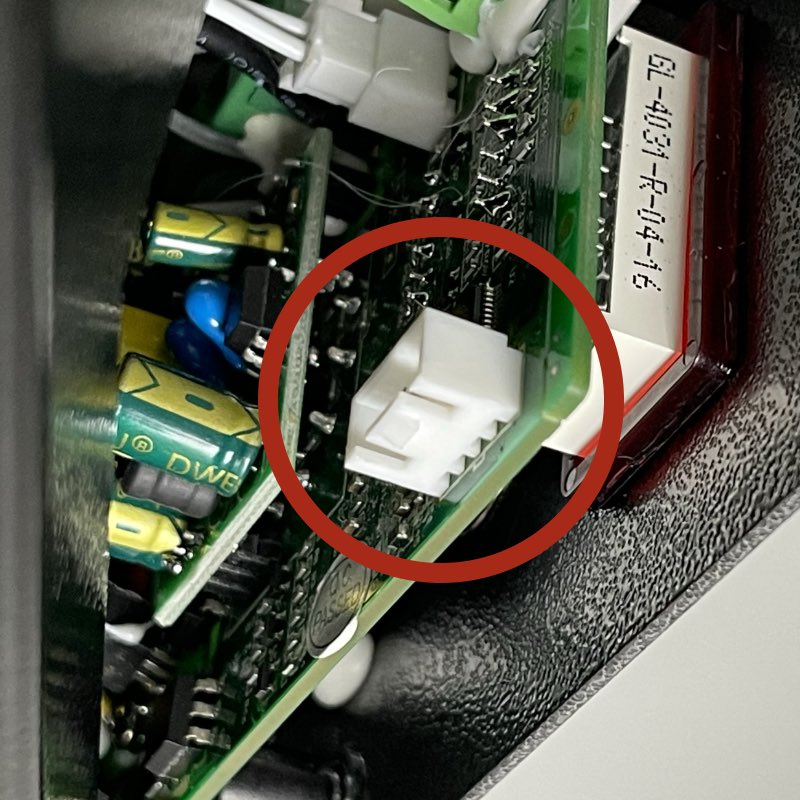
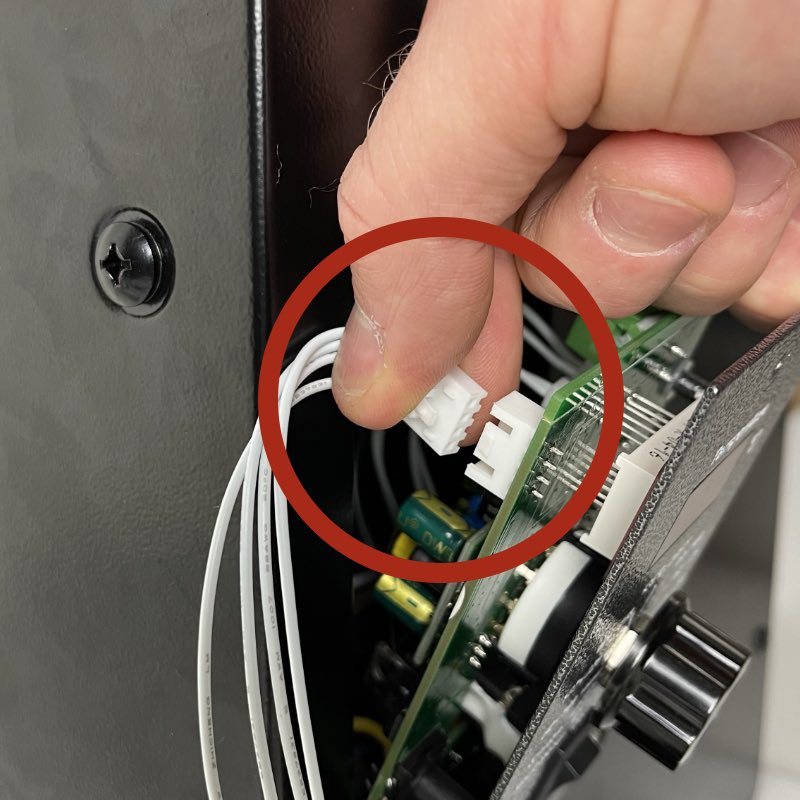
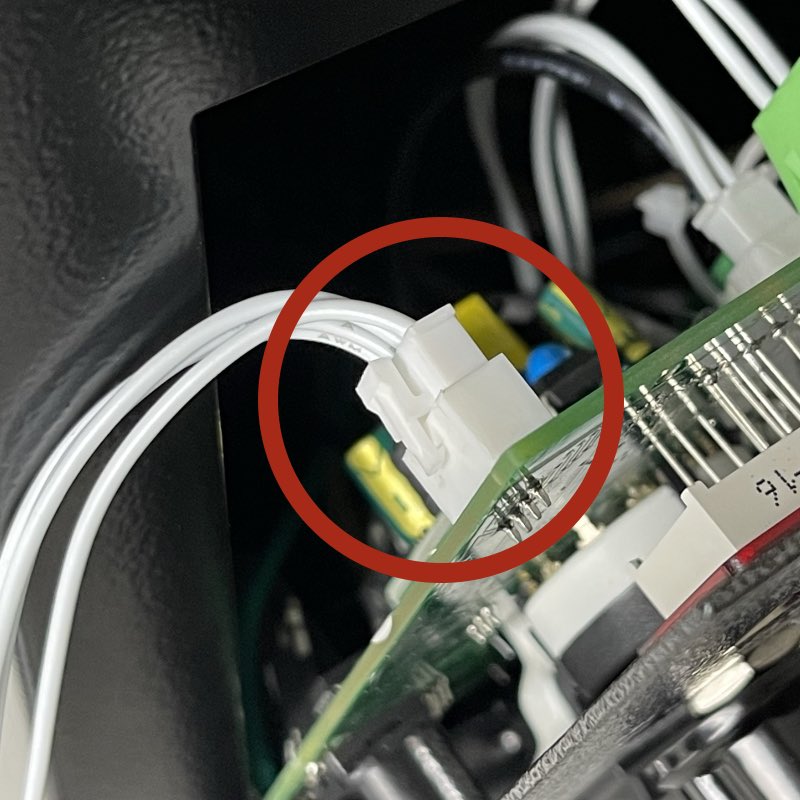
Only controllers with the small white 4 pin plug on the rear of the controller panel (as shown below) can be updated. See the update process instructions below to safely get access to the controller to check if your controller has this plug.
Software Versions
Below is a summary chart of the grill models, serial numbers or model feature for identification and corresponding software versions.
You cannot download a file and complete the update yourself as it requires specialised software and update dongle to complete the update.
Z Grills 200A MINI
| Grill Model | Grill Identification | Default Software | Latest Software | Update Required? |
| 200A V1 (Mid 2022) | N/A | 200A-GD-2.47 | 200A-GD-2.47 | No |
No software changes.
Z Grills 450A
| Grill Model | Grill Identification | Default Software | Latest Software | Update Required? |
| 450A V1 (Mid 2019) | oC only on controller face | 450A-STC-6.708 | 450A-STC-6.708 | No |
| 450A V1 (10/2019~09/2021) | oC only on controller face | 450A-STC-6.606 | 450A-STC-8.30 | Optional |
| 450A V2 (10/2021~~) | oC & oF on controller face | 450A-STC-8.14 | 450A-STC-8.30 | No |
All 450A V1 grills sold from late 2019 to September 2021 may be updated to v8.14 bringing tighter temperature control and better smoke output on the smoke and temperature up to 121ºC. The update is optional.
All 450A V2 grills shipped from 10-2021 onwards will flash “450” “814” when first turned on, indicating the model (450A) and software version (814).
Z Grills 7002B
| Grill Model | Grill Identification | Default Software | Latest Software | Update Required? |
| 7002B V1 (2019-09/2021) | Standard grease tray | 7002B-STC-6.808 | 7002B-STC-8.19 | Optional |
| 7002B V2 (10/2021~~) | Vented grease tray | 7002B-GD-8.11 | 7002B-GD-8.19 | Yes |
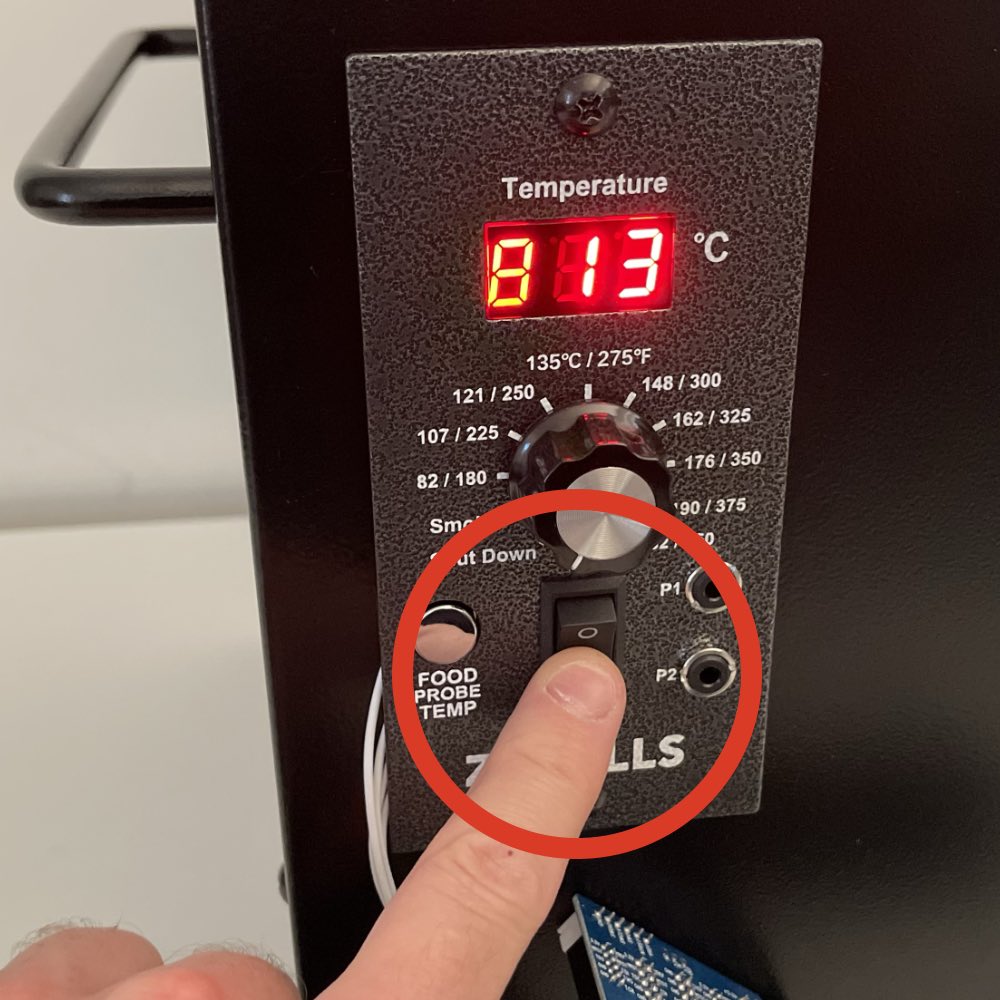
Once updated to the latest software, the display will quickly flash once 702, then the software versions such as “813”.
Z Grills 700E & 700E-XL
| Grill Model | Grill Identification | Default Software | Latest Software | Update Required? |
| 700E V1 (Mid 2019) | Narrow top grill rack | 700E-STC-6.605 | 700E-STC-8.22 | Optional |
| 700E V2 (10/2019~12/2019) | Narrow top grill rack No update plug on controller | 7002B-GD-1.6 | 7002B-GD-1.6 | No |
| 700E V3 (12/2019~11/2020) | XL model Twin narrow top grill racks | 700E-STC-6.8 | 700E-STC-8.22 | Optional |
| 700E V4 (11/2020~09/2021) | XL model Single large top grill rack | 700E-STC-6.8 | 700E-STC-8.22 | Optional |
| 700E V5 (10/2021~~) | XL model Vented grease tray | 700E-GD-8.12 | 700E-GD-8.22 | Yes |
Once updated to the latest software, the display will quickly flash once 700, then the software versions such as “822”.
Update dongles types
There are two types of dongles which are used to to update the software on the controller without the need for a computer.
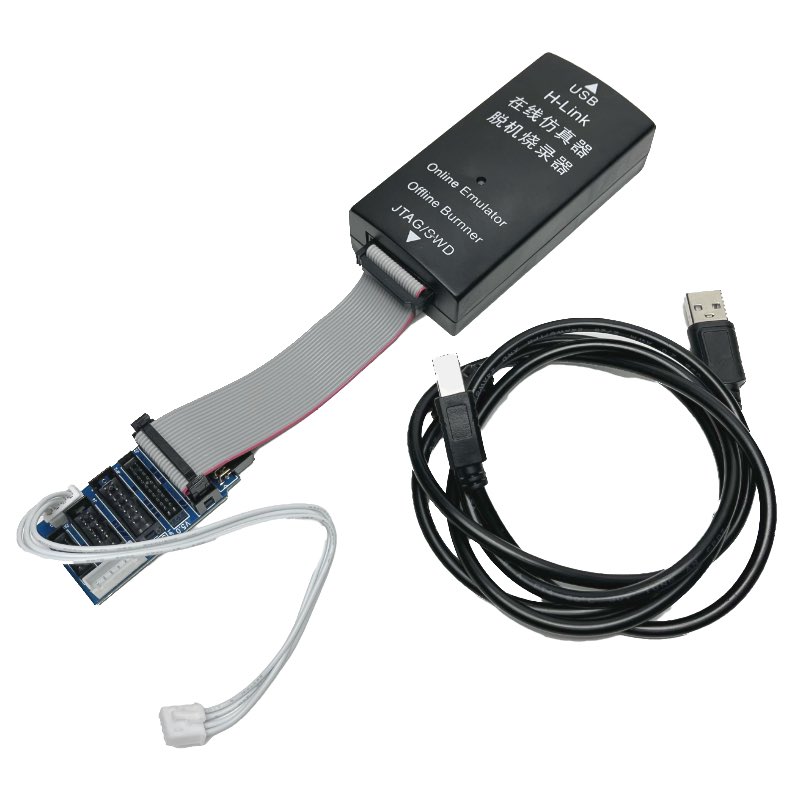
May come with or without the grey ribbon cable.
GD dongle update process
First check the Software Version chart in the section above to see if your grill is eligible for an update. If it is, and you would like to complete an upgrade, double check your controller to make sure it has the update plug.
The update can be completed before or after the grill has been assembled and used. If the grill is NOT yet assembled, do the software update first.
Follow the step by step instructions below.
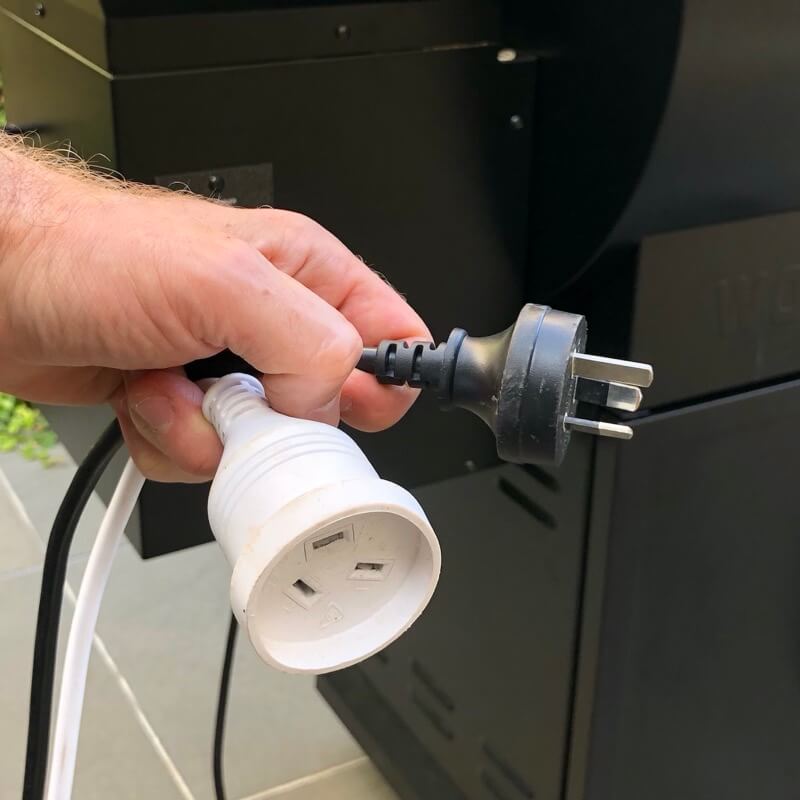
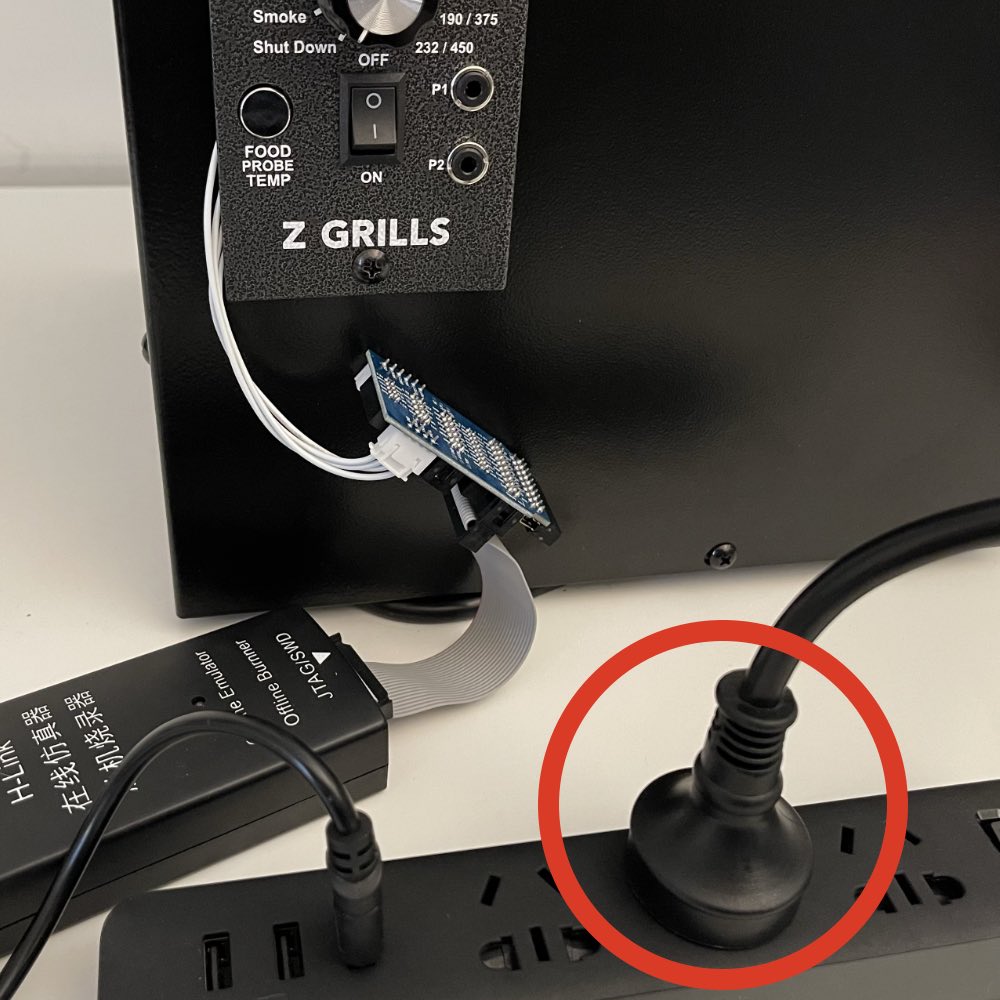
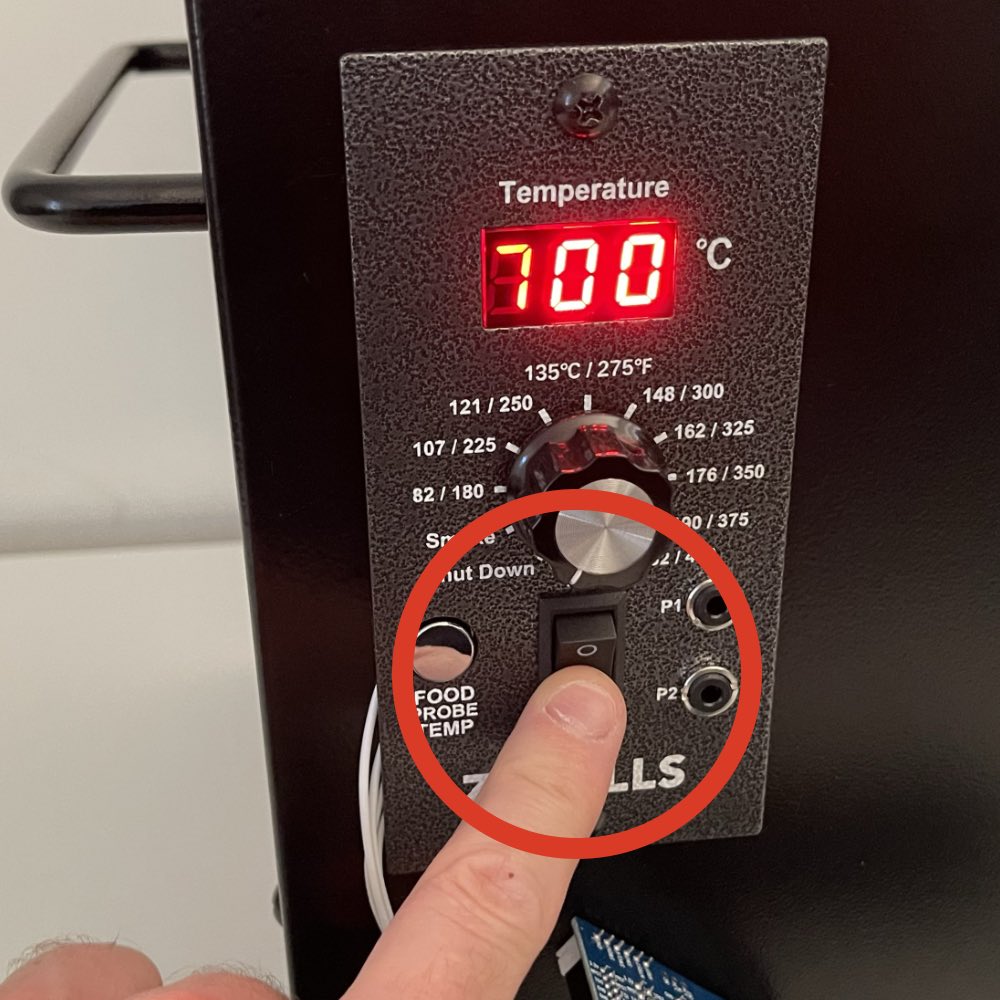
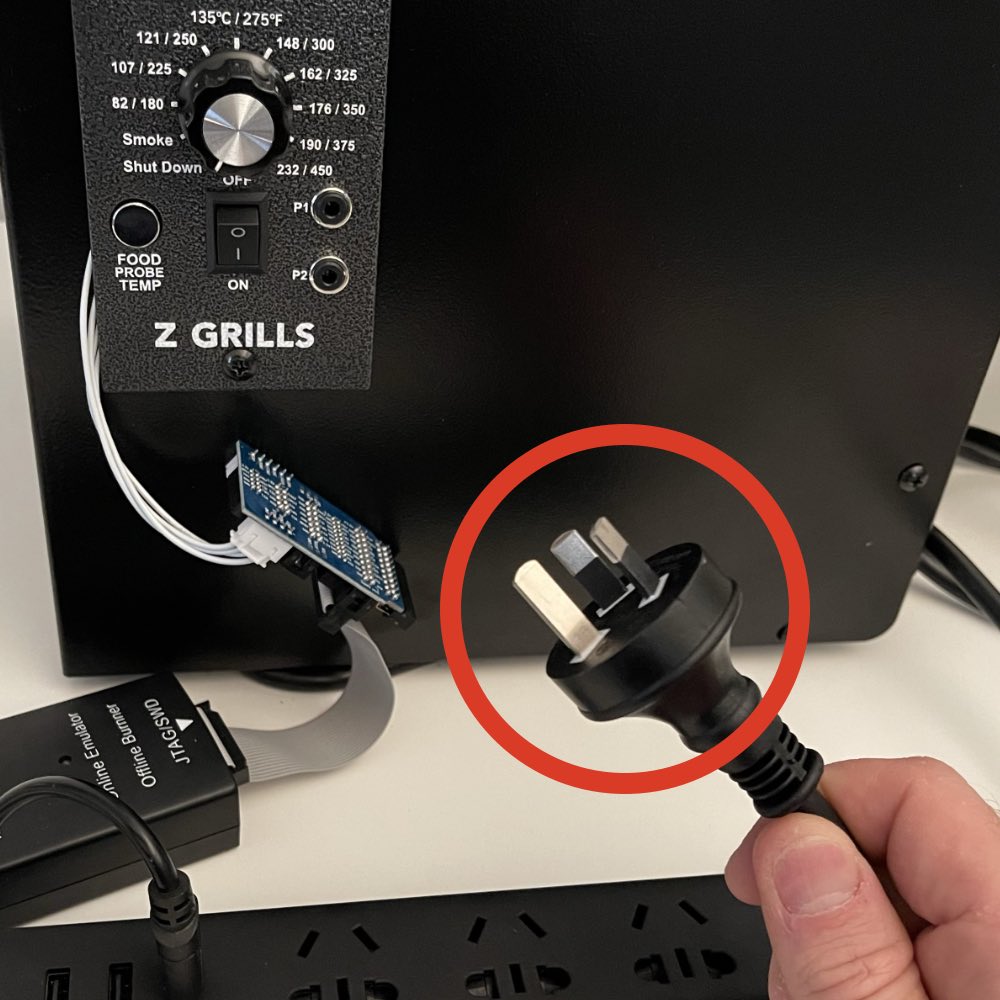
STEP 1. Make sure the controller knob is turn to Shut Down, power switch is flicked up to the OFF position and grill power cable is unplugged (not just turned off at the wall socket).
Leave the grill unplugged for at least 2 minutes before starting STEP 2.
STEP 2. Undo the 2 screws on the front of the controller.
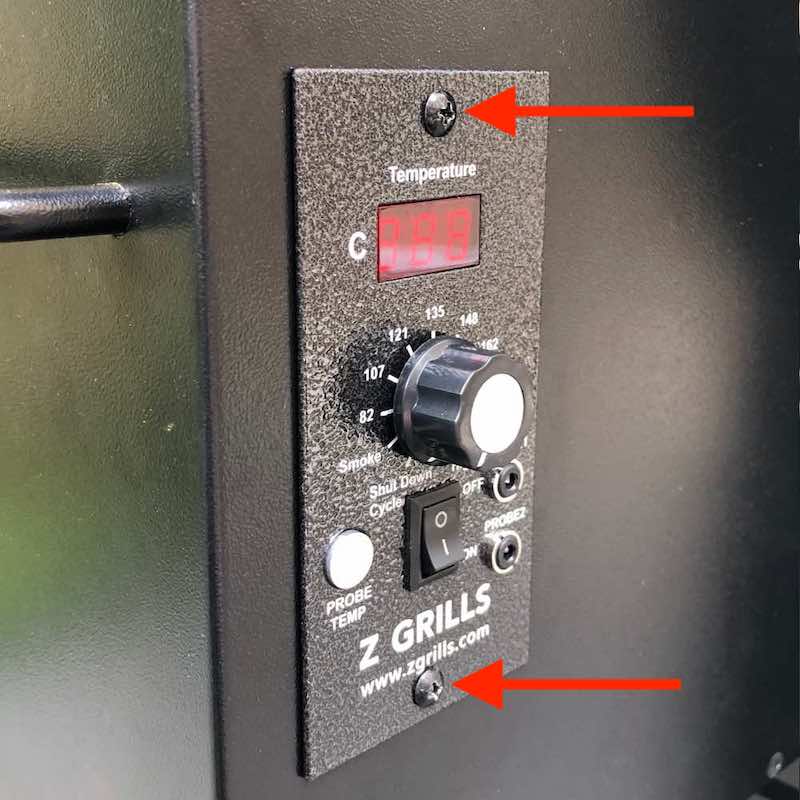
STEP 3. Tilt the controller forward and look for a white plug on the left hand side of the circuit board.
STEP 4. Plug in the cable with the clip to the outside (left side). Push down until it clips into place.
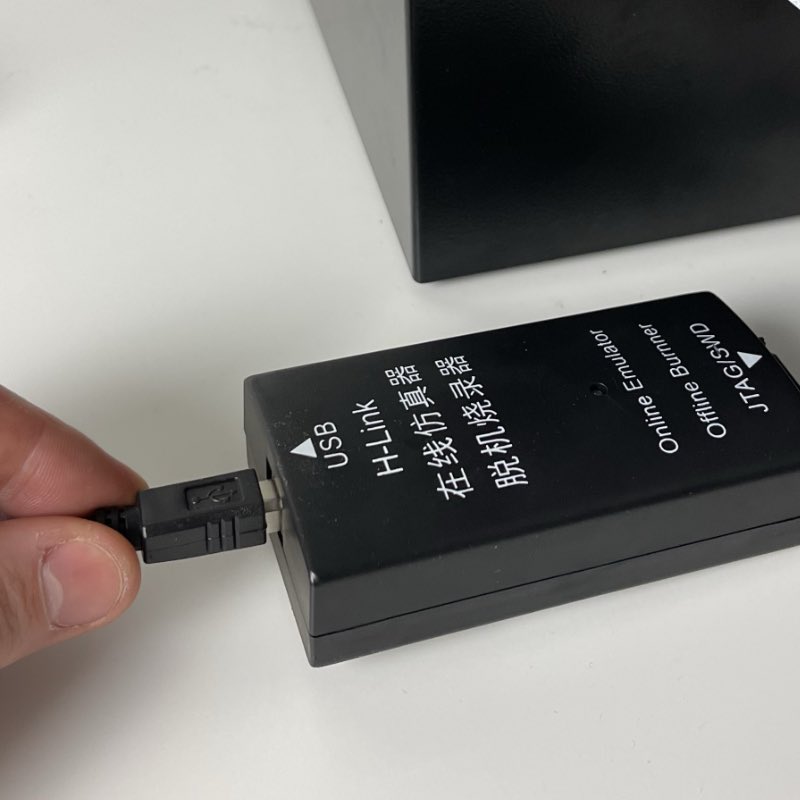
STEP 5. Plug the standard USB cable into 5V power (USB battery pack, USB phone charger or power board USB plug).
Plug the square end of the USB power cable into the dongle.
STEP 6. Watch the light on the dongle.
The light will change colours in the following sequence.
- Quick green light
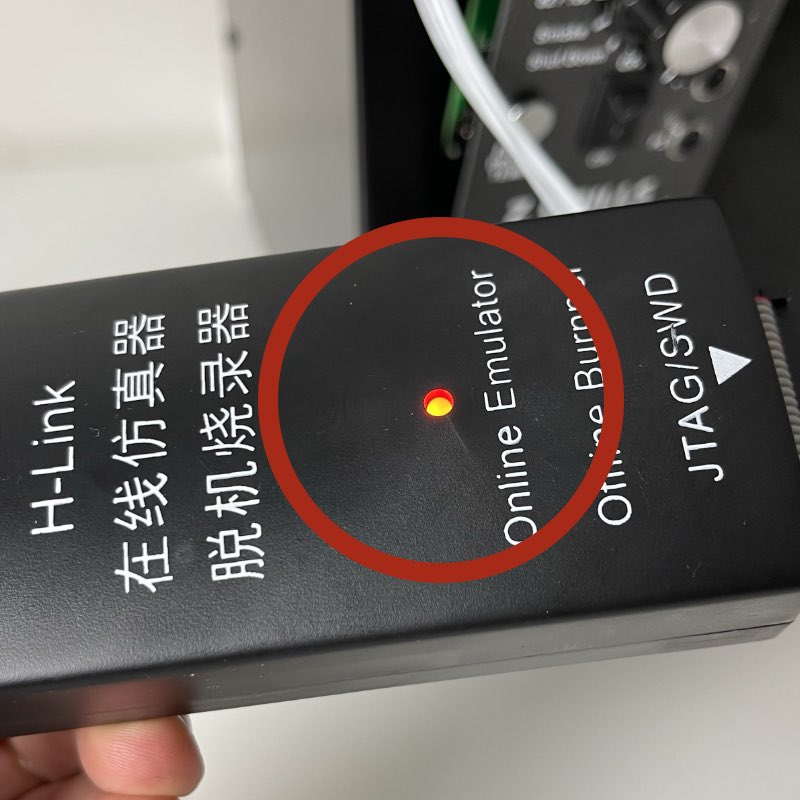
- Solid orange/red light for 3 to 30 seconds (copying process)
- Quick green light
- Quick orange/red light
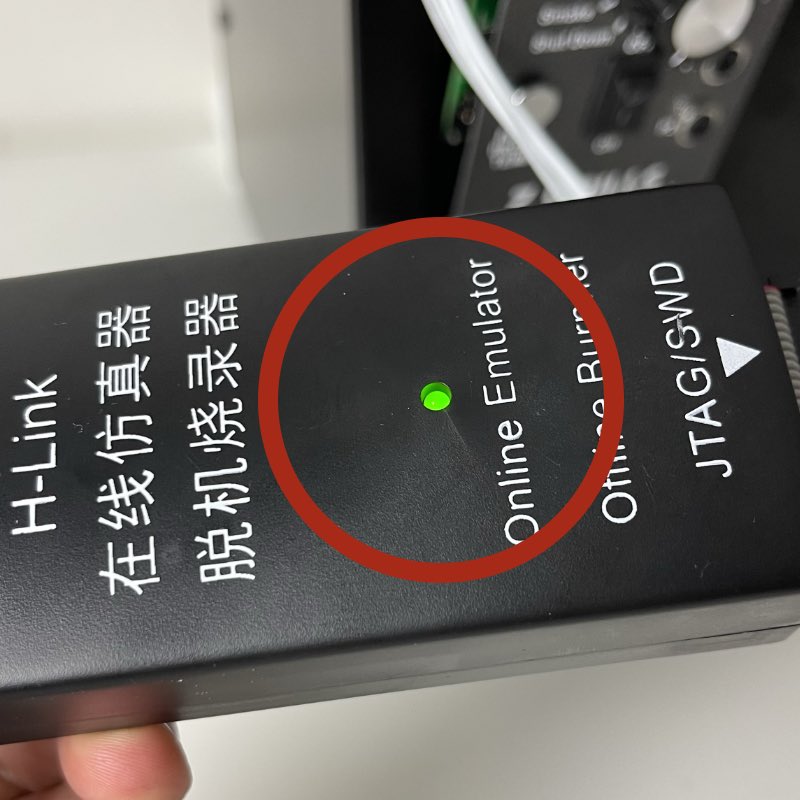
- Solid green light (copying complete)
Once the final solid green light is on, the copying process is complete and the power cable into the dongle can be unplugged. Click here to jump to Step 12
STEP 7. Carefully push the controller back into place with the white cables still attached. Do up both of the screws. Keep the USB power plugged in, so the green light is still showing on the dongle.

STEP 8. Only once both screws are back into place and with the power switch in the up (OFF) position, plug the grill into into power.
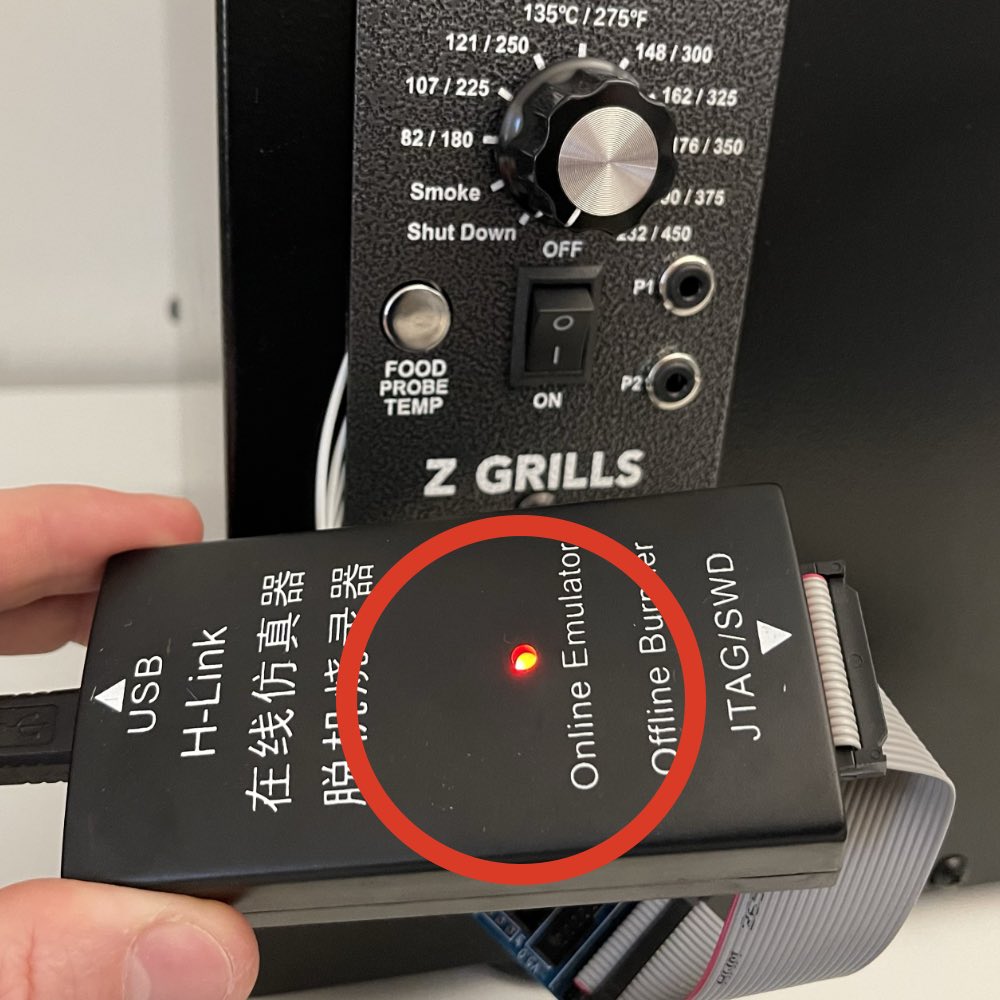
STEP 9. Flick the power switch on the front of the grill down to the ON position. The dongle light should turn from green to orange and begin the update process.
The light will change colours in the following sequence.
- Green light
- Solid orange/red light for 3 to 30 seconds (copying process)
- Quick green light
- Quick orange/red light
- Solid green light (copying complete)
STEP 10. Once the update is complete, unplug the USB power supply from the dongle. Flick the controller power switch up to the OFF position, wait 10 seconds, then switch to the down ON position.
The display should flash 700 then 813 for 700E-XL grills, and 702 then 812 for 7002B grills. This indicates that the controller has been successfully updated.
STEP 11. Unplug the grill power cable, then wait at least 2 minutes. Next, continue on to Step 12.
Continue on from Step 6 or 11……
STEP 12. Squeeze the top of the plug firmly to open the side clip and pull out.
STEP 13. Carefully push the controller back into place and do up the screws.

STEP 14. Plug in the grill power cable and flick the switch on the controller down to the ON position.
The controller should flash the grill model (450, 702 or 700) and then the software version, for example “813”. See below.
Confirm if the version displayed matches that printed on the dongle. If it does you have successfully updated the software. Great job!
If the display does NOT show the updated software version, or is blank, repeat the process.
If it still fails to update correctly, please contact us.
STEP 10. Please wrap the dongle and USB cable back up in the bubble wrap, put in the supplied Australia Post satchel and place in a post box (or give to the local post office) to send back to us.
STC dongle update process
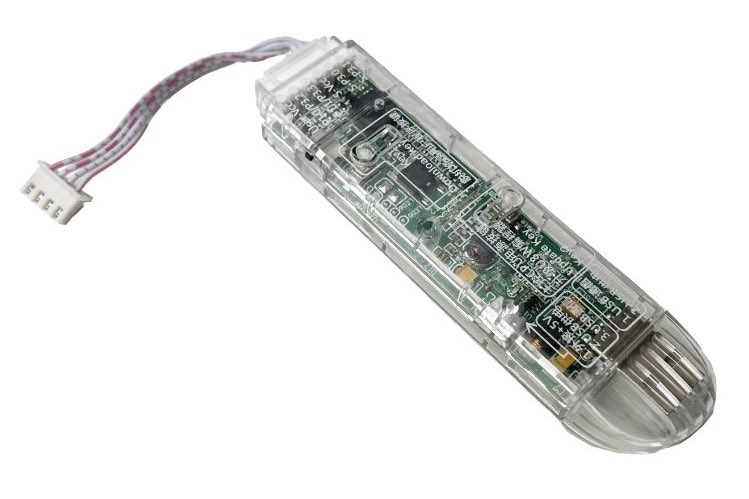
If supplied with a clear plastic dongle like the one shown below, the process is very simple and only takes 4-5 seconds to update.
GRILL MUST BE UNPLUGGED FROM POWER!
All four little LED lights must flash together along with two beeps to indicate the software has successfully updated.
Scroll up to see how to access the little white plug in the back of the controller, plug in the update dongle and power the dongle with the supplied USB cable.
For video overview of the process click here.