Diagnose the reason for loss of power, tripping house power safety switch or blown fuse on all full size Z Grills models (in Australia).
For Grill Models: 450A, 7002B, 700E, 700E-XL
Time: 20 ~ 30 minutes
Difficulty: Medium
Tools Required: Phillips head screwdriver, scissors or snips, table
Spare Parts: Spare fuse is strapped to the top of the fuse box
Starting Questions
Begin by checking the following, which can help to narrow down the problem component.
Do you smell any burning plastic smell?
A quite strong burnt plastic smell is often present if the auger motor or fan motor have burnt out. If this is the case, continue with the process of investigation below, in particular the visual inspection in STEP 6 where you should be able clearly see which motor has the issue.
Did the power failure occur in the first 5 minutes of operation?
If the power failure occurred upon startup or in the first 5 minutes, it is most likely the ignition rod that has failed. It can sometimes cause the power to trip, but then be able to start up again fine once it has cooled down again.
Wireless Controller: the ignition rod can be manually disabled temporarily. The fire can be manually lit to run the grill until a replacement can be provided. Click here for more information. If the power doesn’t trip once disabled, this also confirms that the ignition rod is the cause.
Basic PID controller: to confirm if the ignition rod is the issue it can be unplugged (plug labelled HOT) and the grill turned back on (change out fuse if required). If the fan and auger run fine, then it confirms the ignition rod is the issue.
See the instructions below to remove the bottom cover and access the HOT plug. This can often be done without needing to remove the entire hopper (as outlined below) as an initial quick check. If not practical to do so, then remove the hopper and to the full check out outlined in detail on this page.
Note you can start up the fire manually if eager to use the grill before you can get a new ignition rod. Click here to learn how to manually light the fire.
Did the power trip, but not blow the fuse?
If the power trips the household circuit breaker switch, but doesn’t blow the fuse please check to see what type of ignition rod is installed. If the ignition rod is silicon nitride (rectangular end shape) that is almost flush with the fire-pot, click here to diagnose further as the cause may be accumulation of minerals and ash, requiring a quick clean which may solve the issue.
Fuse Replacement Warning
If there is no power (LCD screen doesn’t flash) when you turn the controller power switch on, the fuse may have blown.
The fuse is there to protect the controller against being damaged if there is a short in one of the three consumers of electricity (auger motor, fire-pot fan or ignition rod).
Replacing the fuse will likely result in it blowing again, as the cause of the short has not been rectified. It is important to diagnose the issue and replace the faulty part.
How to Diagnose?
The cause of the problem can be determined by unplugging the auger motor, fan and ignition rod and then re-connecting one by one (process of elimination) to confirm which has the issue.
Follow the instructions below to complete the checks.
Once the part causing the issue has been identified you can purchase a replacement from our website, or if still within the 3 year warranty period complete this support form to receive a free replacement.
Wiring Connections
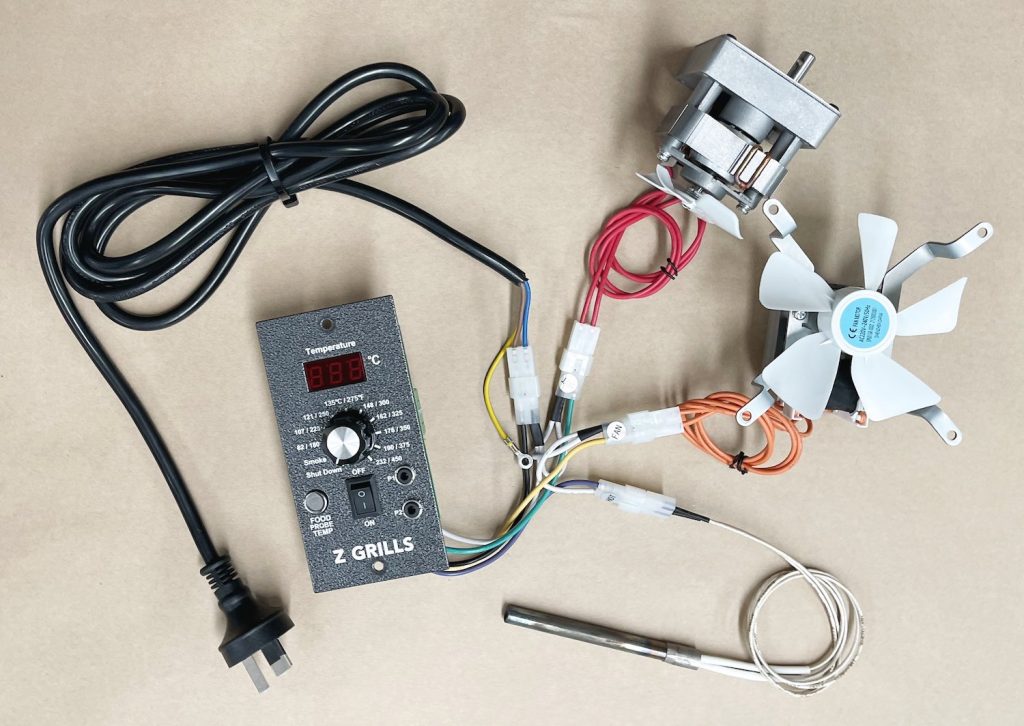
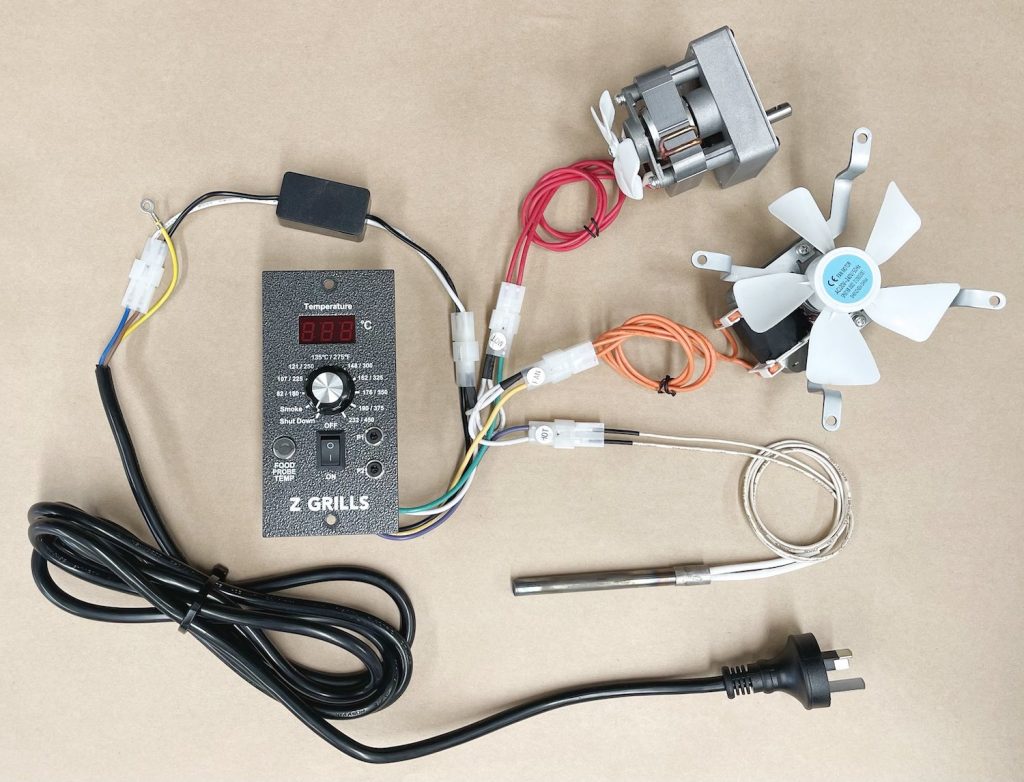
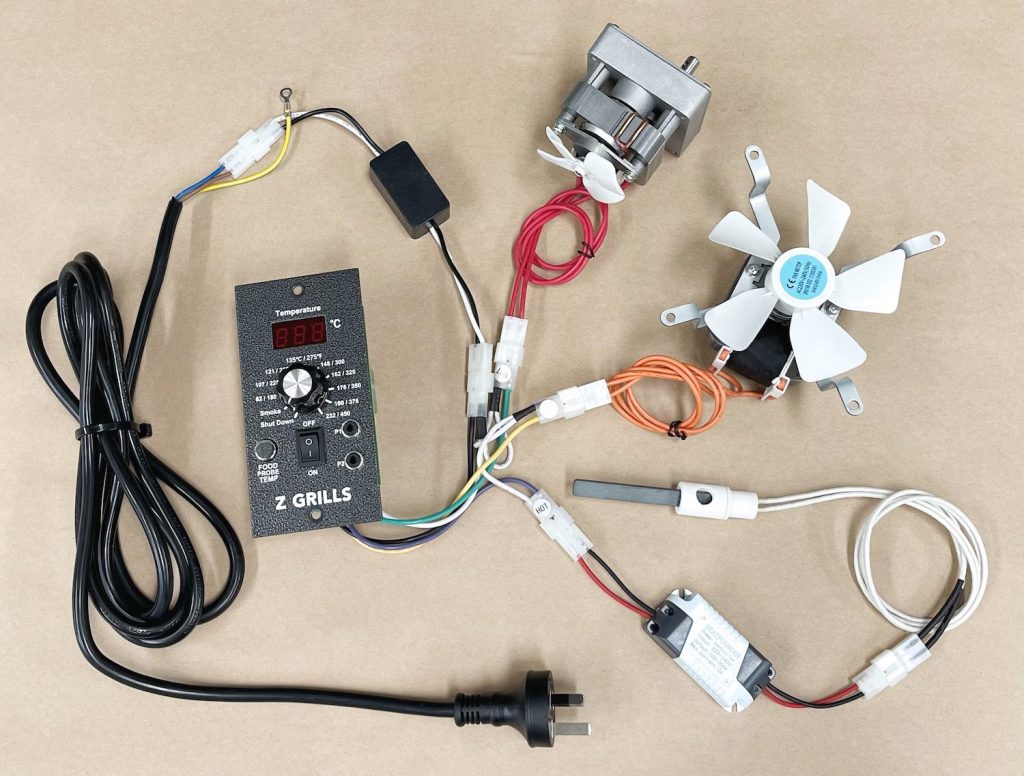
Depending on the grill model, the wiring colour and configuration may differ slightly. Refer to the images below to see the configuration that matches your grill.
The controller 3 output plugs are labeled MOT (auger motor), FAN (fire-pot fan) and HOT (ignition rod). The wiring colours may be different on your grill.
Diagnostic Process
Step 1. Unplug Power
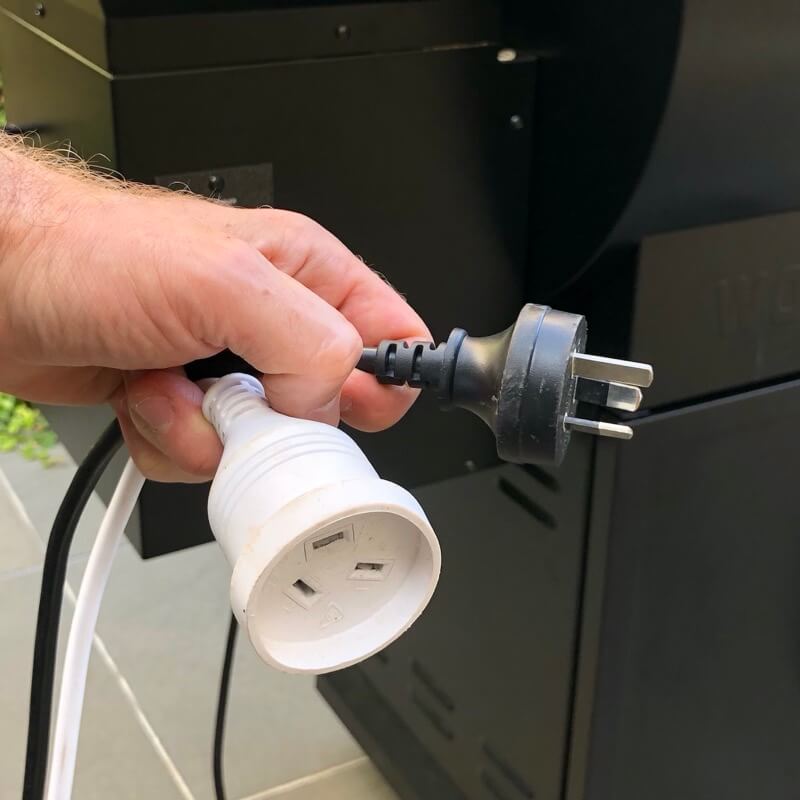
Unplug the grill from power.
Step 2. Empty the hopper

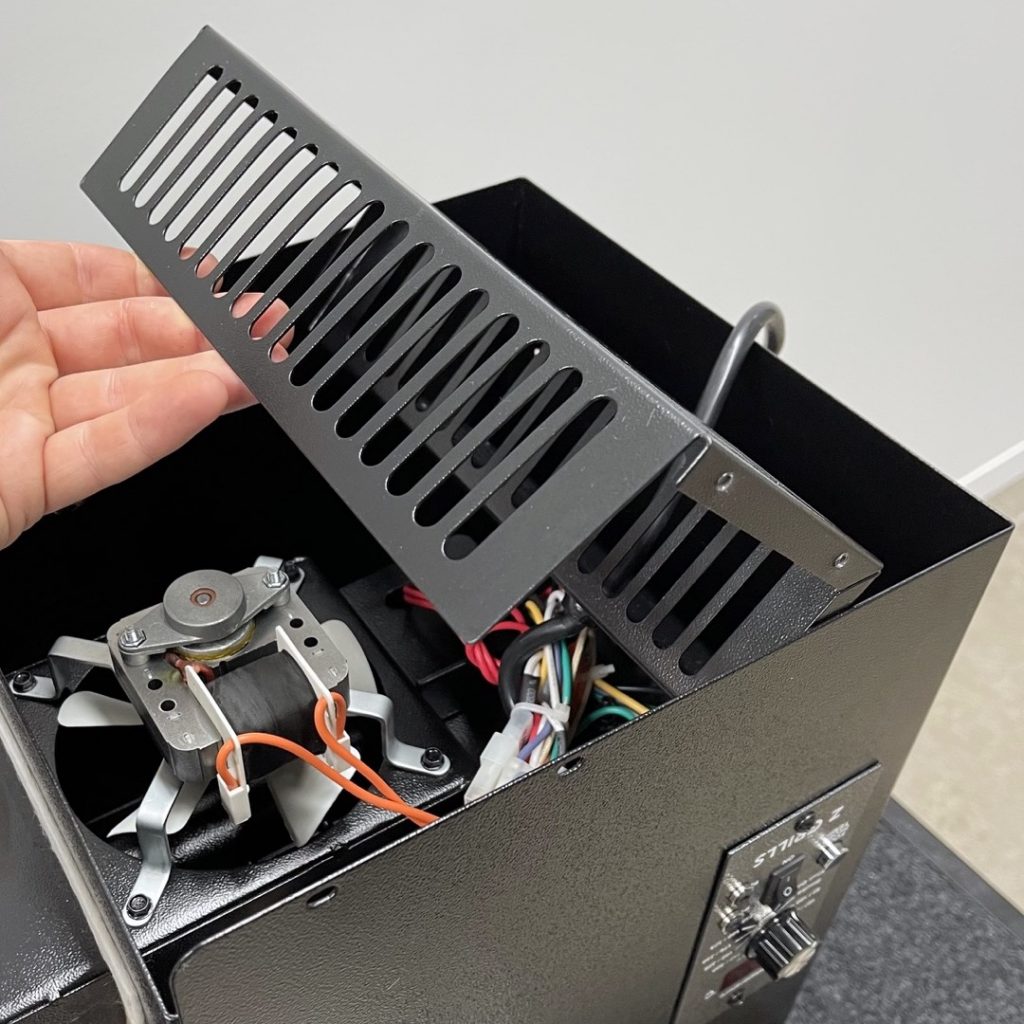
To make cleaning out all the wood pellets easier, you may want to temporarily remove the guard plate. 4 screws are located just under the front and rear lips of the guard. Take care not to drop the screws down into the auger entry hole.
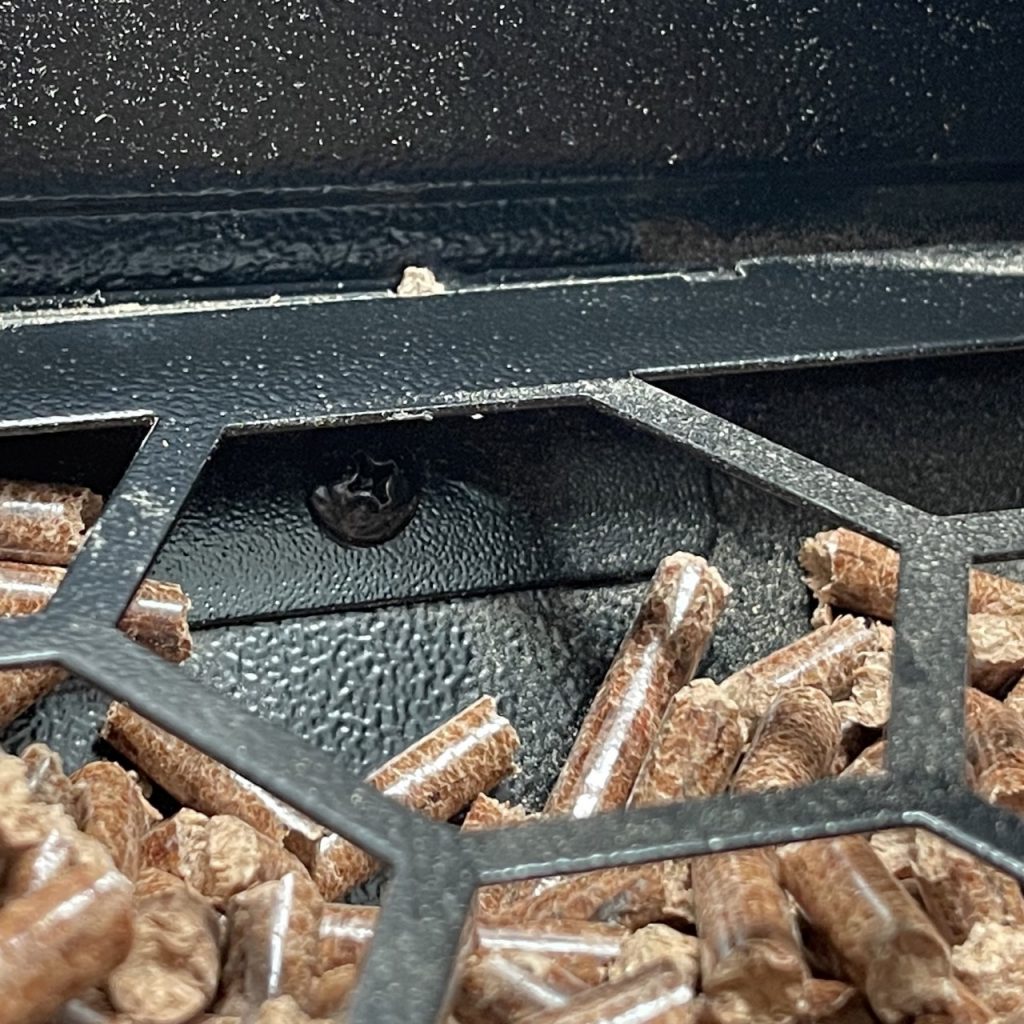
Note the location of the screw, just under the lip.
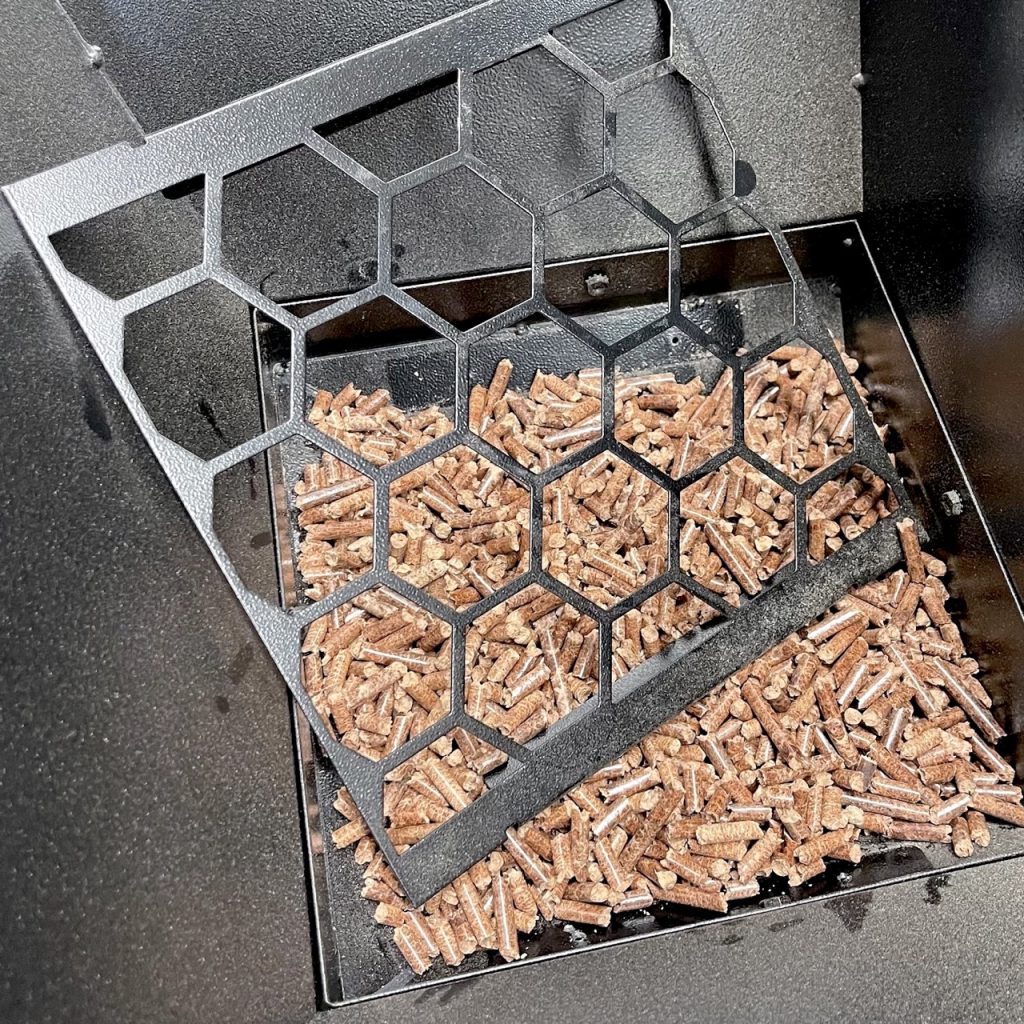
With a little bit of bending, the guard can be lifted out, and returned after repairs are done.
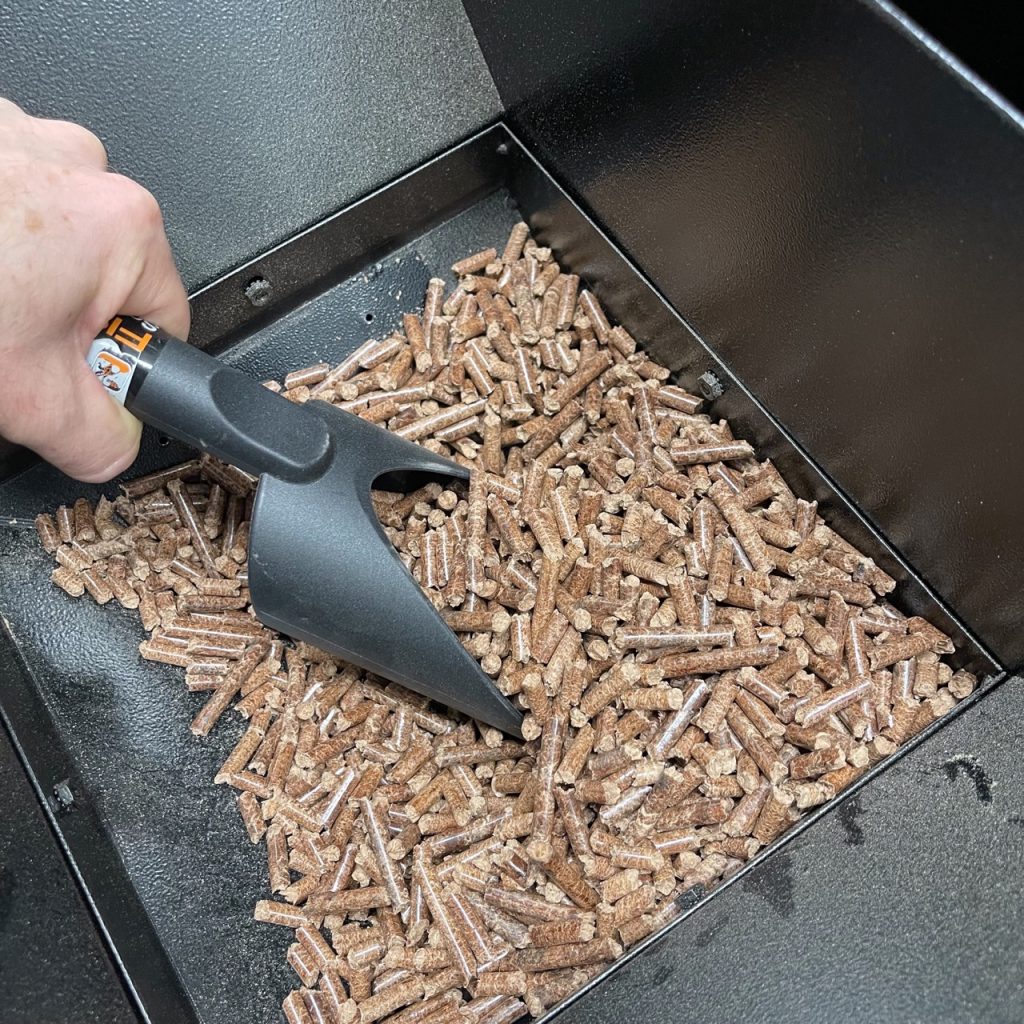
Remove pellets using a plastic scoop, bowl or cup.

Vacuum out the remaining pellets so you can see the auger shaft.
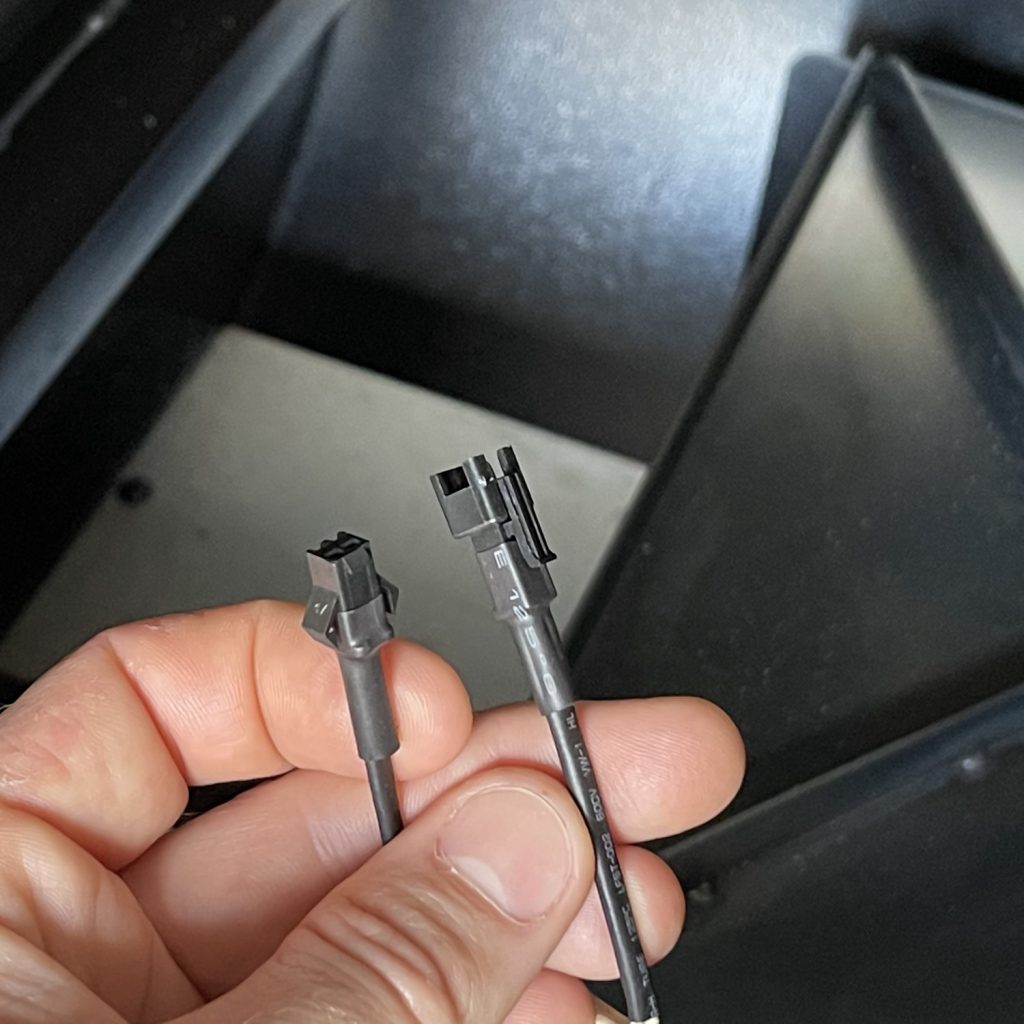
Step 3. Unplug the temperature cable
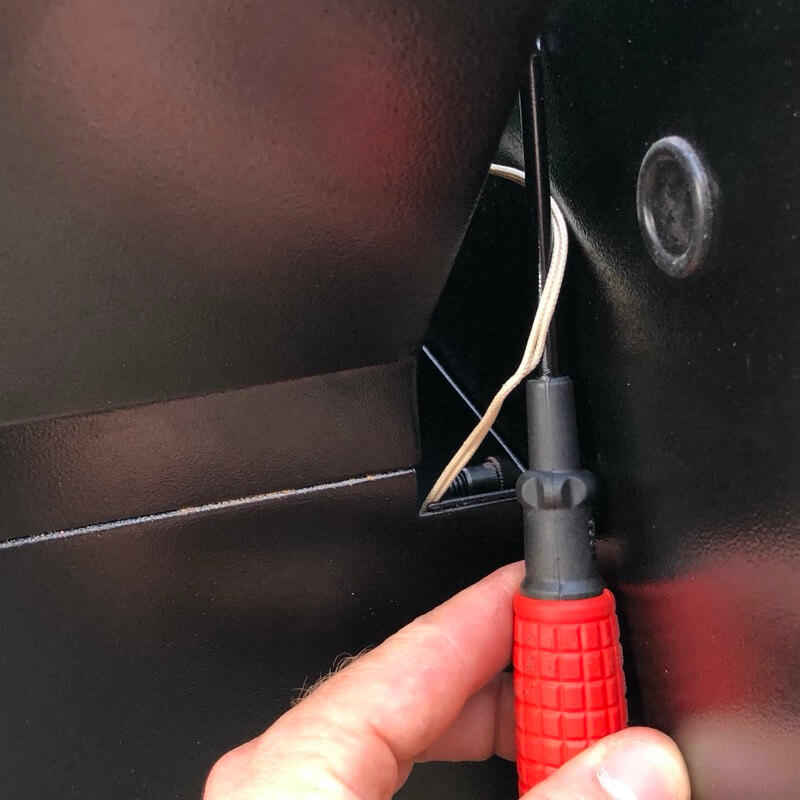
Unplug the temperature sensor cable that sits between the drum and hopper. It can be hooked out with a screw driver if not easily reached.
The 450A model may not have a plug in between the hopper and grill drum. In such cases leave the cable attached (loosen off any twist or cable ties), and just have a table close to the grill. The cable is quite long, so can stay attached.
Step 4. Remove the hopper
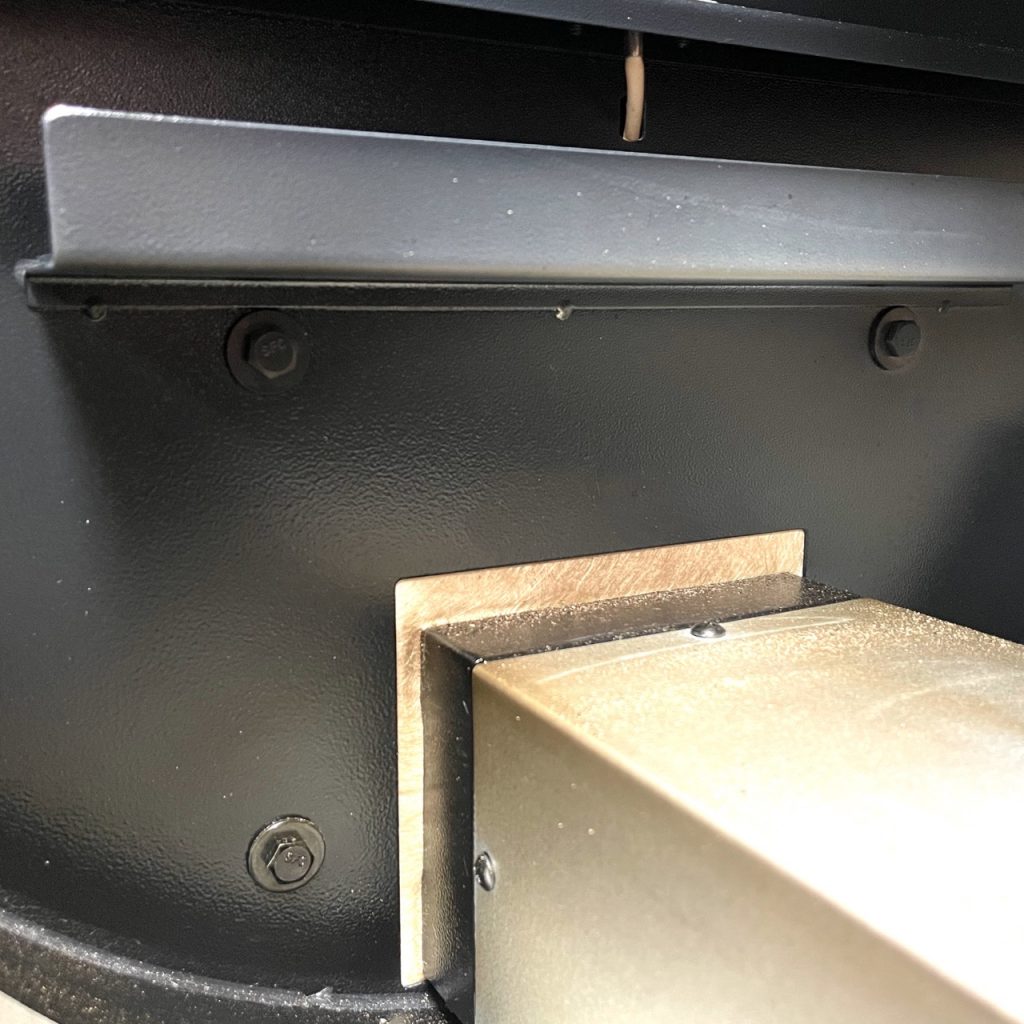
Remove the 4 bolts that secure the hopper to the drum. For 700 series grills, you secured these in place during the assembly process.
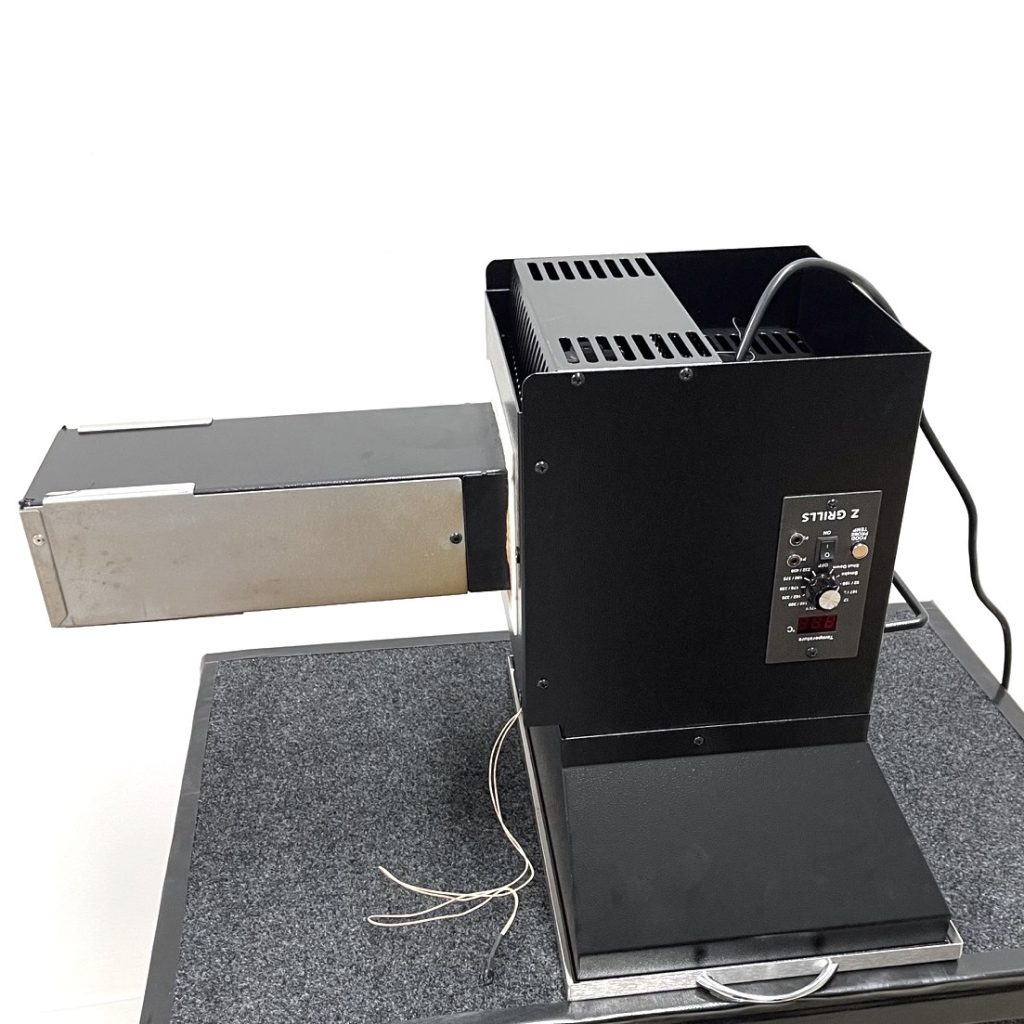
Slide the hopper out and flip up-side-down on a table or the ground. Locate the hopper close to the grill, as later you will need to reconnect the temperature sensor plug to complete operational tests.
If the 700 series hopper too large and cumbersome to turn up-side-down, you can remove the top of the hopper, by undoing the four screws, as you did during the assembly process.
The 450A model has a domed top so can be laid on its back.
Make sure the surface is not going to scratch the hopper lid.
Step 5. Remove bottom cover

Remove the 6 screws holding the bottom cover in place (2 front, 2 rear, 2 on the side)
Gently lift up the cover and rest off to the side, or tilt up enough to access the cables below.
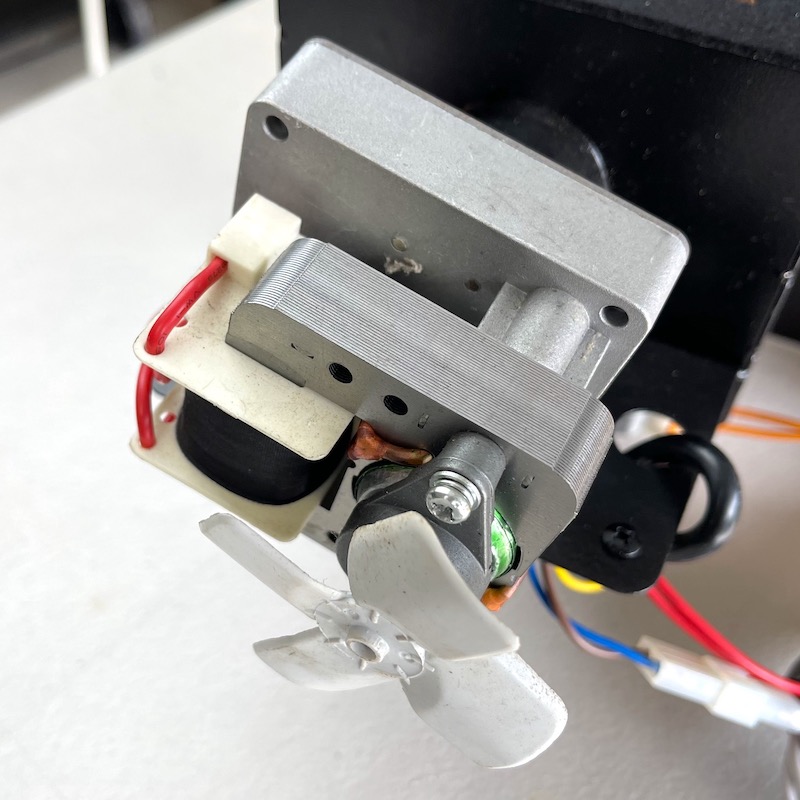
Step 6. Visual inspection
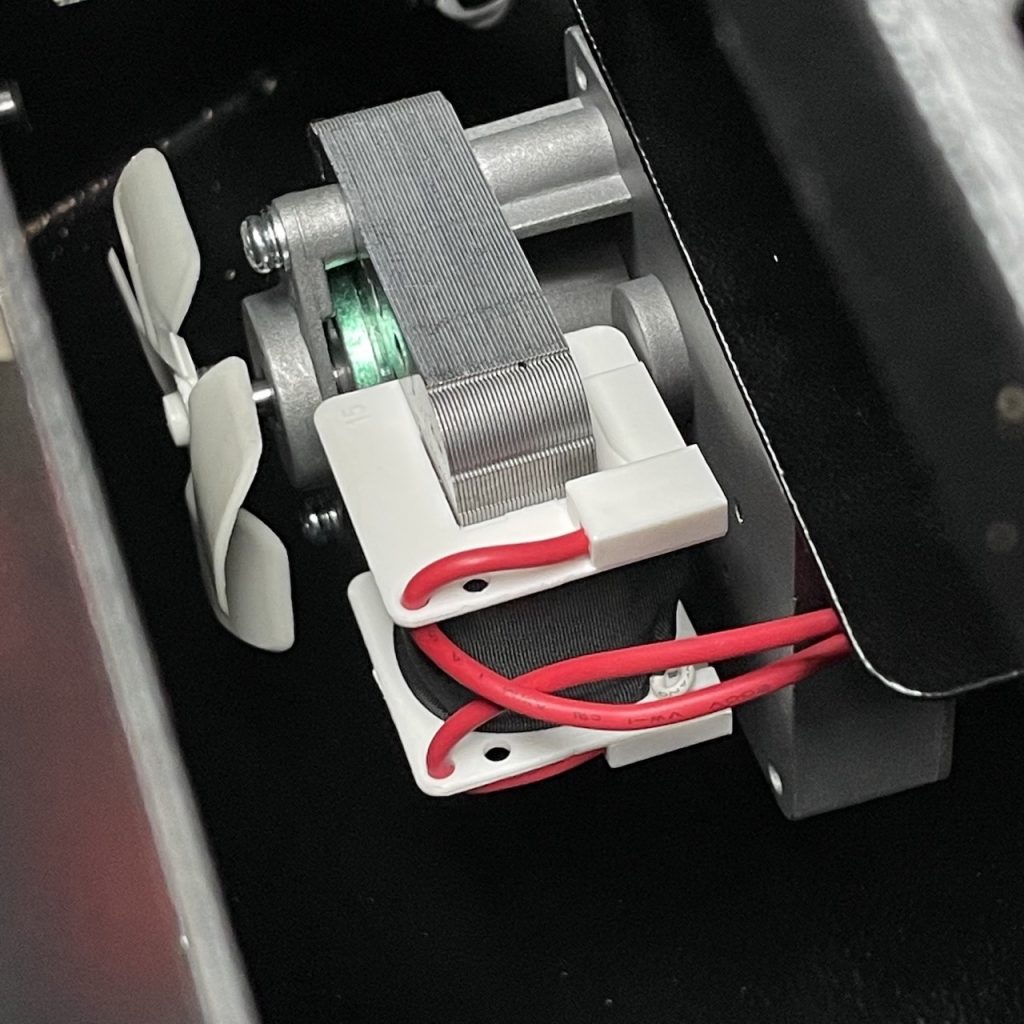
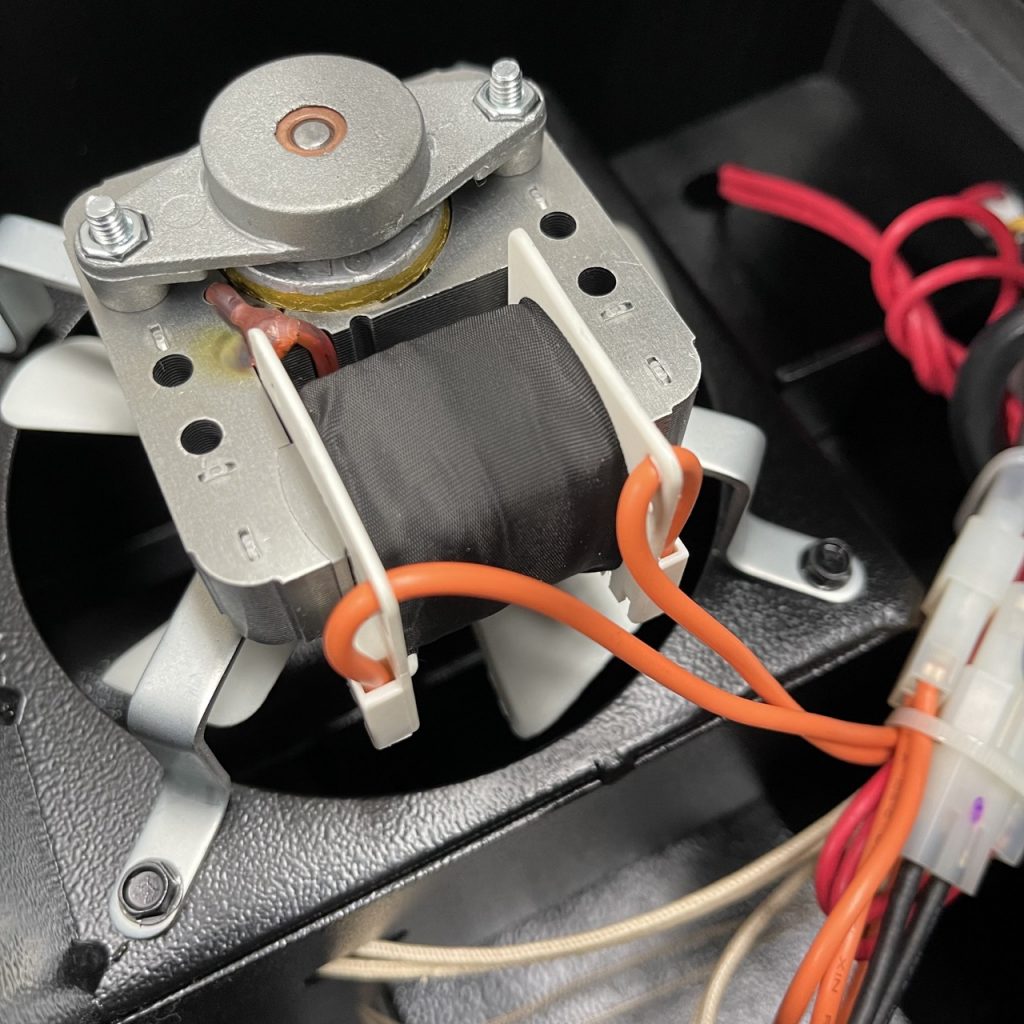
Have a look at the fire-pot fan and the auger motor for any signs of brown discolouration on the cables or plastic plate (holding the motor windings) which would indicate the motors have burnt out. A burnt out motor will often give off a strong burnt plastic smell.
To view the auger motor clearly you may need to release the cables (next step), unscrew the controller and pull it out enough so you can see the auger motor clearly through the controller mounting hole.
If both the motors both look fine, the ignition rod is the most likely culprit. Proceed through the following steps to confirm if the Fan and Auger motor are operating correctly.
Step 7. Release the cables
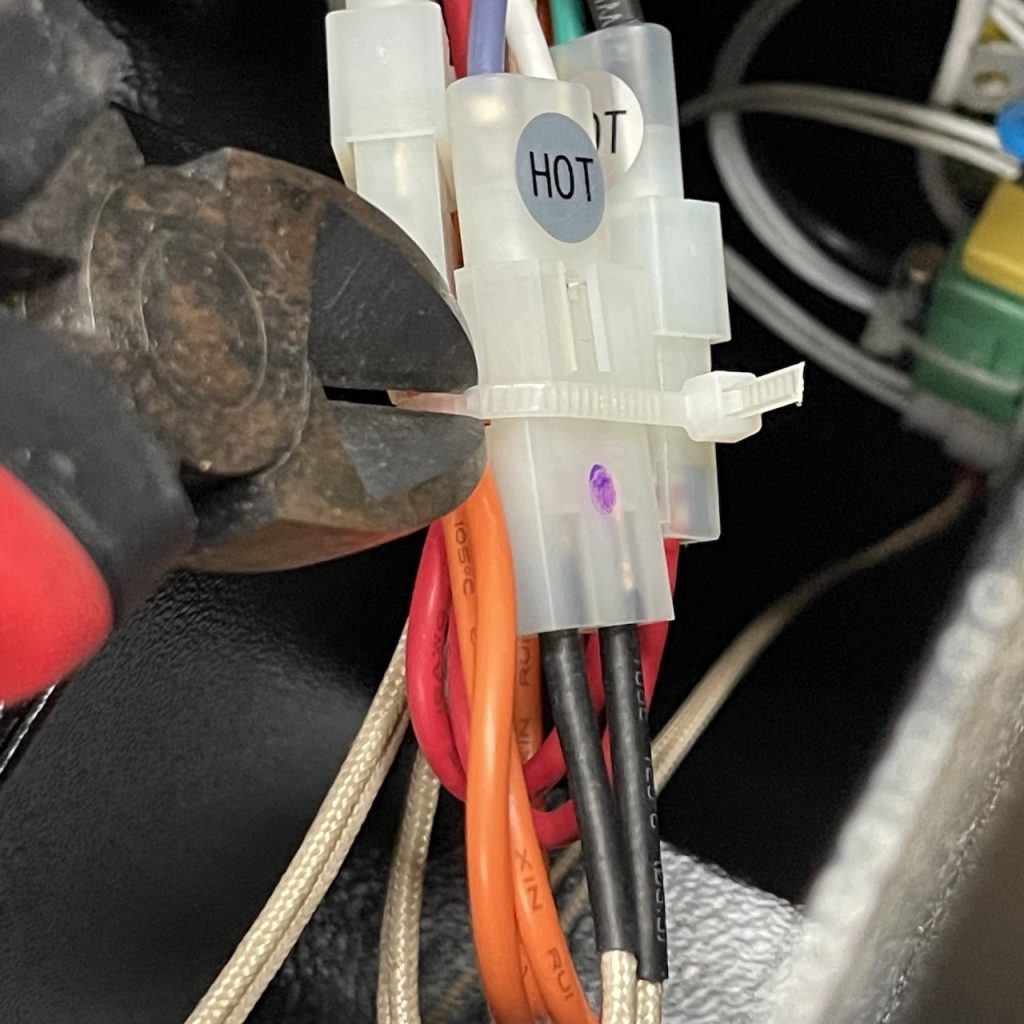
Cut some of the cable ties to free up the bundles of cables.
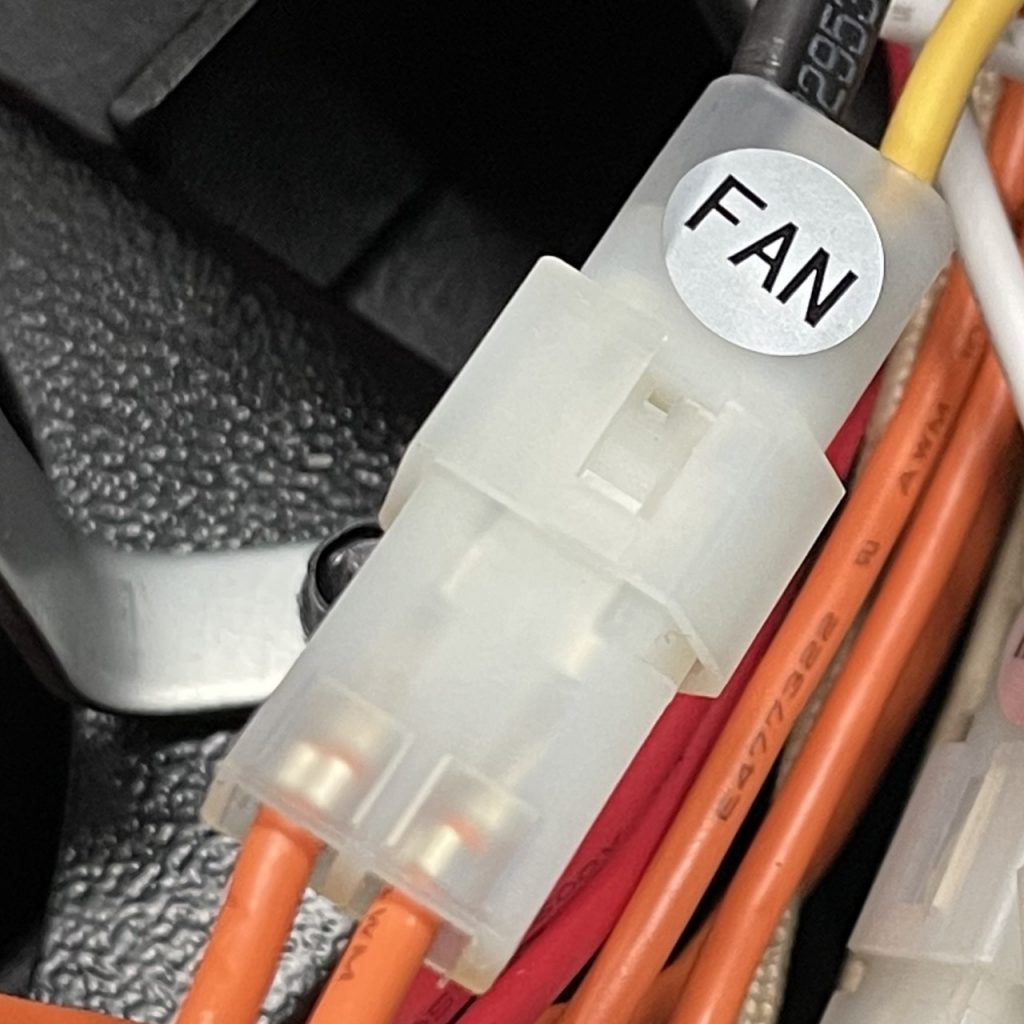
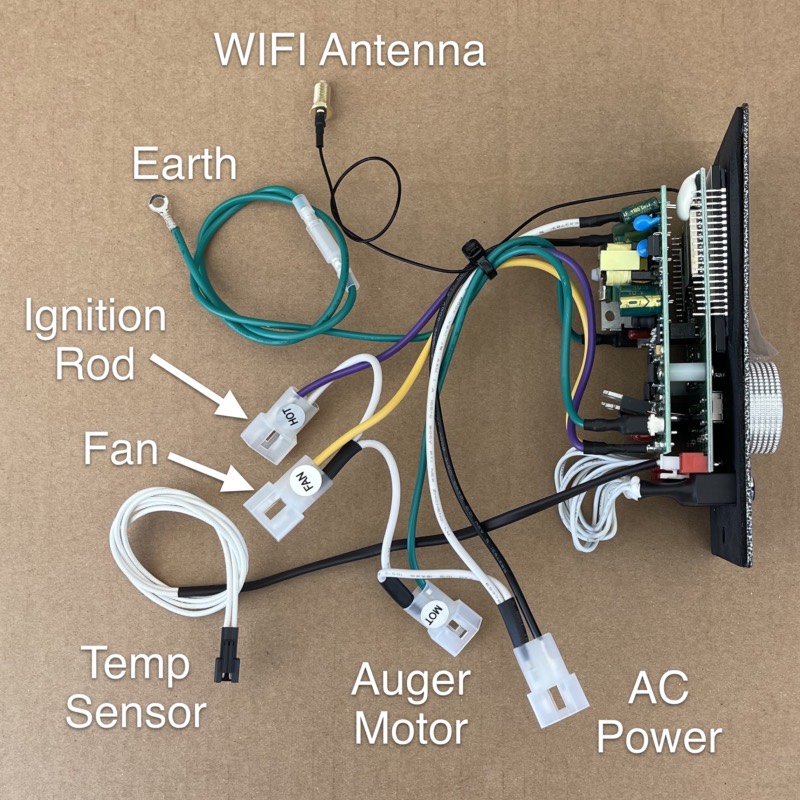
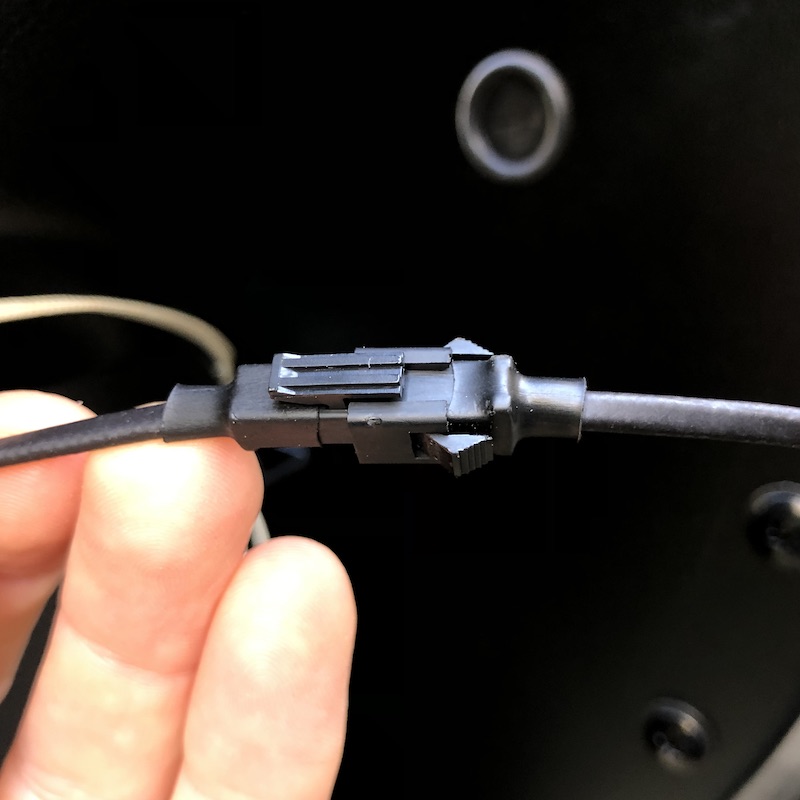
Look for the plugs labelled HOT (ignition rod), MOT (auger motor) and FAN (fire-pot fan).
Unplug FAN and HOT. Leave MOT plugged in, as this is the first one you will test.
Take note of the colour and source of the cables. Refer also to the images at the top of this page for the wiring configuration.
Step 8. Release the Controller
The basic PID controller and Wireless controller
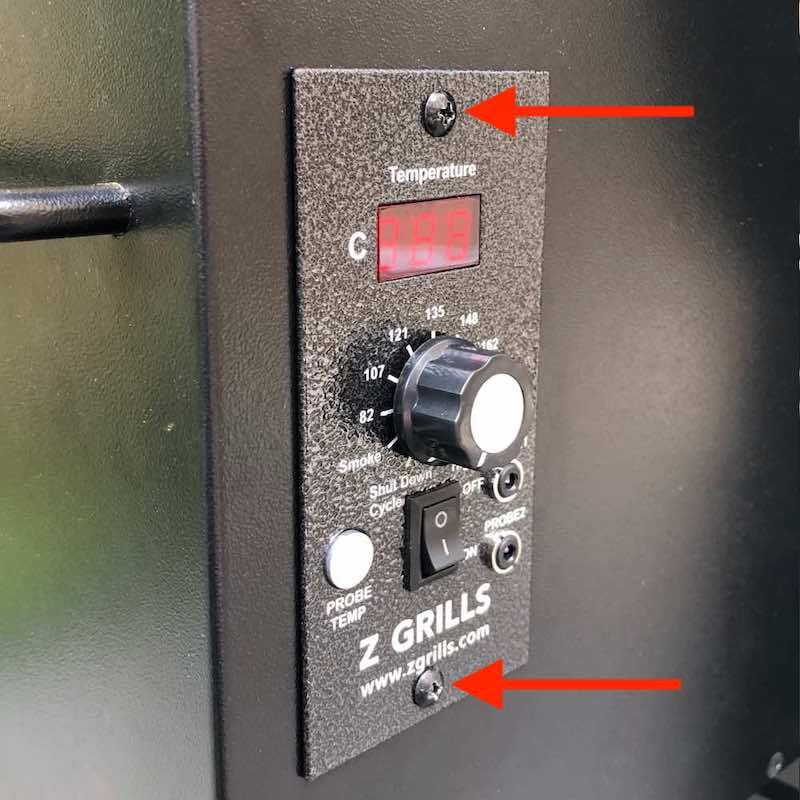
Remove the two screws from the controller.
Step 9. Check the fuse
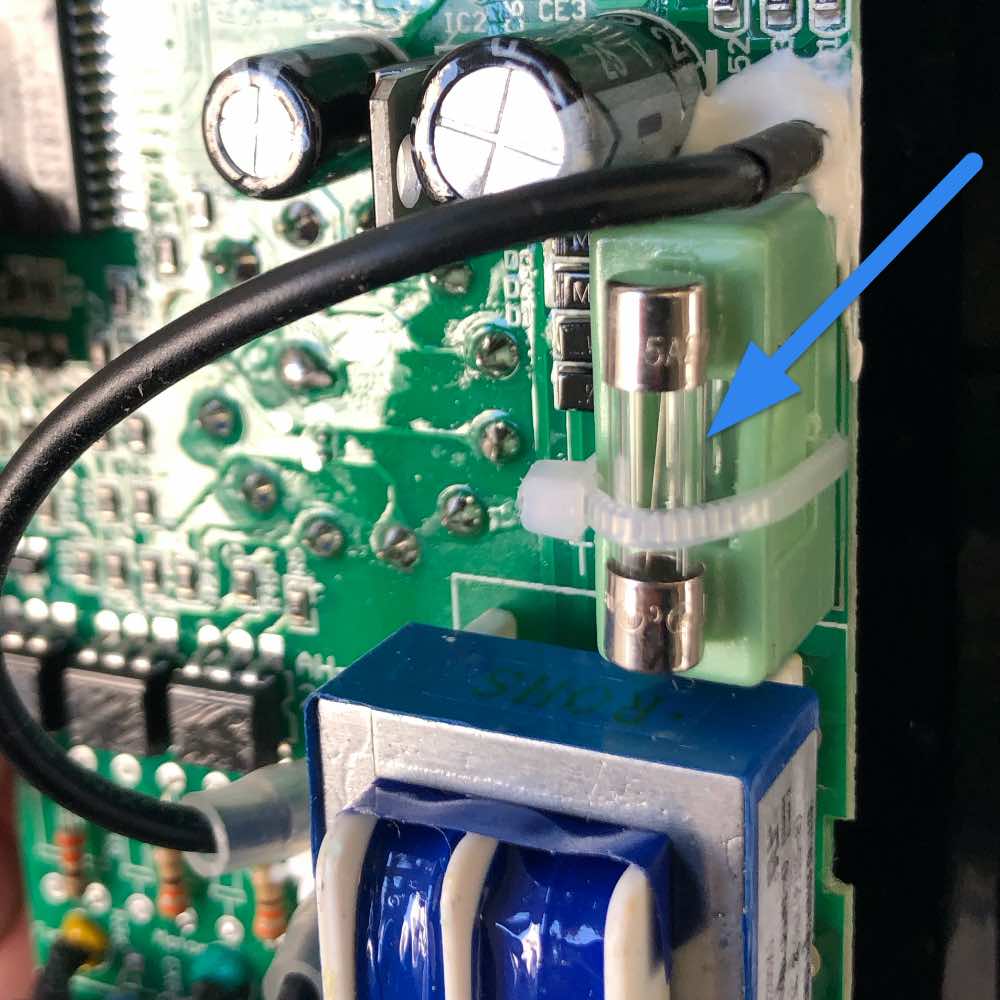
Find the green box on the back of the controller.
A spare fuse is zip tied to the top of the green fuse box.
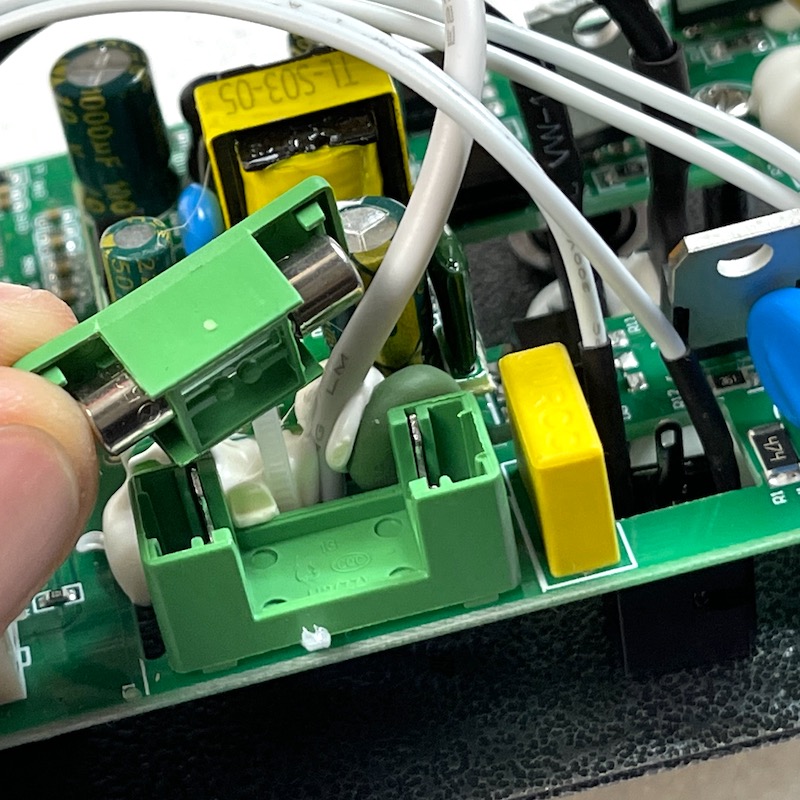
Cut the white cable tie and pull the top off the green box with the fuse housed inside.
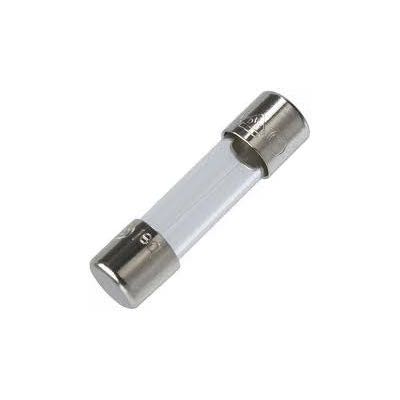
If blown, swap the fuse out with the spare.
The fuse type is a 3A M205 Fast Blow Fuse, which is widely available from electric parts outlets and hardware stores.
Step 10. Put controller back
Push the controller back into place and do up the 2 screws.
Step 11. Reconnect sensor plug
Position the grill close enough to the table to plug the temperature sensor in.
It must be connected for the auger motor or ignition rod to operation. If disconnected when turning the grill on ER1 will be displayed.
Step 12. Test the Auger Motor
Check to make sure the cables are not touching the small white fan at the front of the auger motor, or the fire-pot.
Put the bottom cover back in place (do not need to do the screws up).
Plug the grill into power, and turn the controller power switch on.
If the LCD screen flashes, it means there is power to the controller, confirming the controller is working.
Next, turn the dial from Shut Down to Smoke.
If the power trips or fuse blows, you have confirmed that the auger motor is the problem and needs to be replaced. Jump to Step 14.
If the auger motor rotates (you will hear it) for a few seconds, stops for 20-30seconds then starts to rotate again, then this is working well, and not the cause of the issue. Note the temperature sensor must be connected for the auger motor to run.
Turn the controller to Shut Down and turn the power switch off.
Proceed to testing the Fan.
Step 13. Test the Fan (and ignition rod)

Unplug the grill from power and remove the bottom cover again to access the cables.
Connect the plug labelled “FAN” to the cable that leads to the big FAN (show above).
Put the cover back loosely in place.
Plug the grill back into power.
Next turn the dial from Shut Down to Smoke.
If the power trips or fuse blows you have confirmed that the fan is the problem.
If the fan rotates (you will hear it) continually, it is NOT cause of the issue. Through process of elimination the ignition rod must be the cause of the issue.
Turn the grill to Shut Down and power switch off. Unplug from power.
Step 14. Get Replacement Part
If you have not already been in contact with our team, please contact our support team by completing this form.
In the comments section of the form, please explain that you have completed diagnosis and confirmed the faulty component (Fan, Auger Motor or Ignition Rod).
It is important that you provide the correct model number of your grill which is displayed on the sticker underneath the hopper lid.Eg. 700E-V4.
Also let us know if you have blow the spare fuse and need another one.
If your grill is less than 3 years old, it is covered under warranty and a free replacement part will be express posted to you. If your grill is more than 3 years old, please purchase the replacement part from our shop here.
Parts will normally take 2 to 4 days to arrive via Australia Post Express service depending on your location (shipping from Melbourne, VIC)
Step 15. Repair Instructions
Fan
The fan is easiest to repair with the hopper on the table/ground like you have now. Click here for fan replacement instructions
Auger Motor
The auger motor is easiest to repair with the hopper installed back into the drum.Click here for auger motor replacement instructions
Ignition Rod
If the ignition rod is the issue, you can leave that unplugged, put the grill cover back on, install the hopper back in the drum and manually light the fire to use the grill until the replacement part arrives. Click here for instructions to manually light the fire.