This guide is for grills fitted with the Z Grills Australian wireless controller.
Please Read the Manual!
Please have a quick read through the manual to familiarise yourself with the key parts of the grill. Below is the component summary from page 5 of the manual. Please note the heat baffle (#14) is an updated design, which is different to what is shown on some online photos and videos. Click here to download the pdf version.

Software Update
Once the grill is assembled, the software should be updated to the latest version, then the initial fire up and burn in completed. The burn in MUST be done before the first cook!
The following 6 key steps are explained in detail on this page.
- Download App: Get the Android or iOS Z Grills Aus App to connect to your grill.
- Software Update: Make sure grill controller has the latest software version installed.
- Feed Pellets: Fill up the tube between the hopper and fire-pot with pellets.
- Fire Up: Light the fire in the fire-pot for the first time.
- Burn In: Burn off any surface oils on the grease tray and heat baffle before the first cook.
- Shut Down: Safely shut the grill down.
Download App & Connect
Before firing up the grill for the first time, download the Z Grills Aus App and connect it to your grill. This will not only allow you to update the grill to the latest software version (if available), it will also give you access to all the great features the App provides (see all the App features and more connection instructions here).
The Z Grills Aus App is available for Apple (iOS) and Google Play (Android) versions of the App. The App is called Z Grills Aus, not to be confused with Z Grills 2.0 which is for the USA market. Look for the logo with the AU as shown below.

Software Update
Software updates are available for the controller from time to time providing bug fixes and additional features to allow your grill to run optimally. It is particularly important to update a new grill as the software installed may be from several months earlier.
Software Update Troubleshooting
If there are an issues when trying to complete the update, follow these steps:
- Quit and restart the App on your mobile device.
- Turn the power off (or unplug) the grill, wait 5 seconds then turn back on.
- Press the control knob once to wake up the screen.
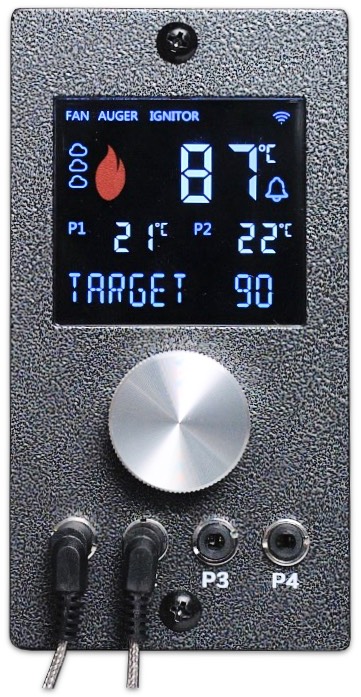
- Make sure the WIFI logo on the controller is solid. If flashing, disconnect the grill from the App and reconnect, then make sure to select a 2.4GHz WIFI network and type in the correct password.
- On the App, navigate to the grill settings page, scroll to the bottom and wait for the Install button to appear. Tap on the install button.
- Watch the controller screen to see the update progress. Wait at least 5 seconds after the screen has turned off then unplug from power (or turn off at wall), plug back in and the press the knob once to power on again.
- Sometimes, depending on the network connection, the progress bar on the app may not move, in which case just wait until the grill has finished updating and simply quit and reopen the app.
- If the install does not complete please contact our support team.
Feed Pellets
The first time the grill is used, and after each time the pellets totally run out, the pellet feed tube needs to be filled up (primed) with pellets.
Follow the steps below:
- With the grill not fired up, press the control knob once to wake up the screen.
- Pour some wood pellets (3 to 4kg is enough) into the hopper.
- Press and hold the control knob for 2 seconds to enter the MENU, rotate to FEED PELLETS, press once to confirm.
- The pellets will feed for 4 minutes which is normally long enough to begin dropping them into the fire-pot. Press the control knob at anytime to stop feeding.
- You do not need to accumulate pellets in the fire-pot. As soon as a few drop you can stop the feeding. During the normal Firing Up process more pellets will be delivered to get the fire going.
Fire Up
Open grill lid
- It is important to open the lid to allow fresh air to circulate during the start up process.
Add wood pellets
- Pour 3 to 4kg of pellets into the hopper.
Turn on and fire up
- Plug the grill into power and press the control knob once to turn on.
- Press and hold the control knob for 2 seconds to enter the MENU, rotate one step to FIRE UP and press once to confirm.
- Pellets will begin to feed intermittently into the fire-pot, the fan will blow and the ignition rod will get red hot to light the fire. There should NOT already be lots of pellets in the fire-pot and never manually add pellets before firing up, as it will just result in lots of smoke.
- The fan will make a strange sound, with the pitch changing up and down a bit due to the lower speed when firing up and operating at low temperatures. At high temperatures the fan will run at full speed and sound smooth.
Smoke and fire
- Wait to see the fire light in the fire-pot. Feel free to take a photo, as it’s pretty exciting!
- Place the heat baffle and grease tray (no foil) back into the grill. The grill racks can be left out as next step will be burning the grill in.
- Close the grill lid. NEVER close the grill lid without the heat baffle in place!
- The controller will display Fire Lit once the grill temperature rises by at least 5℃ / 10℉ and at least 2 minutes has passed. Three beeps will sound (if sound turned on). This may have already happened before you closed the lid which is fine.
- By default the grill will operate with a low target temperature. The correct temperature for burning in will be set in the next step, see below.
Burn In
Only required before first use!
This process involves running the grill at a high temperature (burning wood pellets for heat) to burn off any surface oil on the heat baffle and grease tray (new grill). This must be completed before cooking any food for the first time.
The smoke will have an oily odour, so avoid breathing in the smoke or completing the Burn-In near an open window.
Follow the process below:
- The unit should already be running with the heat baffle, grease tray (no foil) and placed inside. The grill racks can be left out.
- By default the grill will be operating at a low temperature and may still be displaying the FIRE LIT message.
- Press the control knob once and rotate to 220oC and press again to confirm.
- Run on this temperature setting until no more smoke is being released, or at least 30 minutes. The grill should reach over 200oC after about 15-20 minutes. It is normal for the temperature to first exceed the target temperature and then stabilise.
- Once the Burn-In has been completed, the grill can be Shut Down. See instructions below.
Shut Down Grill
The grill needs to ensure the fire is totally burnt out by running the fan for 10 minutes before turning itself off.
Always follow the correct process outlined below when shutting down the the grill.
- Press and hold the control knob for 2 seconds to enter the Menu, then rotate to Shut Down and press again to confirm.
- If less than 140℃ / 284℉ the grill will begin the Shut Down Cycle, running the fan for 10 minutes then turning the power off.
- If the grill is hotter than 140℃ / 284℉ it will first continue to operate with a small fire to cool down below 140℃ / 284℉ before commencing the Shut Down Cycle.
- Don’t disconnect or turn off the power until the fan stops.
WIFI Antenna
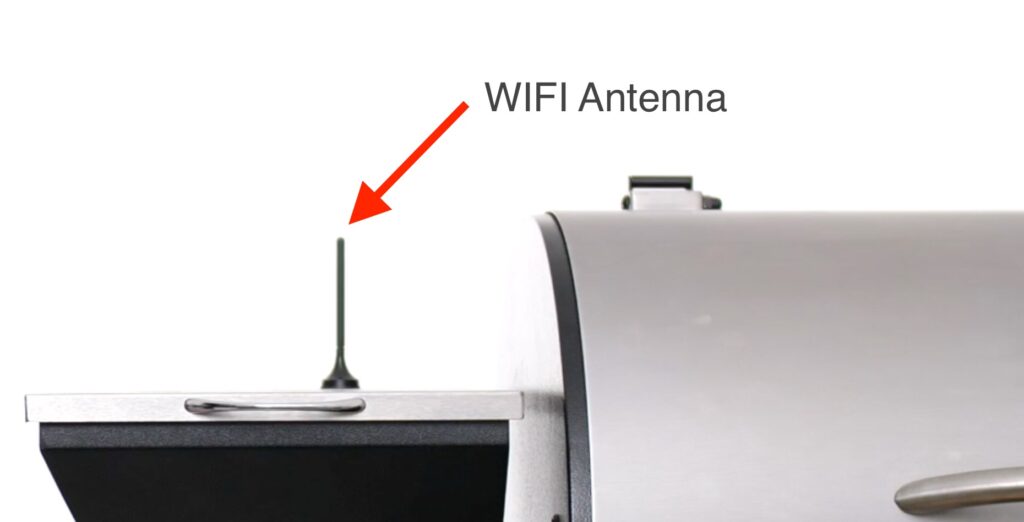
The black plastic pole with magnetic base is the WIFI antenna, NOT a temperature probe! Do not place it inside the grill or even on the side of the hot grill as it will melt!
It is bundled up underneath the hopper together with the power cable.
The best locations are on top of the hopper lid, rear or side the hopper where it can receive the strongest WIFI signal.
If you have dogs or little kids make sure to keep away from their little teeth and hands.
Starting Cooking!
- In the grill racks were placed in during the Burn In, wipe down with a moist cloth.
- Cover the grease tray include the vent holes with foil before using.
- Time to Fire Up again and cook something delicious!
- Click here for full instructions on how to use.