This article covers how to replace the ignition rod (hot rod) in a Z Grills 450A pellet smoker.
For Grill Models: 450A
Time: 20-30min
Difficulty: Medium
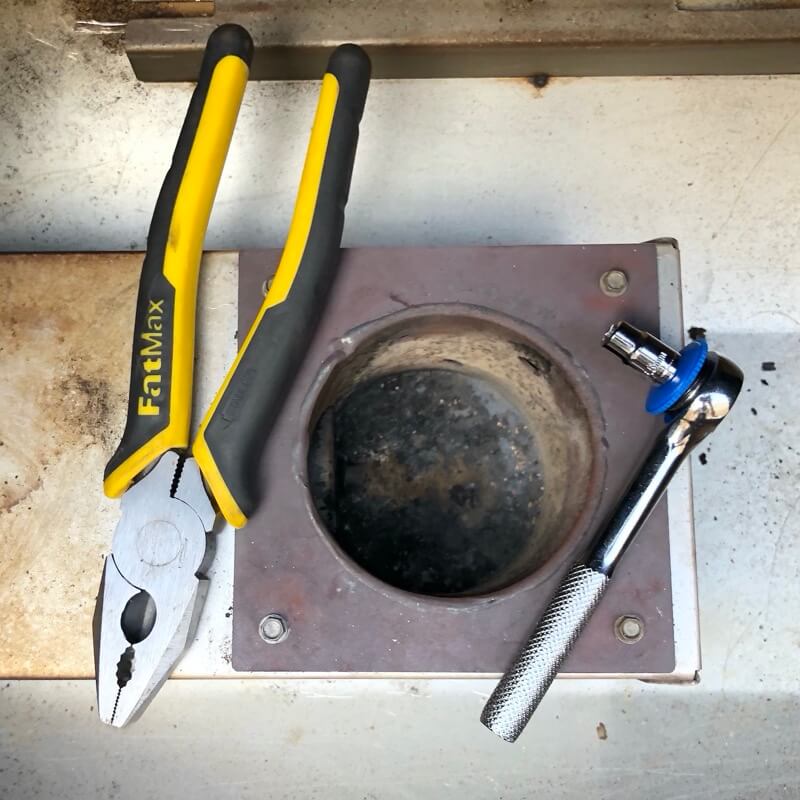
Tools Required: Pliers or small socket set, Phillips head screwdriver, Scissors or knife
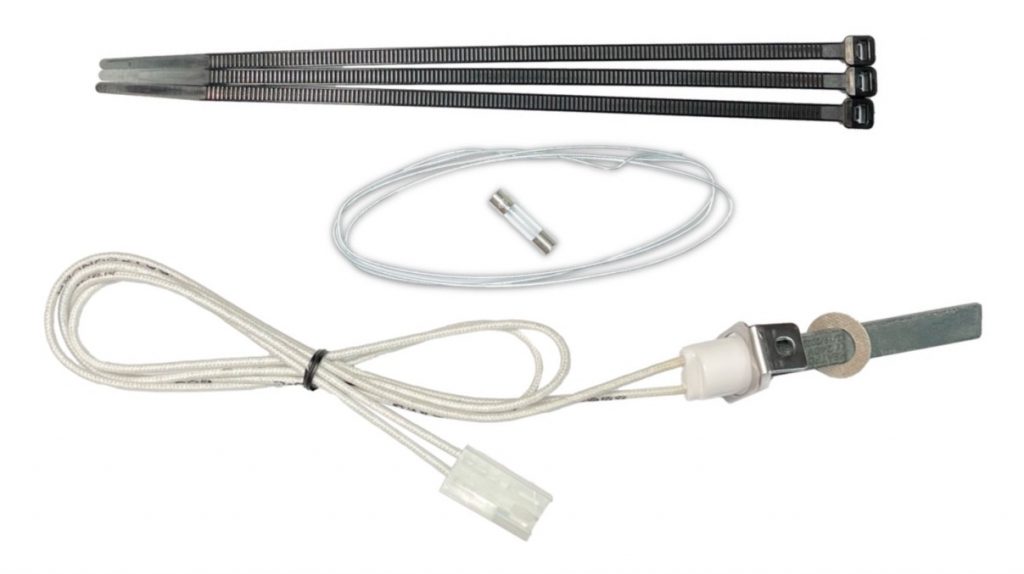
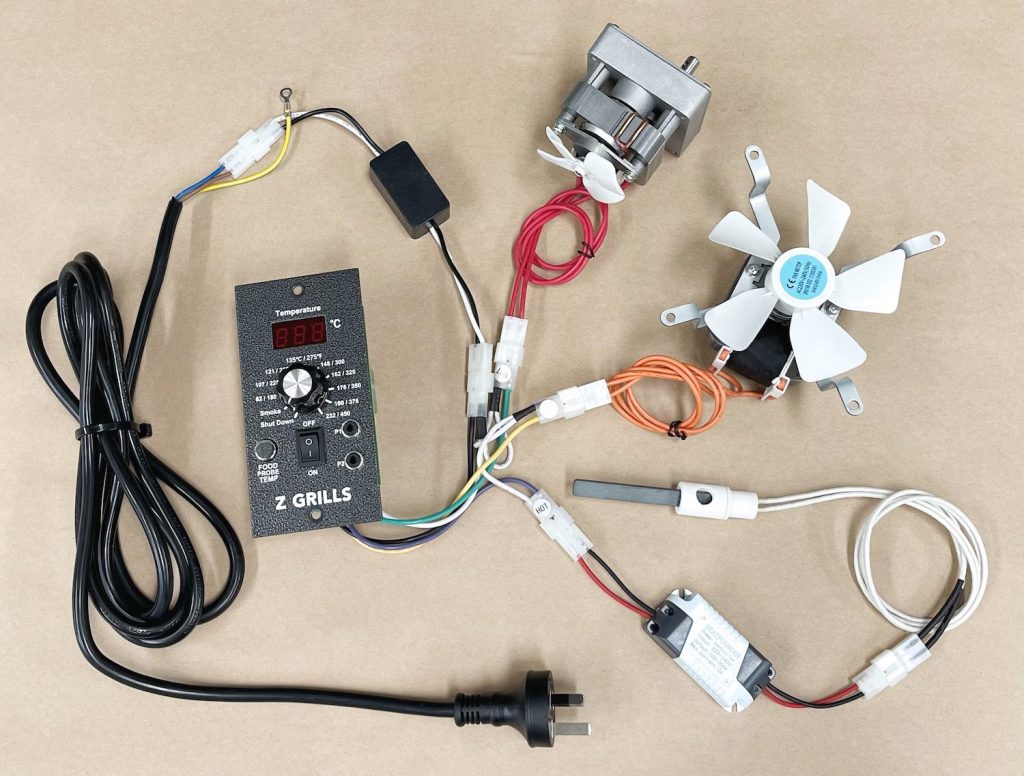
Spare Parts (from Z Grills): SN ignition rod, fibre washer, mounting bracket, cable pull wire, cable ties, spare fuse.
What is the ignition rod?
The ignition rod is responsible for igniting the wood pellets. Each time the grill is turned from Shut Down the Smoke setting, the ignition rod runs for 5mins, getting red hot.
New Silicon Nitride Ignition Rod
From November 2021 a new type of type of ignition rod will be supplied to Australian Z Grills customers if an ignition rod fails during the warranty period. To learn more about ignition rods, click here.
What is an ignition rod?
The ignition rod or “hot rod” is responsible for igniting the wood pellets in the fire-pot.
There are two types of ignition rods used in Z Grills pellets smokers in Australia.
Metal tube ignition rods are the most common type used in wood pellet smokers, but Z Grills Australia has recently introduced a new Silicon Nitride (SN) type ignition rod which not only heat up much faster but is also far more reliable.

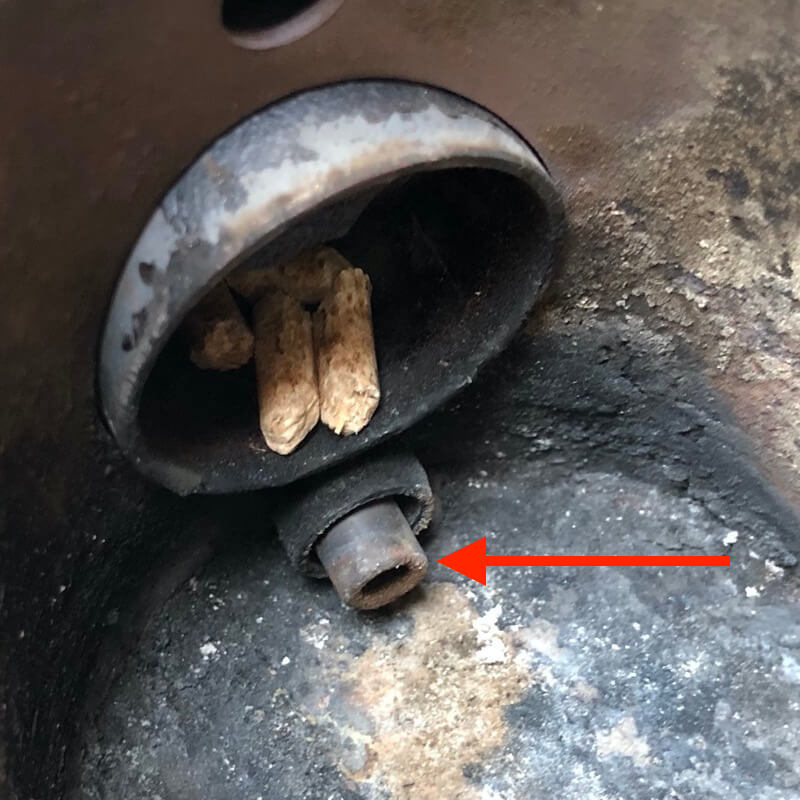
The ignition rod sits in the tube at the base of the fire-pot. Metal tube ignition rods need to extend out about 1cm as they need to physically touch wood pellets to ignite them.
Silicon nitride (SN) ignition rods get much hotter and get red hot right to the tip, so do not need to extend far out into the fire-pot like the metal tube type.
Repair Instructions
Step 1. Unplug the Power
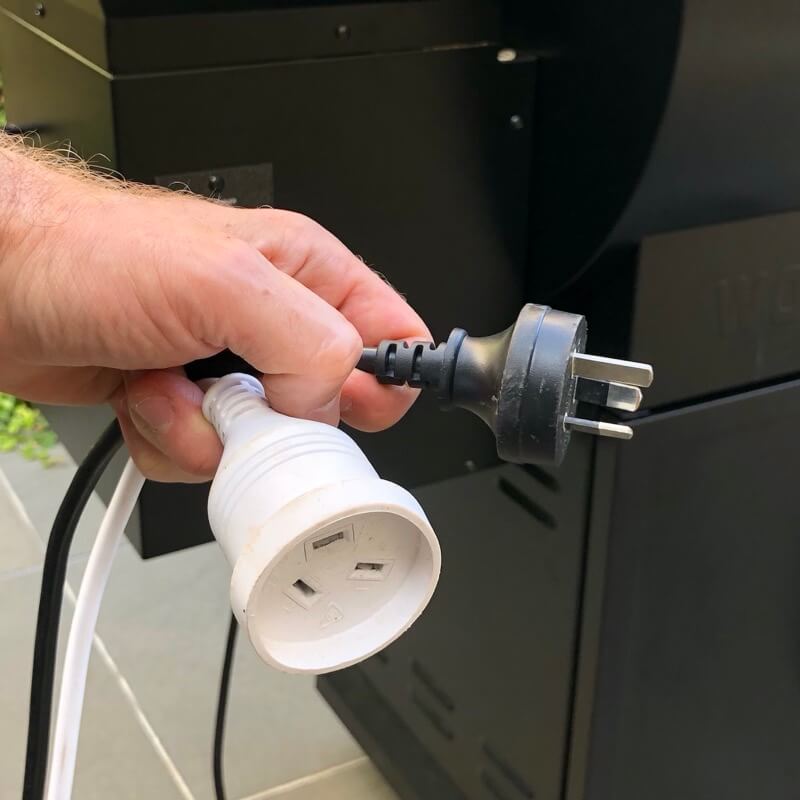
Before doing any maintenance or cleaning, always unplug the power to the grill.
Step 2. Empty the hopper
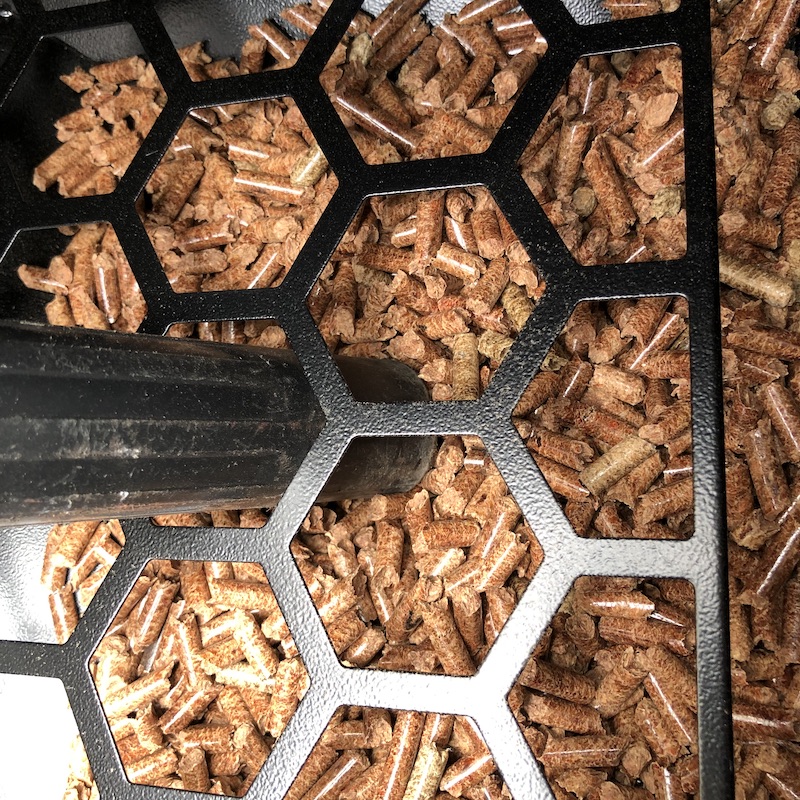
Scoop as many pellets out as you can using a plastic scoop or cup.
Vacuum out the remaining pellets so you can see the Auger.
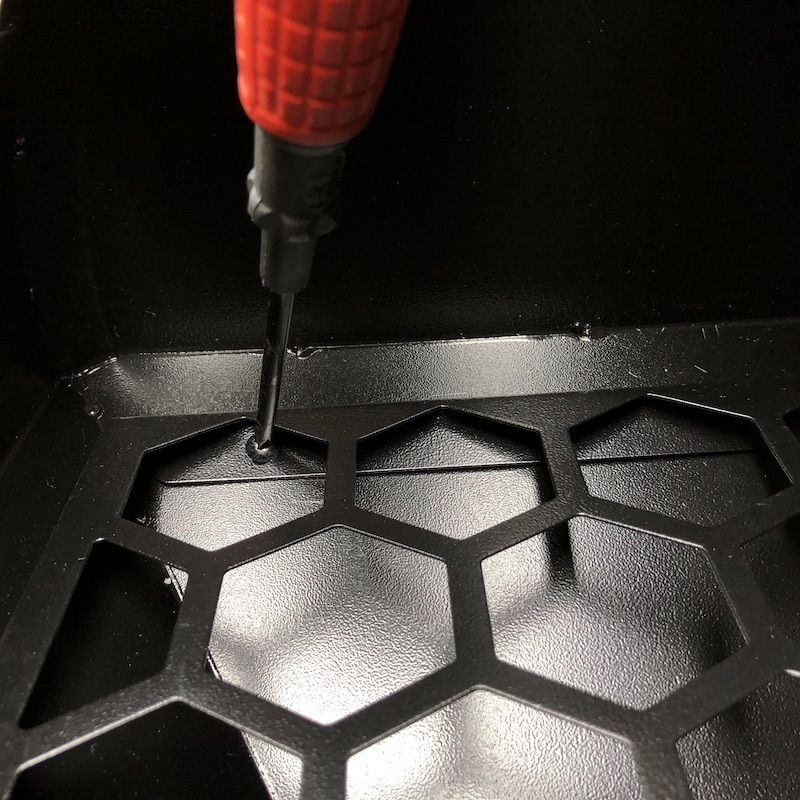
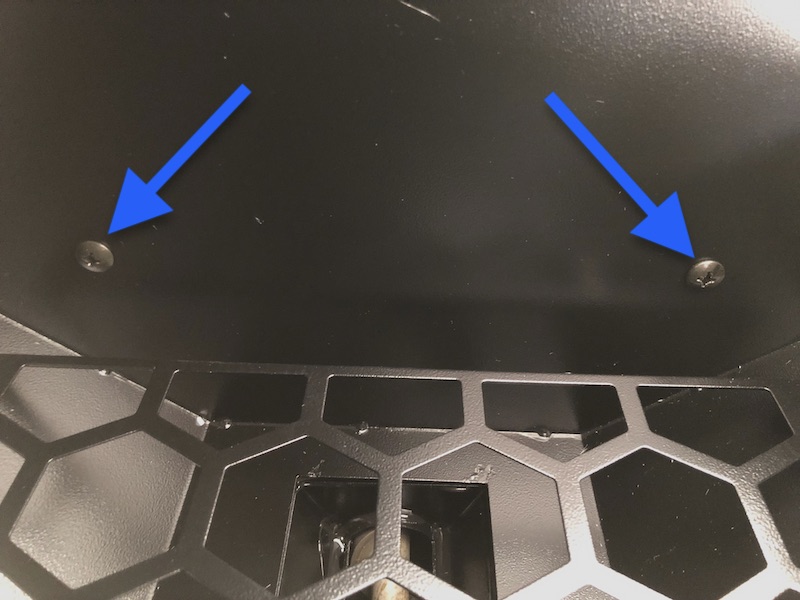
To make cleaning out all the wood pellets easier, you may want to temporarily remove the guard plate.
2 screws are located just under the lip of the guard, or on the right, depending on the guard design.
Take care not to drop the screws down into the Auger.
Step 3. Remove base cover

Remove the 8 screws to release the base cover.
Step 4. Release the Controller
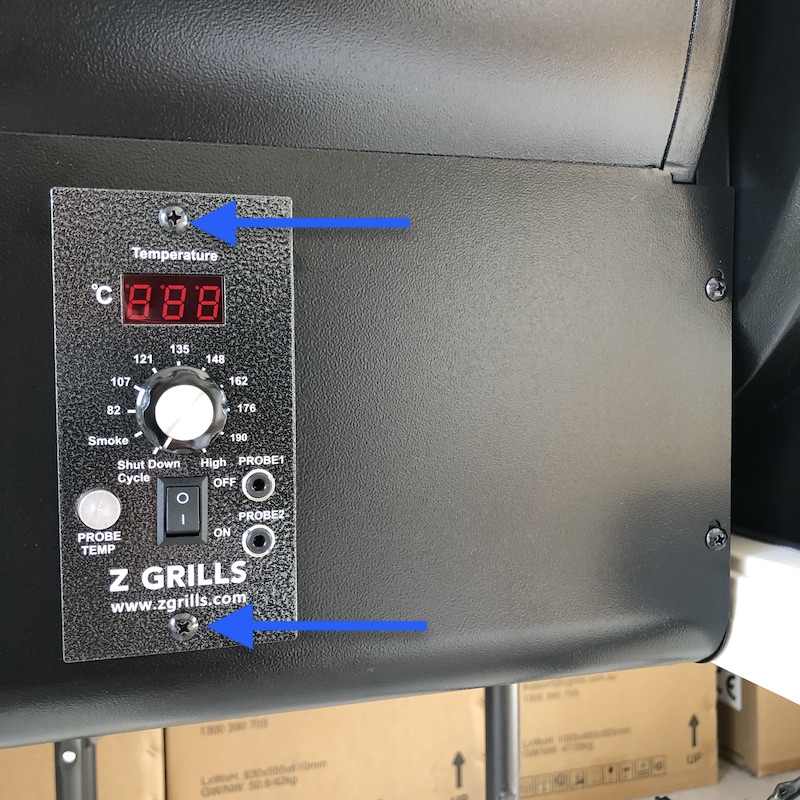
Remove the two screws from the controller.
Gentle pull the controller forward and then push back in through the hole in the hopper box.
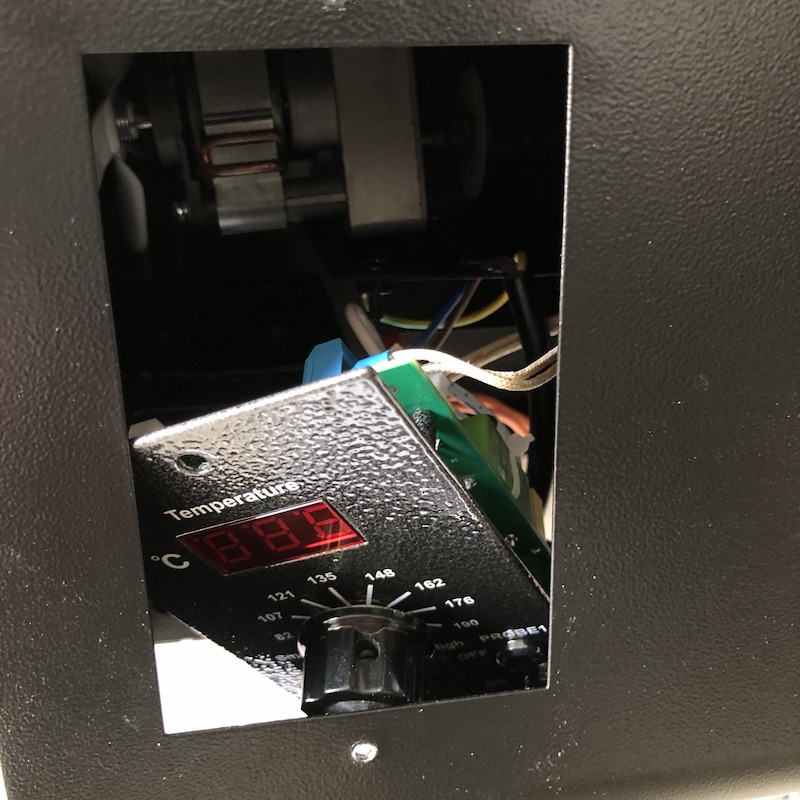
If the controller is hard to move, it may be necessary to cut the white cable tie that is securing the cables together. Take care not to cut any of the wires.
Gently pull the bundle of wires out that are sitting in the small box.
Step 5. Remove hopper box

Remove the two front and two rear screws.
Remove the 2 screws inside the hopper.
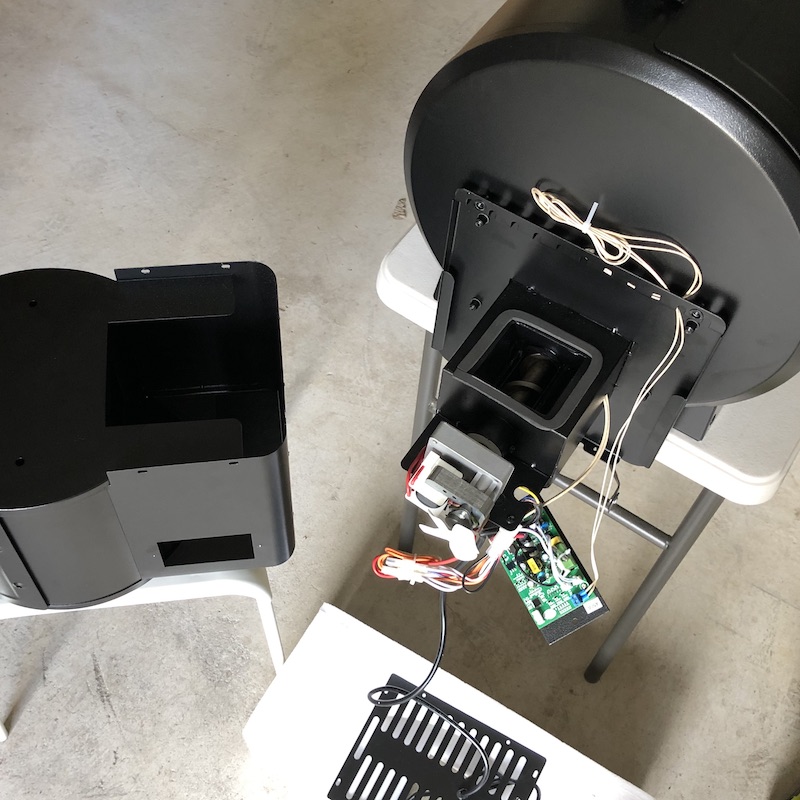
Gently lift off the hopper and place off to the side out of the way.
You now have full access to the controller, auger and all the cables.
Step 6. Check the fuse
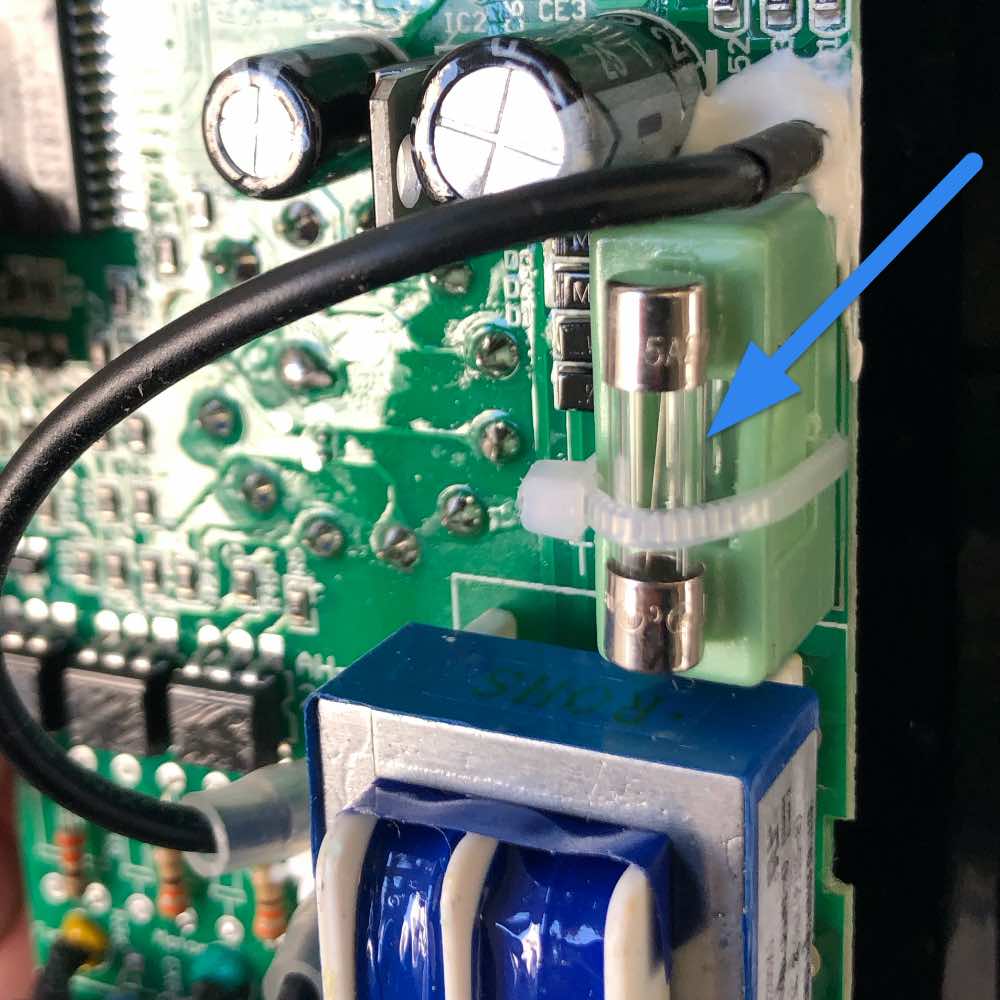
If the ignition rod tripped the power (quite common) the fuse is most likely blown.
A spare fuse is zip tied to the top of the green fuse box.
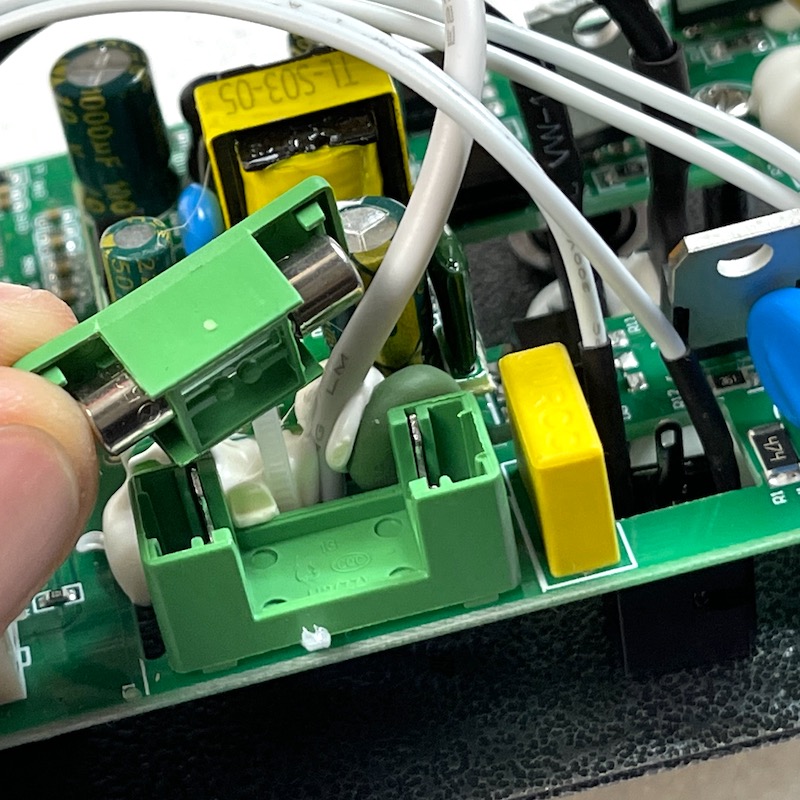
Cut the white cable tie and pull the top off the green box with the fuse housed inside.
If blown, swap the fuse out with the spare.
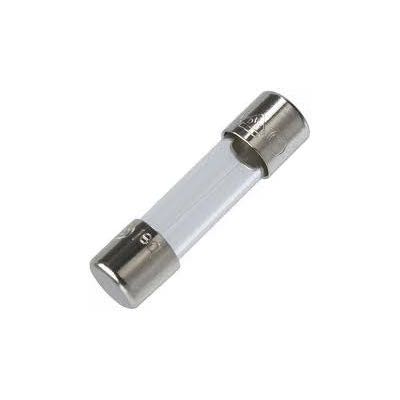
The fuse type is a 3A M205 Fast Blow Fuse, which is widely available from electric parts outlets and hardware stores.
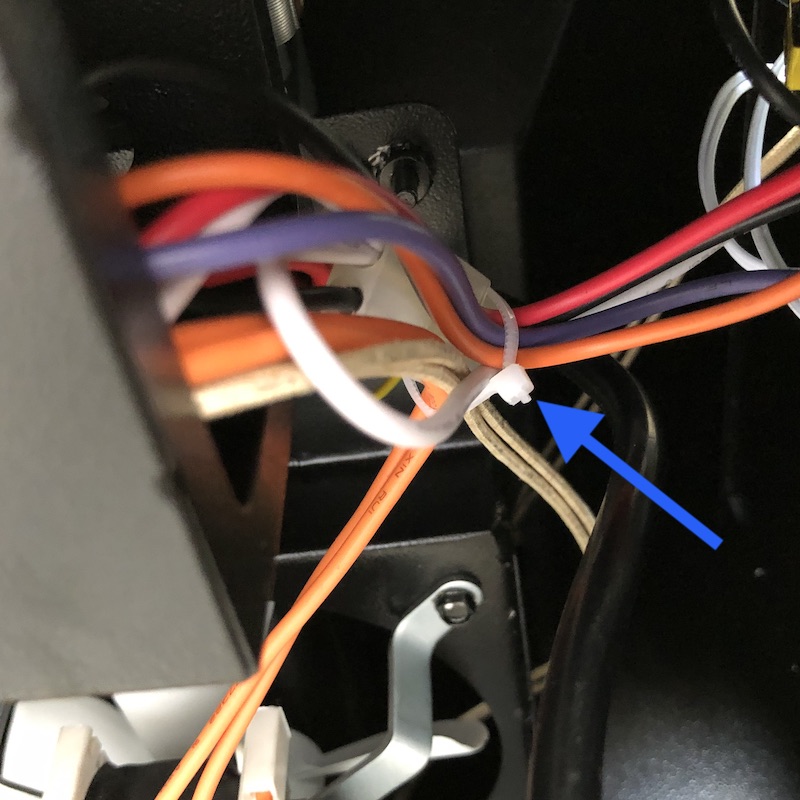
Step 7. Unplug the ignition rod cable
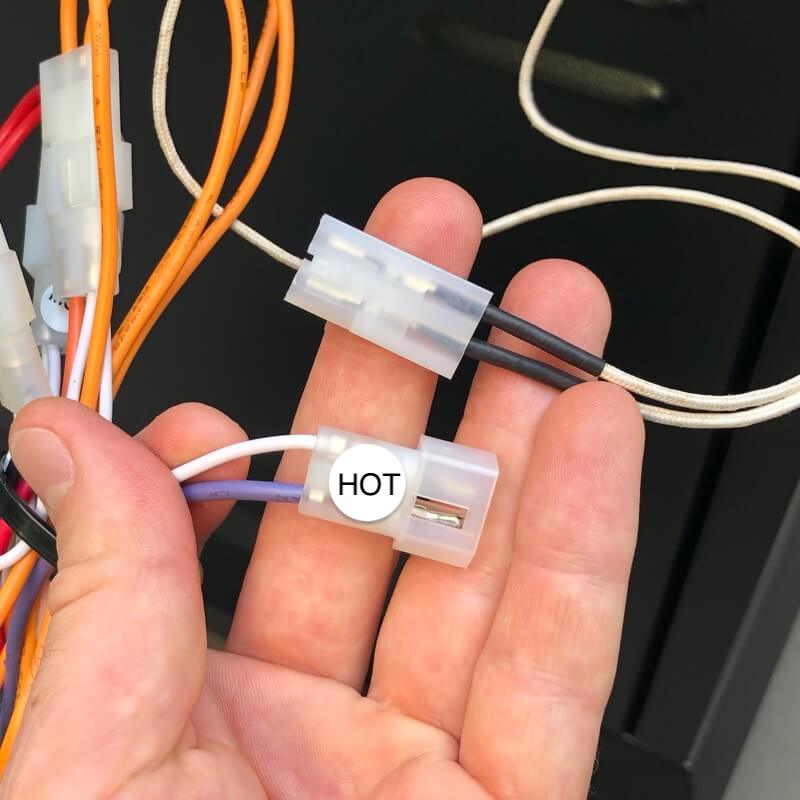
Cut off all the cable ties to free up the cables.
Identify the cable with the sticker HOT on it which powers the ignition rod.
The cable will be purple-white from the controller and white-white leading into the side of the grill to the ignition rod.
Carefully unplug by pulling on the plastic connectors and not the wires.
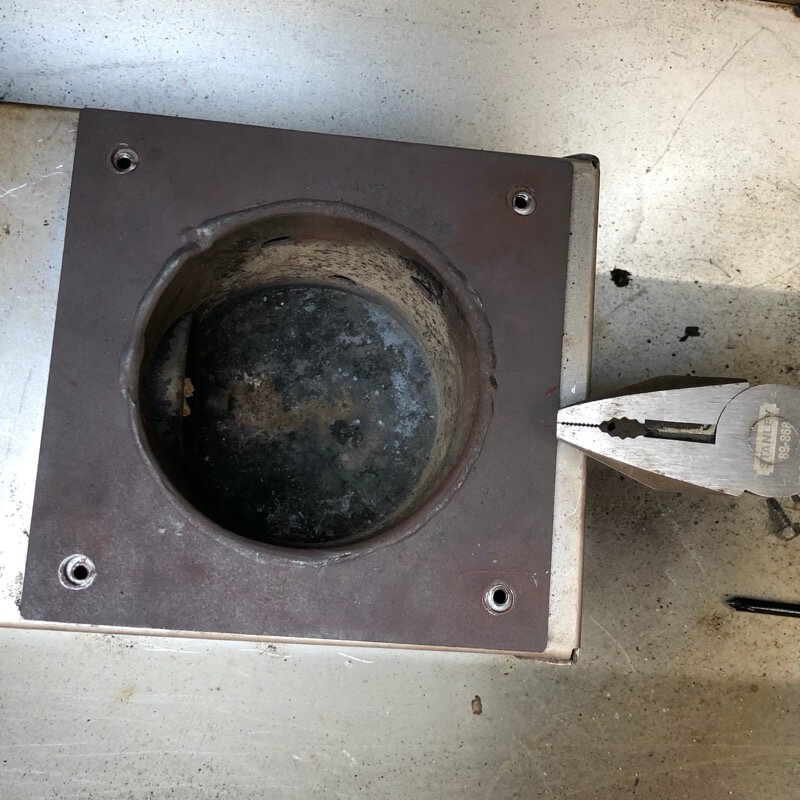
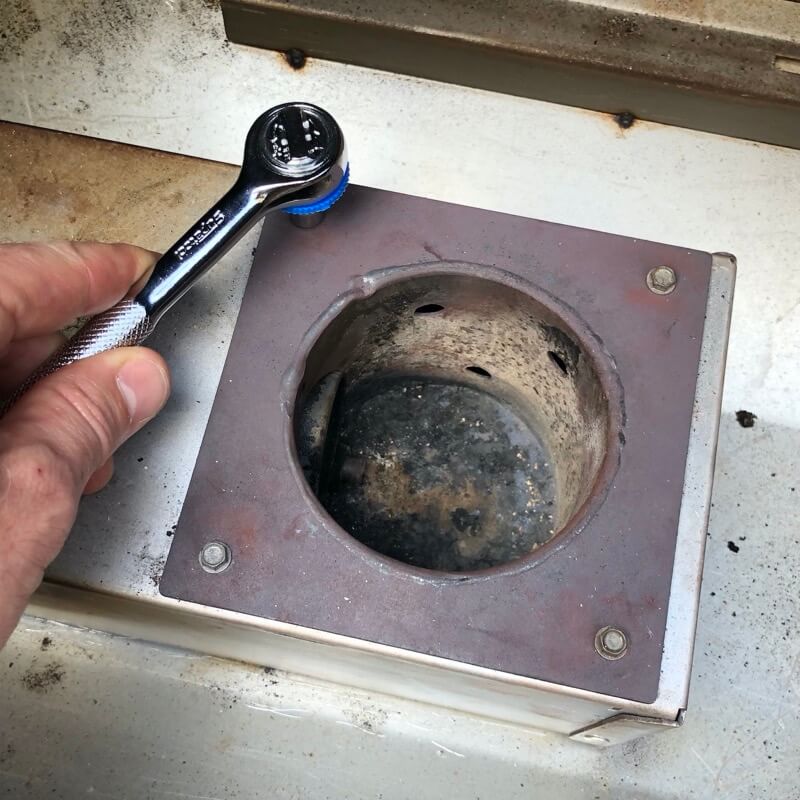
Step 8. Remove fire-pot
Undo the 4 screws on the top of the fire-pot using a pair of pliers, spanner or suitable sized socket wrench.

Pull the fire-pot to the right (tap with pliers if required).
To lift out, rotate the pot to the side and lift up and out at an angle.
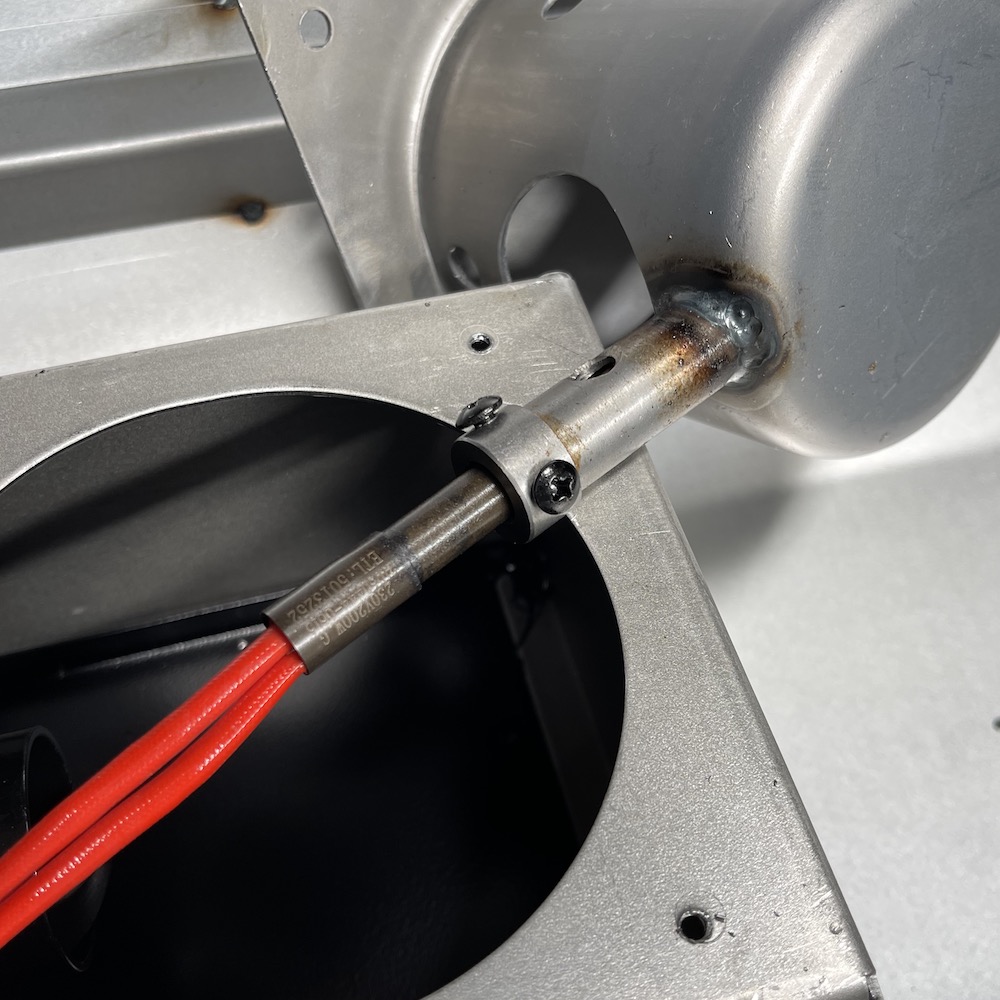
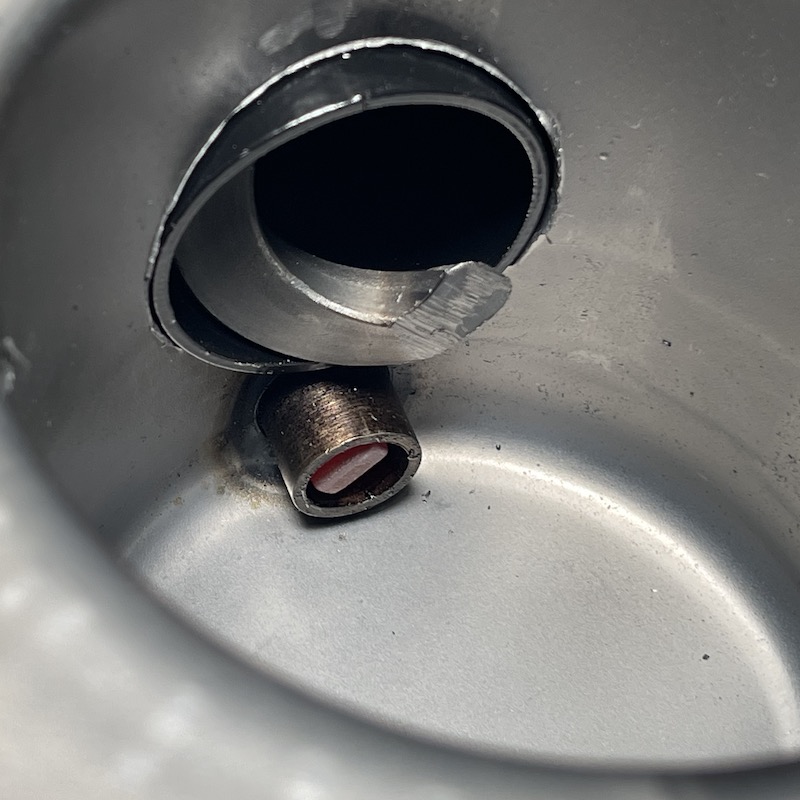
Flip the fire-pot over and gently undo the screw(s) until the ignition rod can slide out.
The fire-pot may have one or two screws. If there are two screws, remove the bottom one entirely as only the side one will be used.
Step 9. Replace ignition rod
Pull the thick white cable to remove the old ignition rod from the grill.
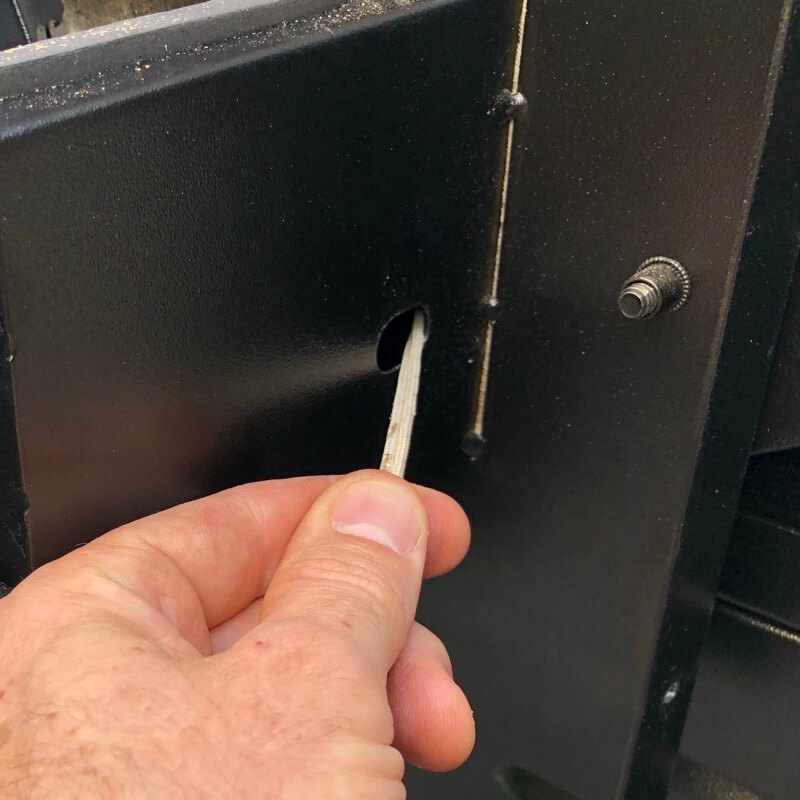
Straighten out the supplied wire and bend a big hook at the other end so it doesn’t pull through.
Feed the wire through to small hole through to the fire-pot.
Slide the bracket onto the cable as shown. Do this BEFORE the next step!
Use the wire to pull the new ignition rod cable through the small hole.
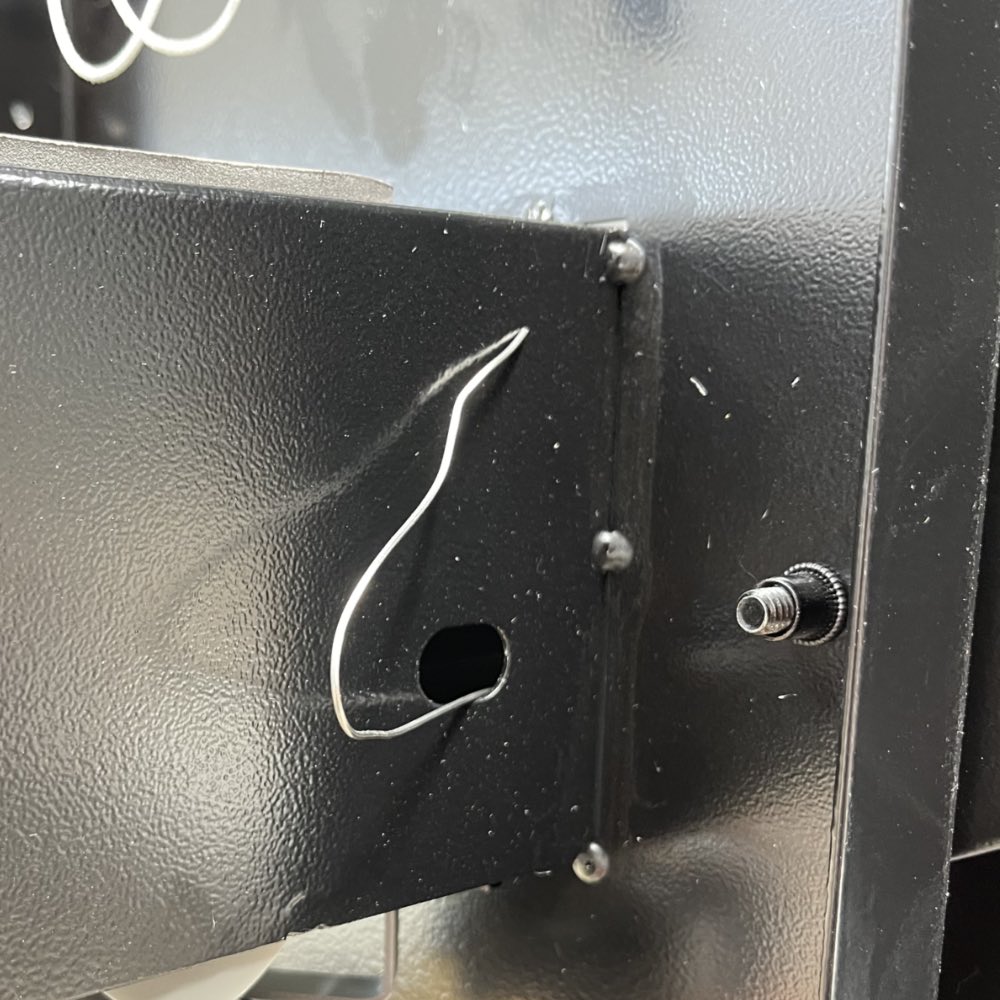
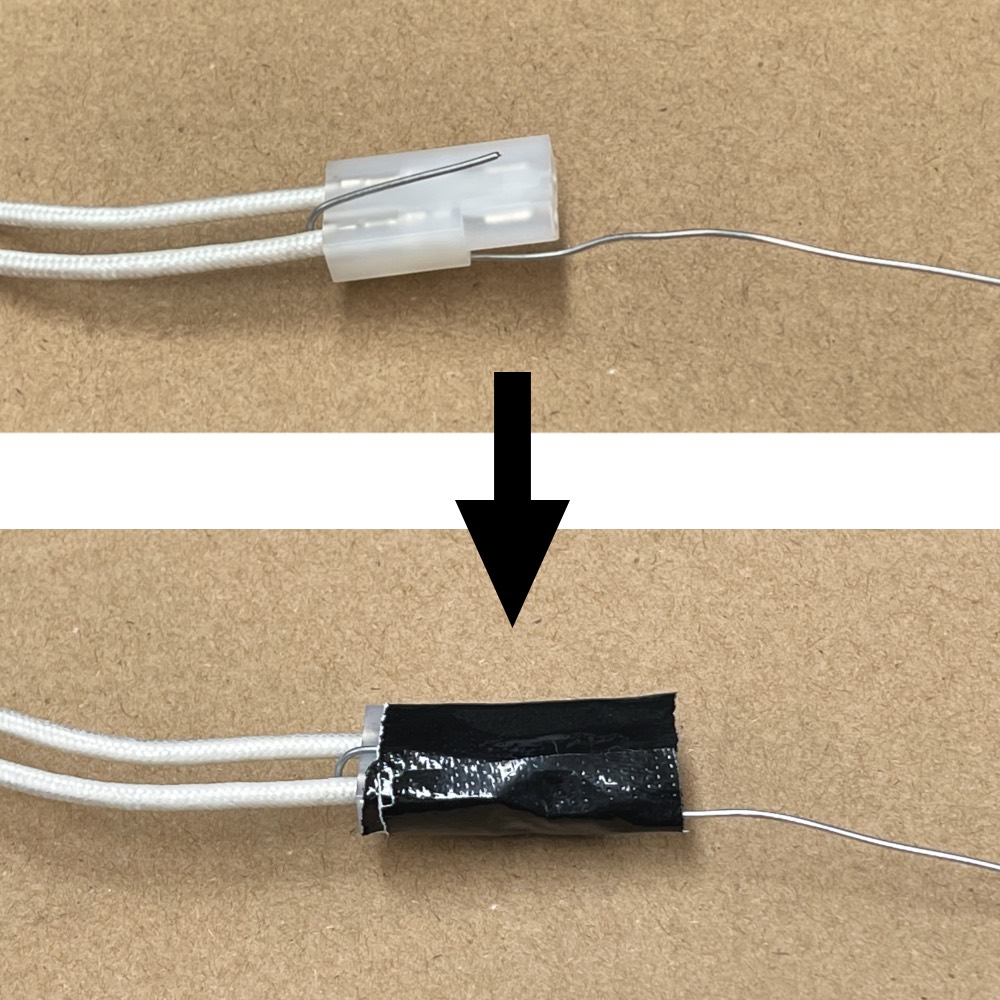
Pass the wire between the two cables and bend in half as shown above.
Use tape to secure in place.
Use the wire to pull the new cable through and out the small elongated hole.
Ensure the cable sits on the side of the pellet feed tube and does not wrap underneath on its path from the fire-pot to the exit hole.
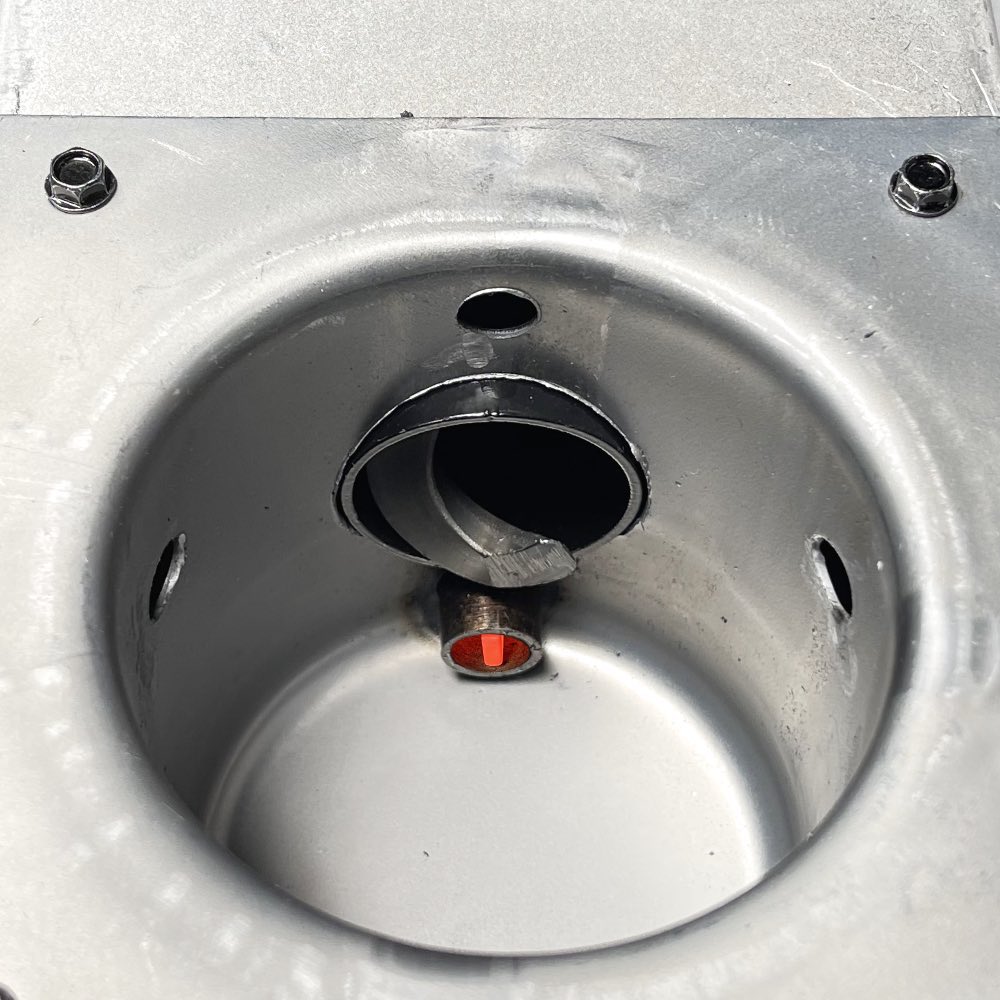
Slide on the fibre washer, this must be installed to seperate the metal from the white ceramic body of the ignition rod.
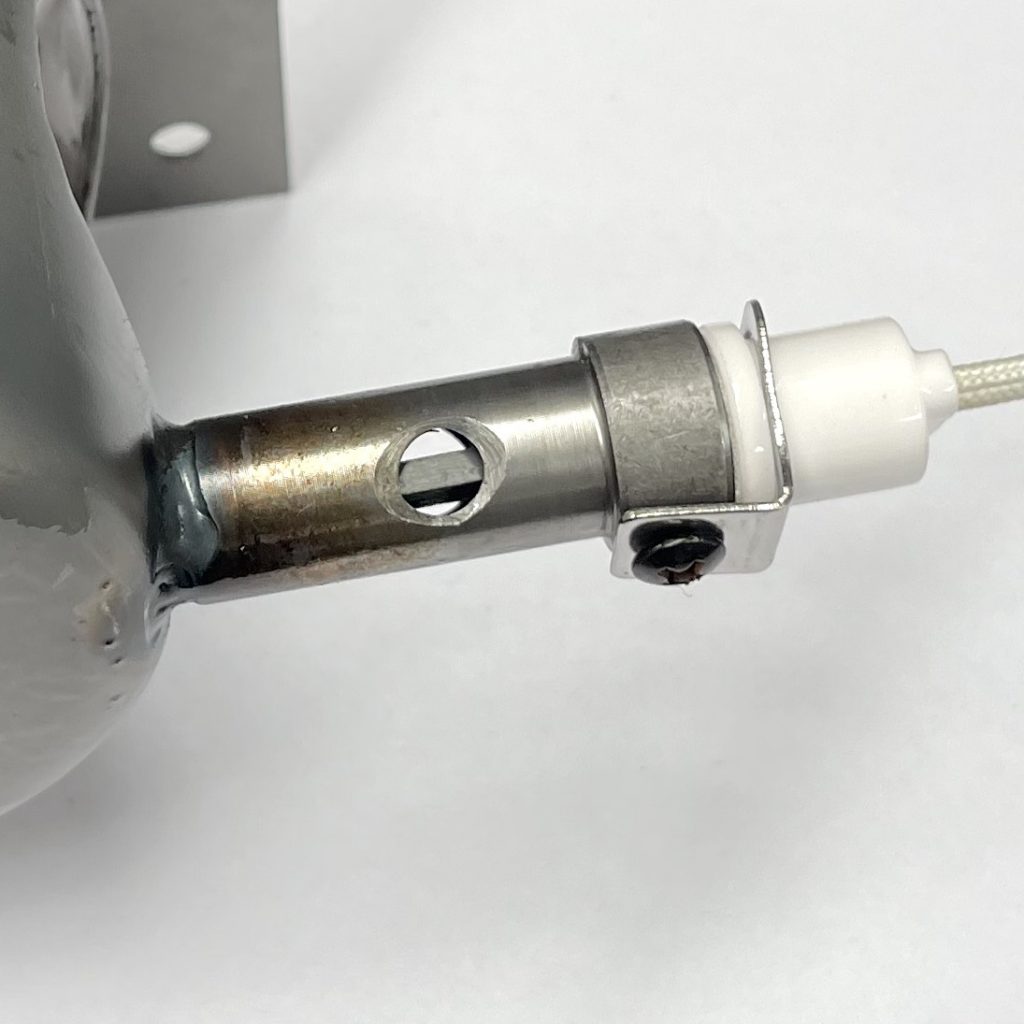
Secure the bracket to the side (or bottom if only one screw) on the fire-pot tube using the screw.
The SN ignition rod should remain a little loose and may freely rotate which is normal.
DO NOT tighten the screw into the side of the ignition rod – it will crack and fail!
The ignition rod will NOT extend far out into the fire-pot like the metal one did. It will sit flush or extend out about 1mm.

Put the fire-pot back in place by angling the ignition rod to the front of the auger feed tube.
Drop down and then rotate to align the auger feed tube with the big hole in the fire-pot.
Do NOT use force as it should slide in easily if using the correct angle.
You may need to gently push the auger feed tube up or down to slot into the hole in the fire-pot.
As required, gently tap the fire-pot into place so the screw holes align.
Firmly do up the screws. Do not over-tighten.
Step 10. Connect and bundle cables
Wiring plug connections
Depending on your grill model there could be a few different cable configurations.
Use the stickers on the controller plugs as guides (not colours) as the colours may be different to those shown. Controller plug labels are:
MOT = Auger Motor
FAN = Fan
HOT = Ignition Rod
Please Note:
The black box connected to the power cable may not be present in some grills.
The black and pale blue box connected between HOT and the ignition rod (shown below) may not be present in your grill, and is not required. Plug the ignition rod directly into the HOT plug.
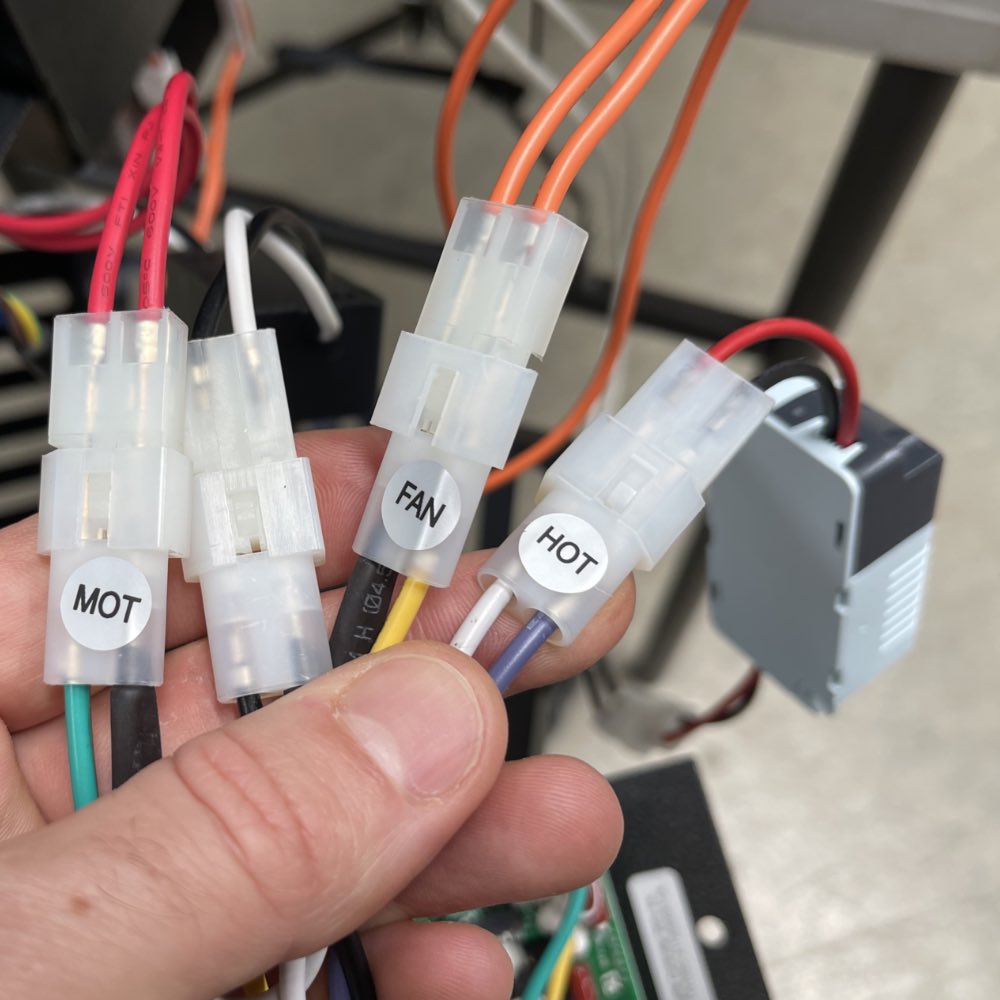
Connect the black/red power limiter plug to the purple-white plug labelled HOT.
If no power limiter box, plug the ignition rod directly into the the HOT female plug.
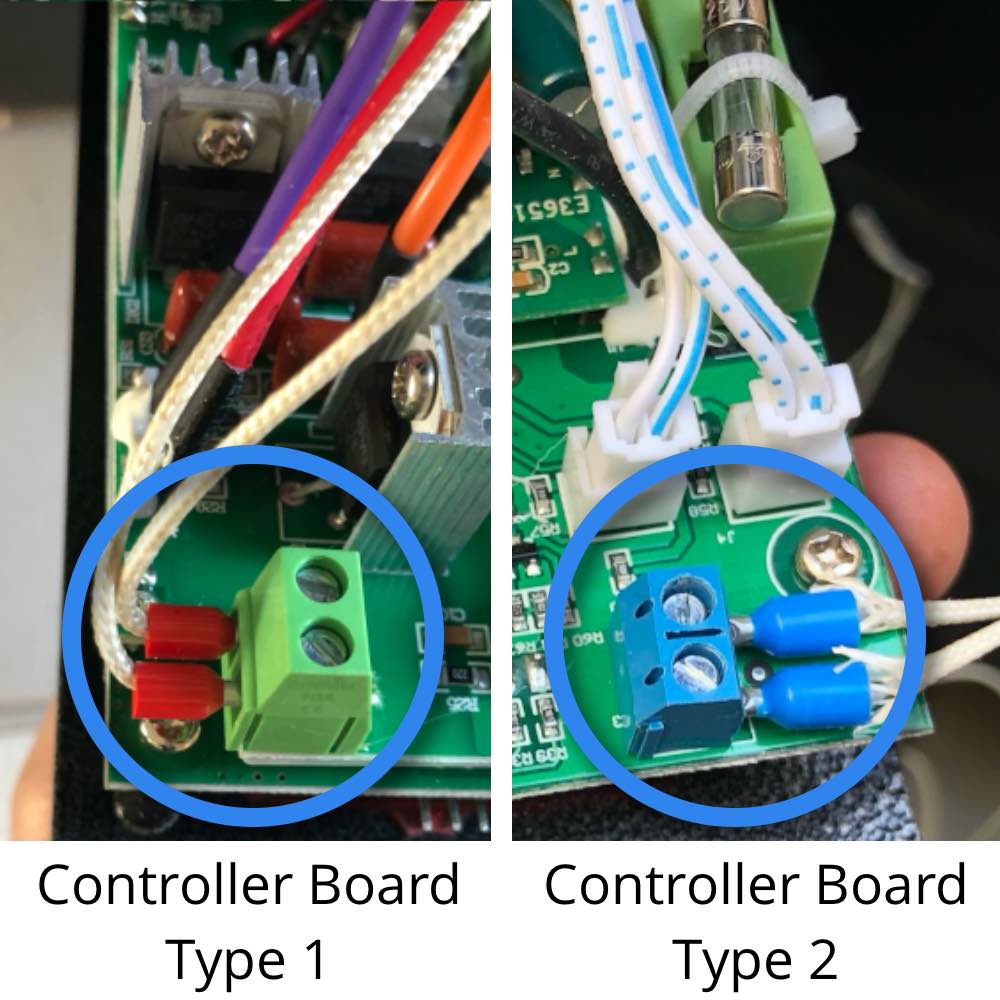
Check to make sure the temperature sensor cables are still firmly in place.
Depending on the controller model, the colour of the cable ends and terminal block may be different. Both are situated at the top of the controller board.
Bundle the cables neatly in behind the controller so they will be able to fit back into the little box.
Use several cable ties to secure the cables together taking care to ensure none are close to the main fan (underneath) or auger motor small cooling fan.
If available, use some spiral conduit to wrap around the cables.
Step 11. Put everything back
Reverse the process to put the hopper cover back on, cables back into place and controller back mounted on the front.
It is a good idea to have a look underneath (using mirror or front facing camera) before replacing the base plate to ensure none of the cables are close to the auger motor fan or main fire-pot fan.
Step 12. Test operation
Before replacing the bottom cover first test the operation of the grill.
Plug into power, switch on and turn the controller knob to Smoke setting.
Listen for the fan sound and look to see if the auger it slowly rotating (it comes on/off) intermittently. You may need to wait 30-40 seconds to see it rotate.
The ignition rod should shine bright red within 1-2 minutes of turning the grill to Smoke setting.
Pellets should ignite in 2-3 minutes.
If the fan, auger motor or ignition rod are not working, unplug from power and check the plug connections.
Step 13. Replace base cover
With the grill shut down and the power unplugged replace the bottom cover.