This article covers how to replace the fan in a Z Grills 700 series pellets smoker.
For Grill Models: 7002B, 700E, 700E-XL
Time: 30-40min
Difficulty: Medium
Spare Parts (from Z Grills):
- Fan
- Cable ties & spiral wrap
Tools Required:
- Pliers or small socket set
- Phillips head screwdriver
- Scissors or knife
What is the Fan?

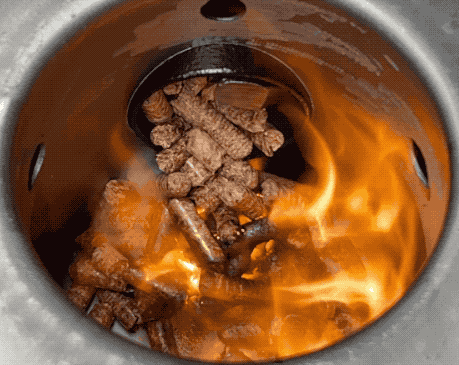
The large fan on the underside of the hopper box feeds the fire with airflow through the holes in the fire-pot. The controller is able to change the speed of the fan (mostly at lower temperature settings) to help modulate the heat output.
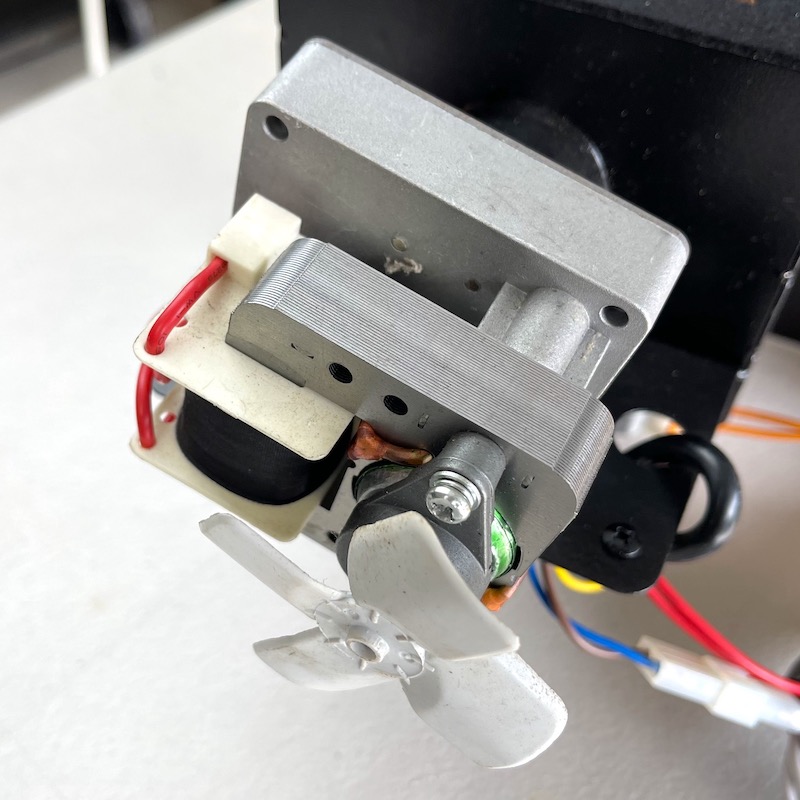
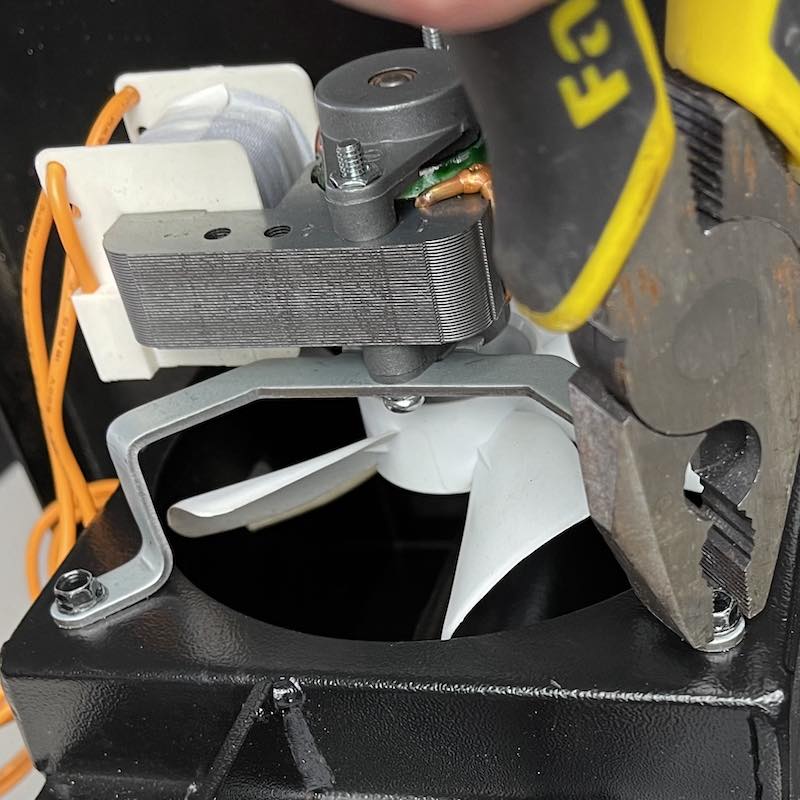
Do not confuse the large fan (feeding the fire-pot) with the small fan on the front of the auger motor that is used to cool the auger motor (shown below).
Fan Failure
The fan motor can sometimes “burn out” and stop working due to a component fault. A burnt out motor will often release a “burning plastic” smell and have visible brown discolouration on the motor windings or cables. A visual check of the motor is therefore an excellent first step in diagnosing if it could be the reason for a power trip or blown fuse.
Z Grills stocks replacement fans and this page provides a step by step guide to replace one.
If still within the 3 year warranty period, please contact our customer support team who can provide you with a replacement fan. If out of warranty you can purchase a fan from here in Australia, and here in the US.
Repair Instructions
Check out the step by step instructions with photos on this page to understand how to replace a burnt out fan.
Step 1. Unplug the Power
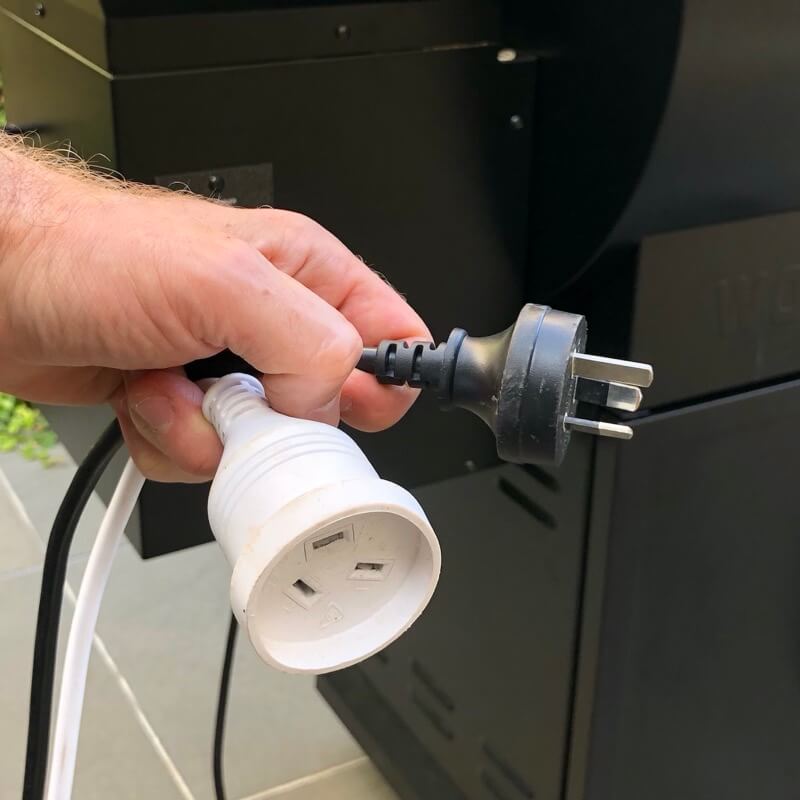
Before doing any maintenance or cleaning, always unplug the power to the grill.
Step 2. Empty the hopper
Scoop as many pellets out as you can using a plastic scoop or cup.
Vacuum out the remaining pellets so you can see the Auger.

To make cleaning out all the wood pellets easier, you may want to temporarily remove the guard plate. 4 screws are located just under the front and rear lips of the guard. Take care not to drop the screws down into the auger entry hole.
Step 3. Remove base cover
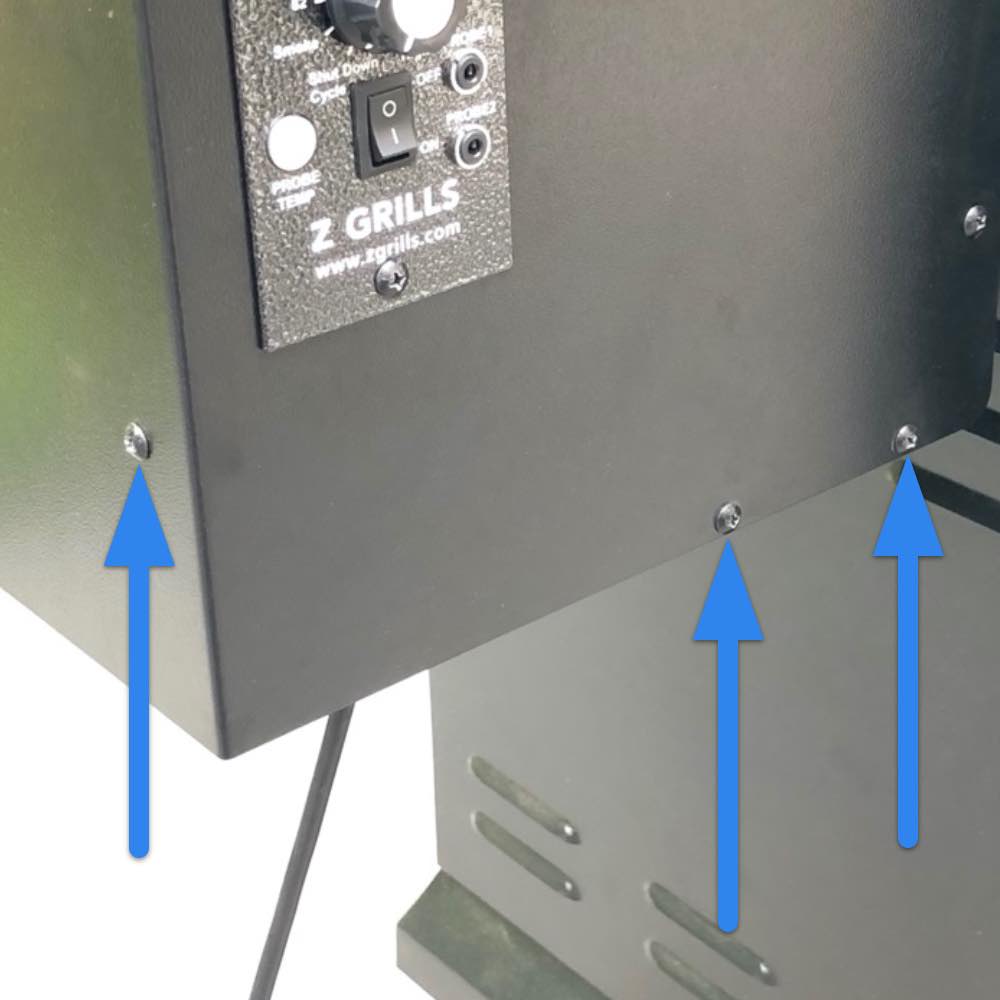
Remove the 6 screws (3 front, 3 rear) to release the base cover.
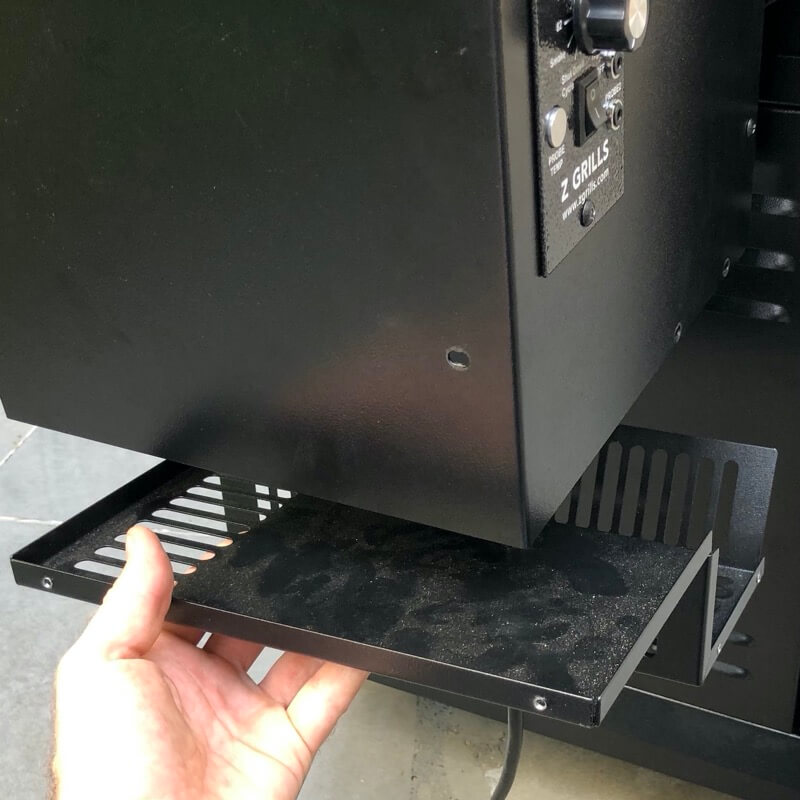
The base cover may drop down slightly depending on the slack on the cable tension gland in the cover.
If possible, gently push the cable up through the cable tension ring to drop the cover down a bit lower. This will make getting the hopper box off and back on a little easier.
Step 4. Release the Controller
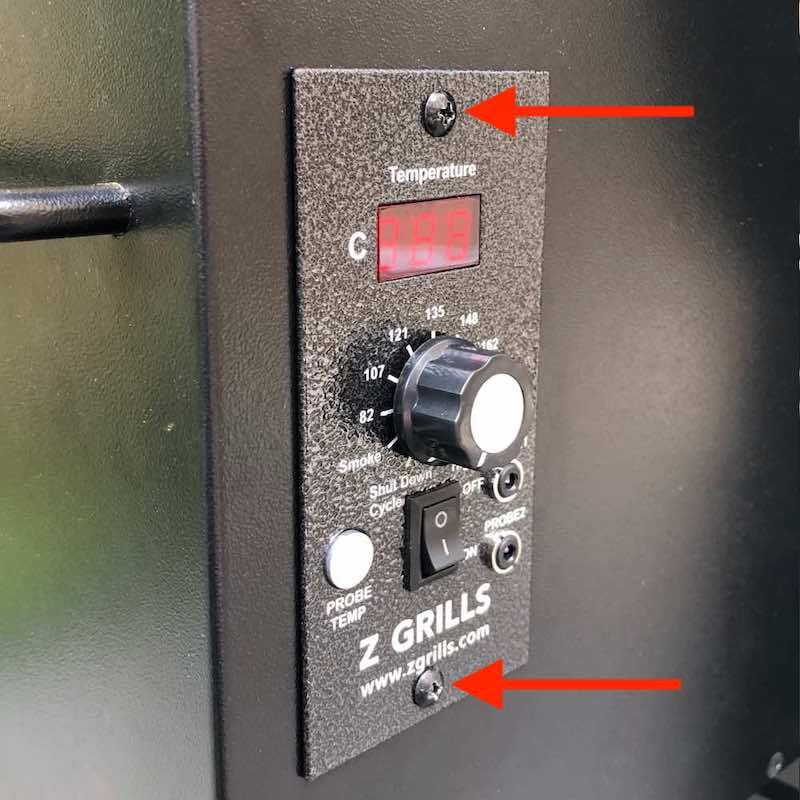
Remove the two screws from the controller.
Gentle pull the controller forward and then tilt sideways to push back in through the hole in the hopper box.

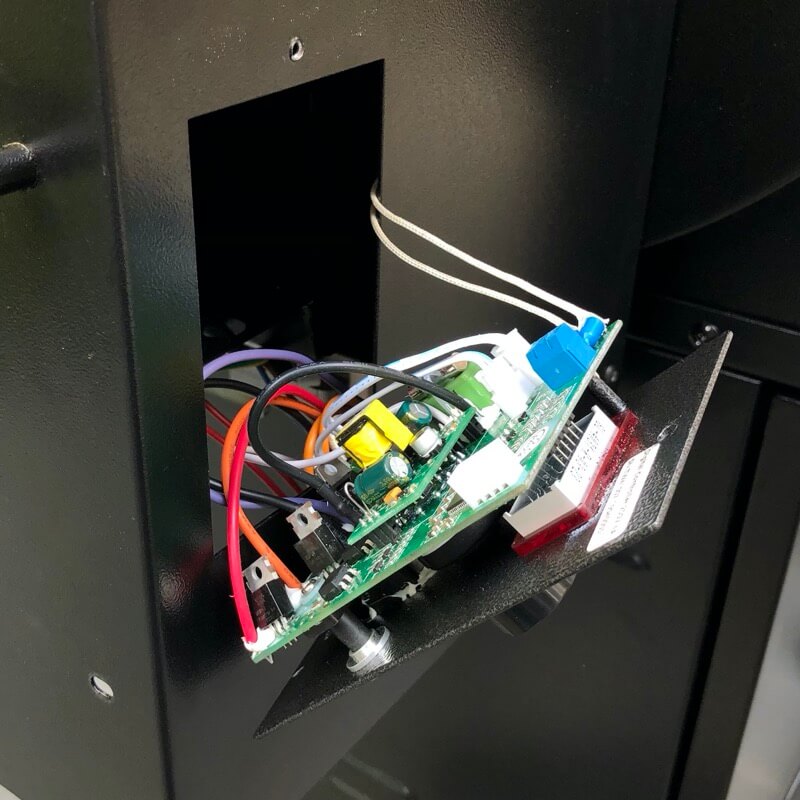
Once pushed through the hole, the controller may dangle down below the hopper box as shown.
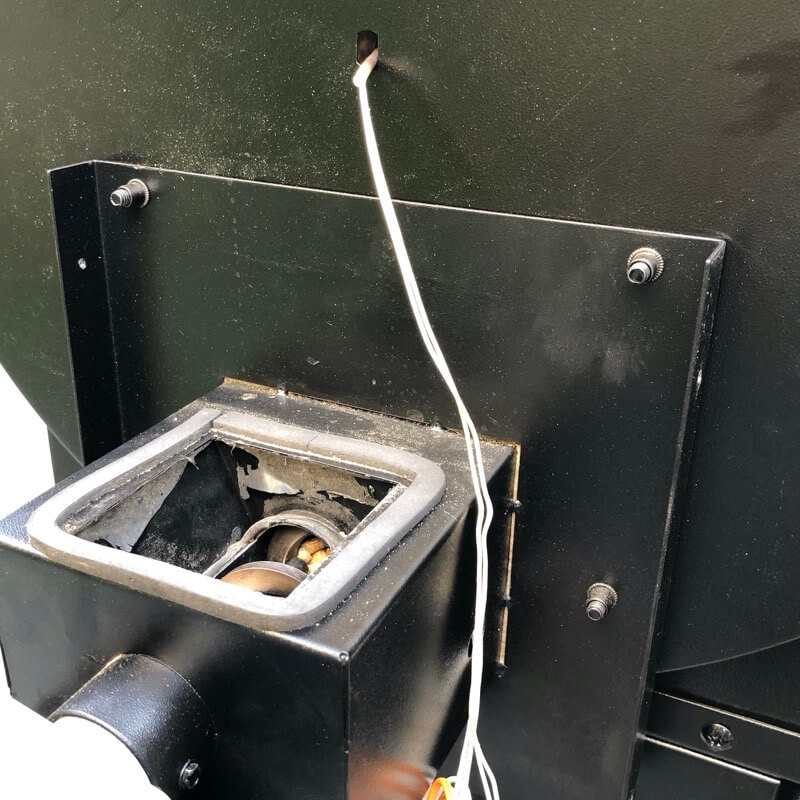
Step 5. Remove hopper box
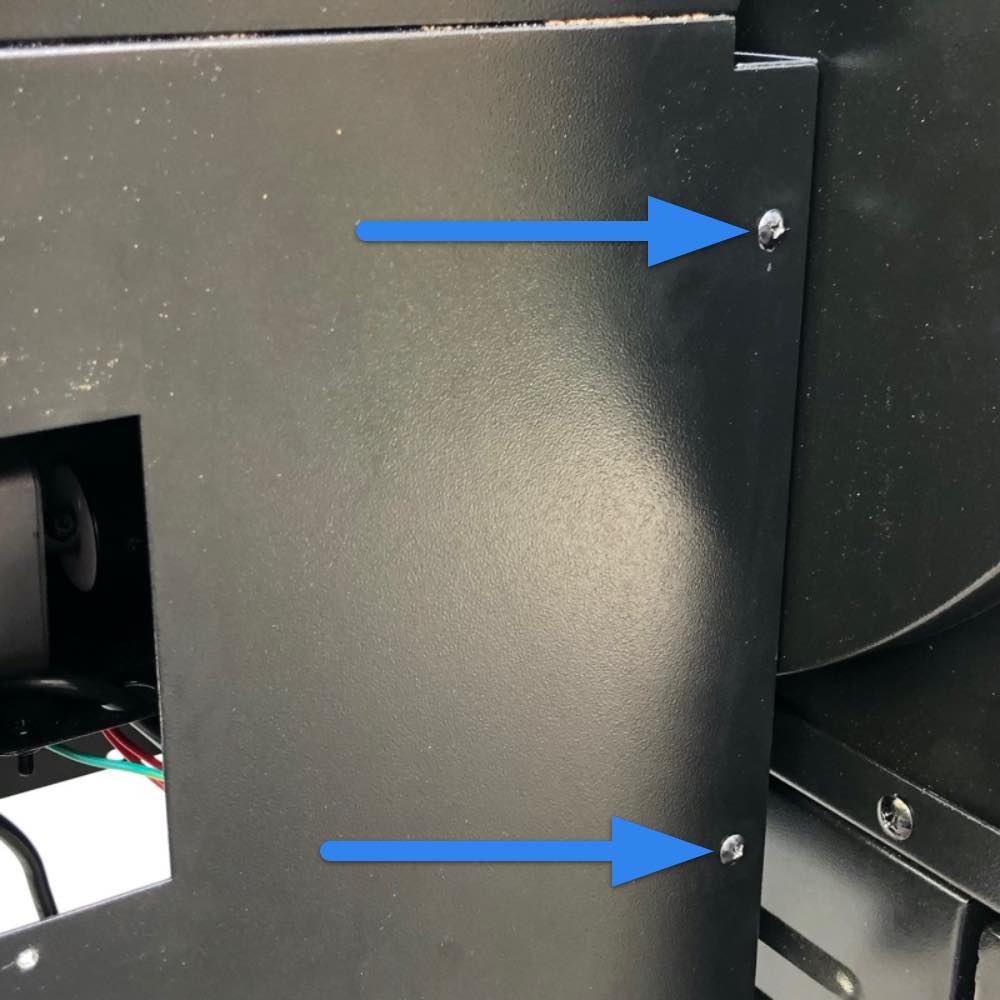
Remove the two front and two rear screws.
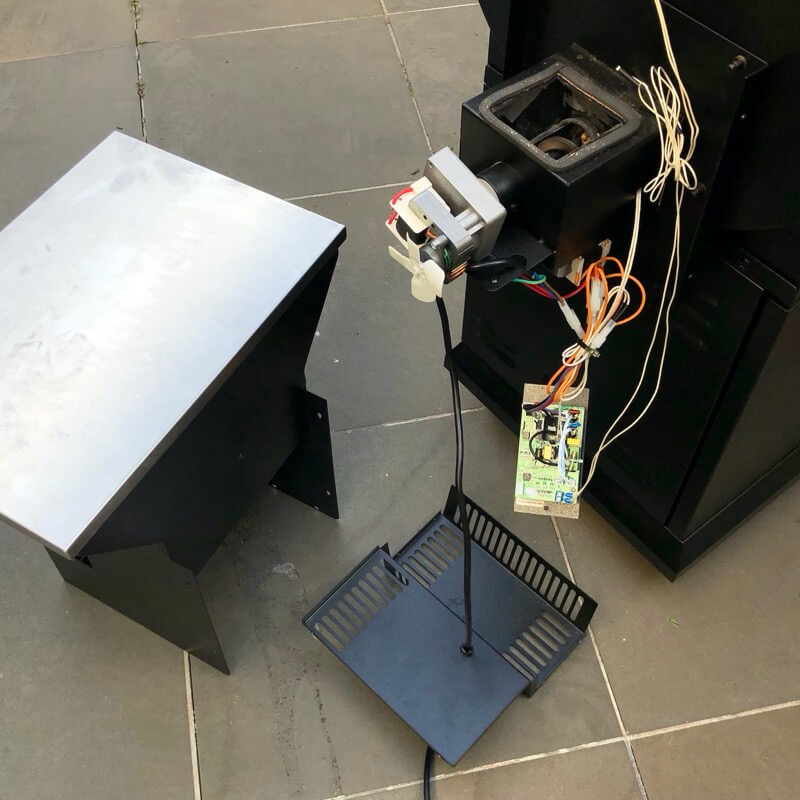
Carefully lift the hopper box up and off and place to the side out of the way.
You now have clear access to the controller and all the electrical components.
Step 6. Check the fuse
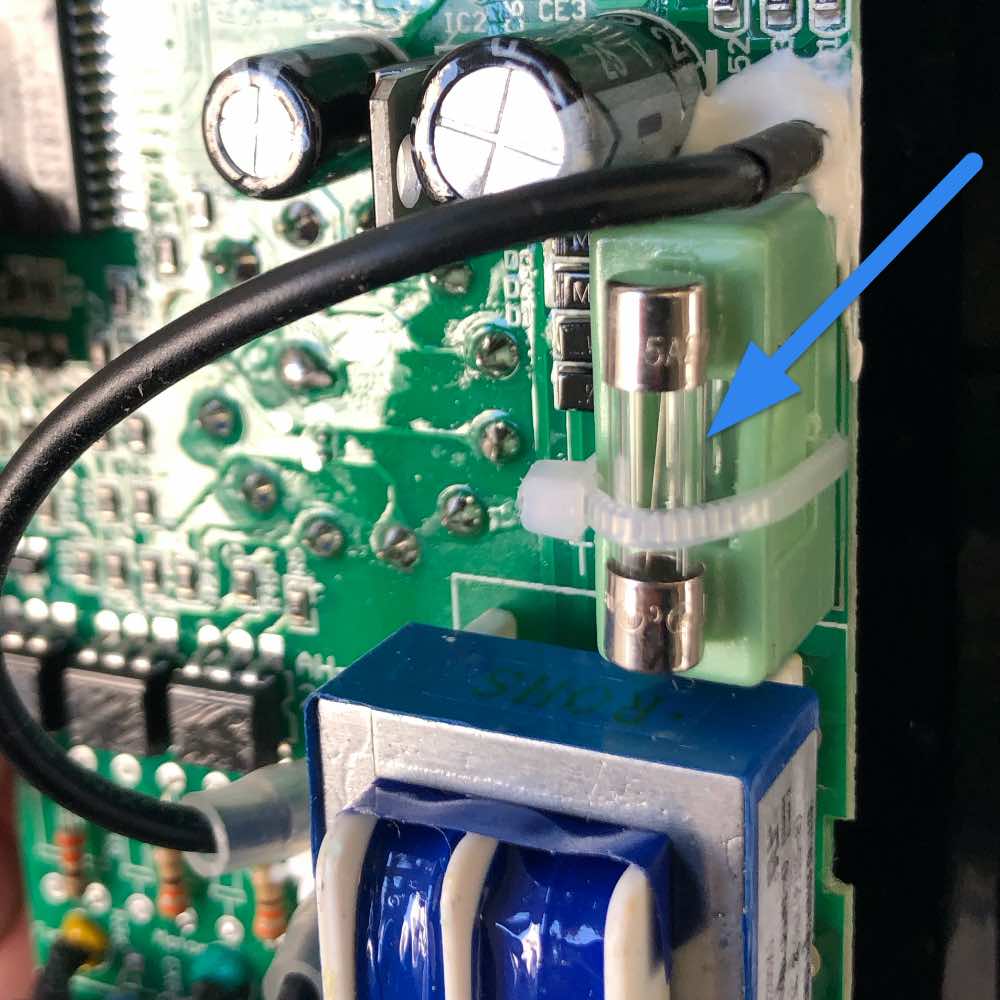
If the auger motor has failed and tripped the power (quite common) the fuse is most likely blown.
A spare fuse is zip tied to the top of the green fuse box.
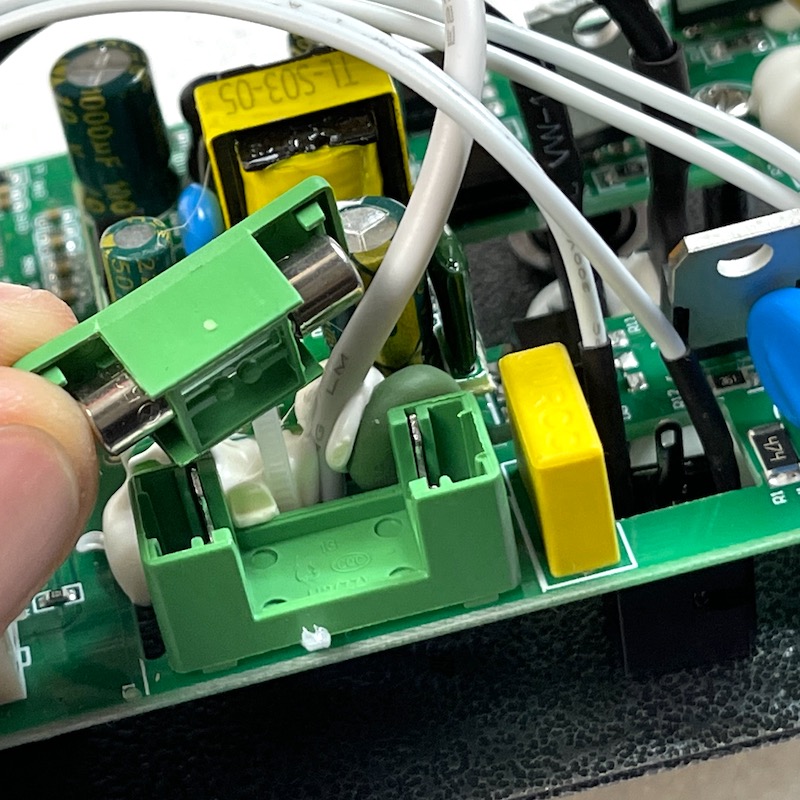
Cut the white cable tie and pull the top off the green box with the fuse housed inside.
If blown, swap the fuse out with the spare.
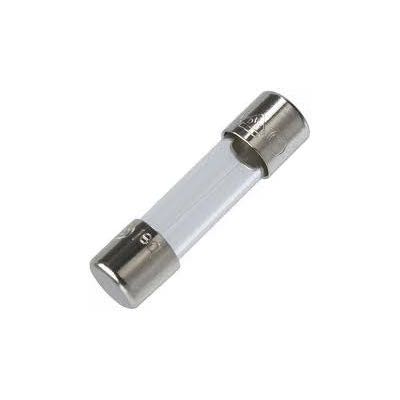
The fuse type is a 3A Cartridge 5x20mm (M205) Fast Blow Fuse, which is widely available from electric parts outlets and hardware stores. A 4 Amp version is also acceptable.
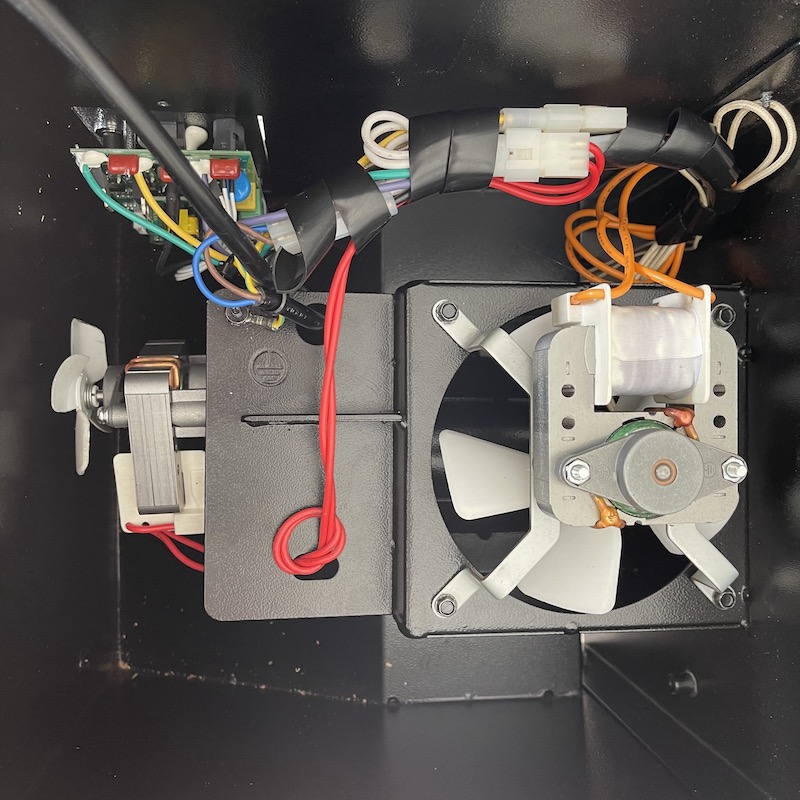
Step 7. Unplug the fan cable
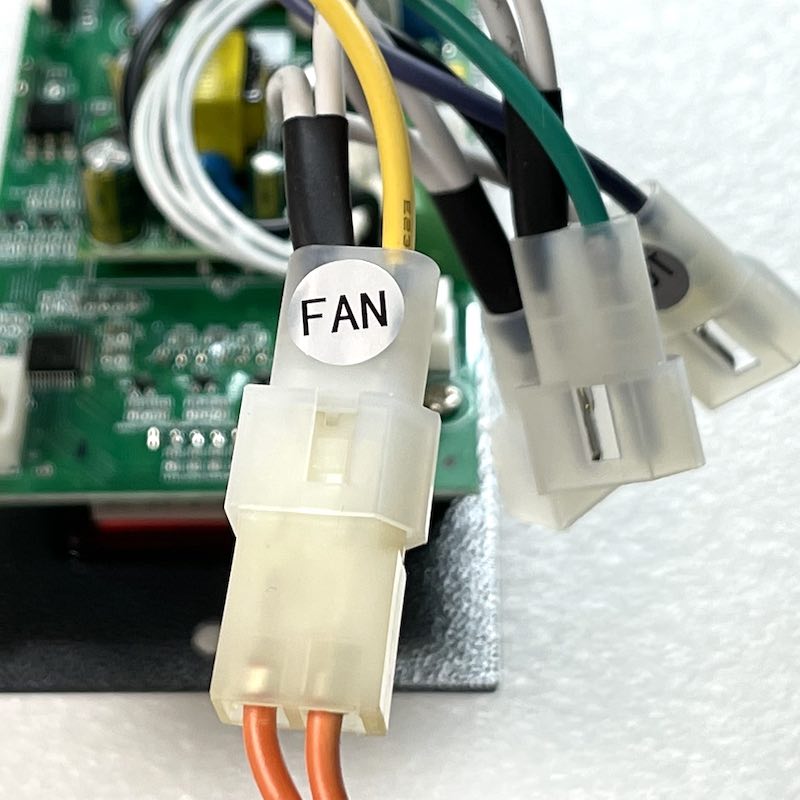
Cut off all the cable ties to free up the cables.
Identify the cable labelled FAN on it which powers the auger motor.
Carefully unplug by gripping the plastic connectors, not the wires.
Step 8. Replace the fan
Remove the 4 screws that secure the fan in place with a socket, adjustable spanner or flat head pliers. Replace with the new fan, taking note of the direction of the cables to the side of the box.
Step 9. Connect cables
Connect the auger motor plug back to the controller plug labelled FAN.
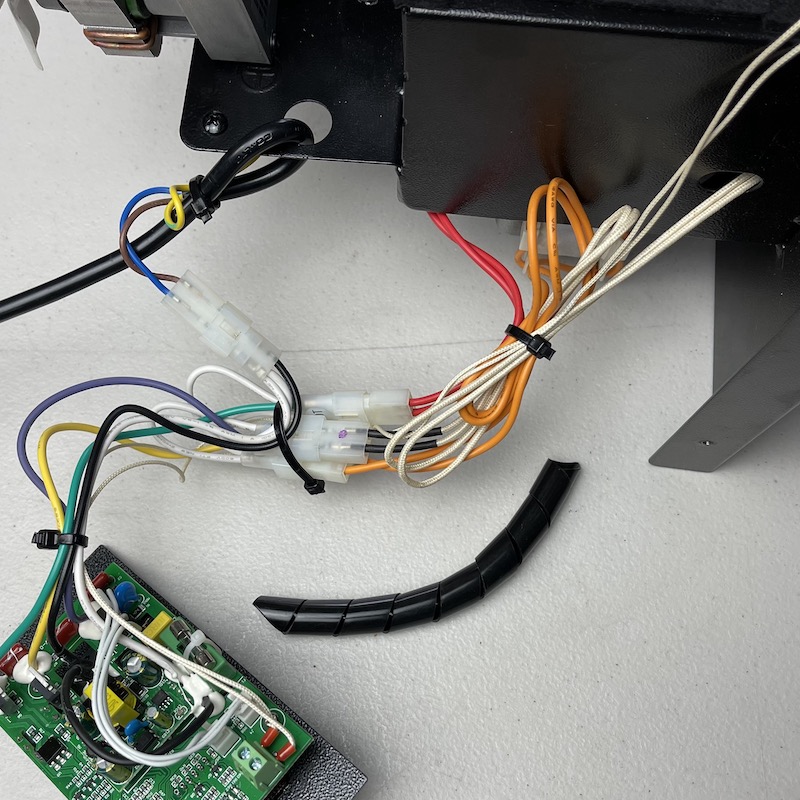
Bundle all the cables together neatly using the thick white cable exiting the hopper box (power the ignition rod) as an anchor so that the cables are across to the right of the auger box.
Use several cable ties to secure the cables neatly.
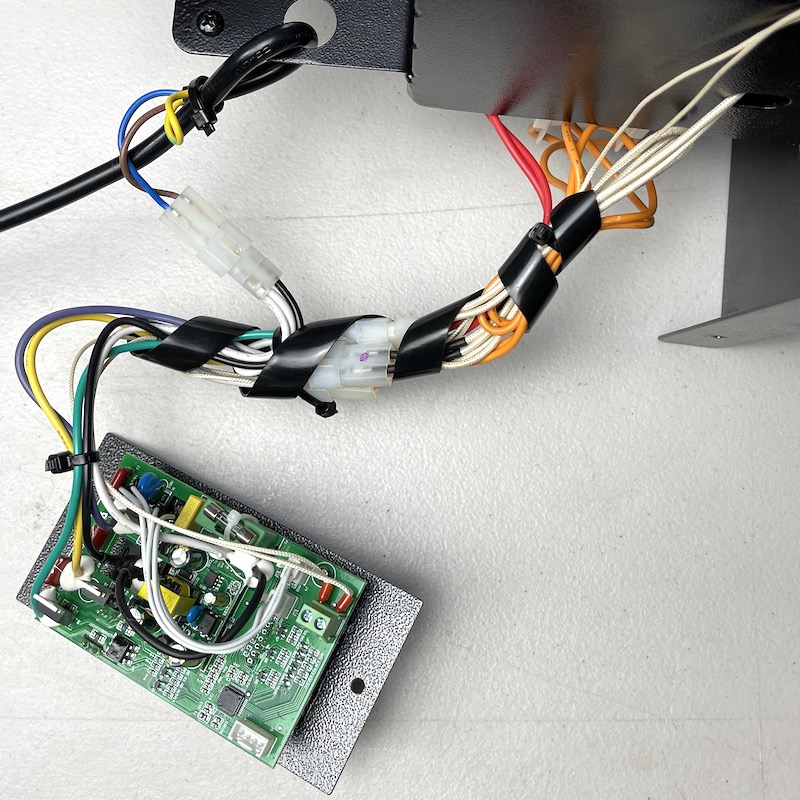
Plastic spiral wrap is great to make the cables even neater. It is important to ensure that none of the cables are close to either the auger motor fan, or main fan.
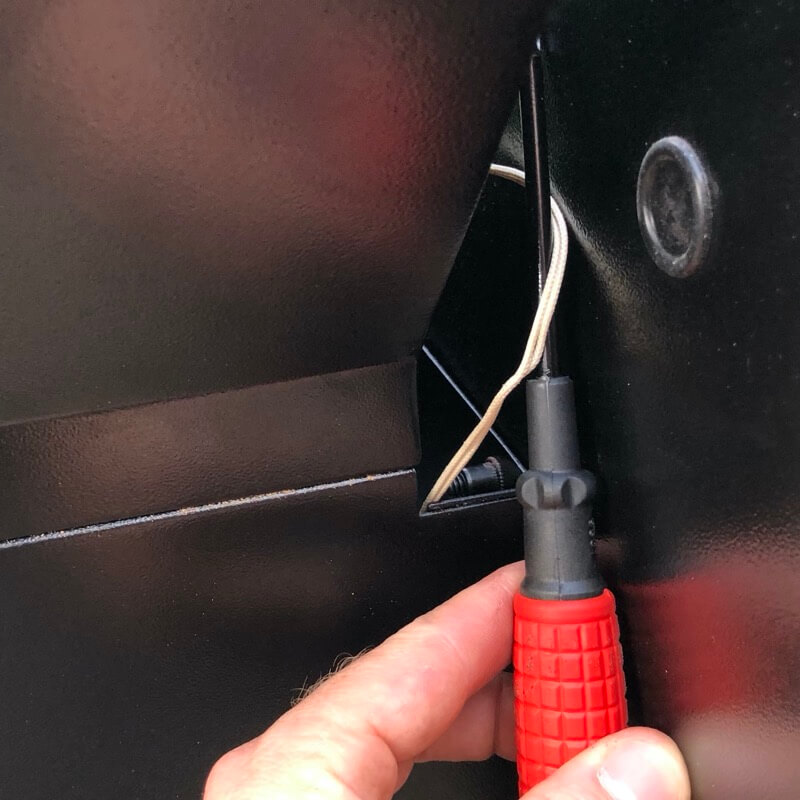
Ensure the temperature sensor cable is handing down on the INSIDE of the mounting plate as shown above.
Step 10. Put Controller Back
Pass the controller back up through the hole in the hopper box.
Do the two controller front plates screws up.
Gently pull up all the slack in the temperature sensor cable so no loose cable is in the hopper box.
Bundle the cables up and secure using twist tie or cable tie, then tuck down between the hopper and grill.
Using a mirror or the selfie camera on your photo check underneath to ensure none of the cables are close to the main fan or the auger motor fan. It should look nice and neat like the image above.
Step 11. Test operation
Before replacing the bottom cover first test the operation of the grill.
Plug into power, switch on and turn the controller knob to Smoke setting.
- FAN: Listen for the fan sound and air blowing into the fire-pot
- AUGER MOTOR: Look to see if the auger it slowly rotating and intermittently. You may need to wait 30-40 seconds to see it rotate.
- IGNITION ROD: Check if the ignition rod is getting hot (in the fire-pot) by touching with long piece of rolled up kitchen paper. It should start to get hot enough to char/burn the paper after a few minutes.
If any of the components are not working, turn the grill OFF, disconnect from power and check the plug connections of the cables.
If a high speed buzzing sound is heard, one of the cables is contacting a fan. Check the view from underneath again to ensure all cables are neatly in place and not close to the auger fan or main fan.
Once confirm everything is working, turn the power OFF and disconnect from power.
Step 12. Replace bottom cover
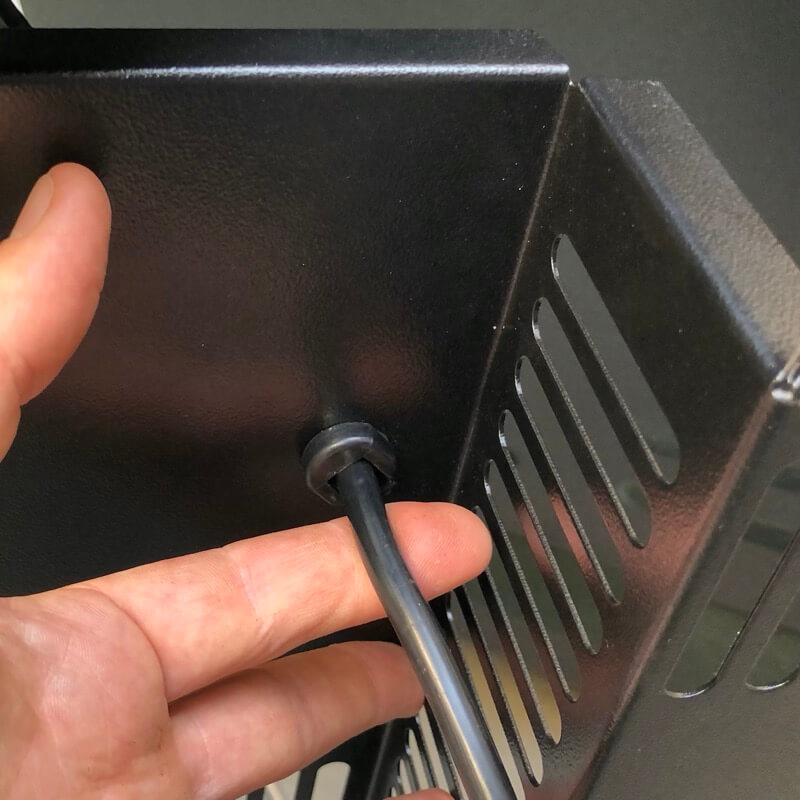
Slide the cover back up into place by wiggling the cable through the cable tension ring.
Put all 6 screws back in place. Don’t over-tighten them.
If the auger feed tube has been totally emptied of wood pellets you will need to follow the initial startup procedure to prime the wood pellets. Click here for instructions. The initial burn-in does not need to be completed again.